Composing Messages
We made the message composing experience as simple as we could, with the big emphasis of juggling multiple messages at once.
The left panel displays the list of the campaign’s messages — so you can switch between them instantly, reorder them, and add new messages.
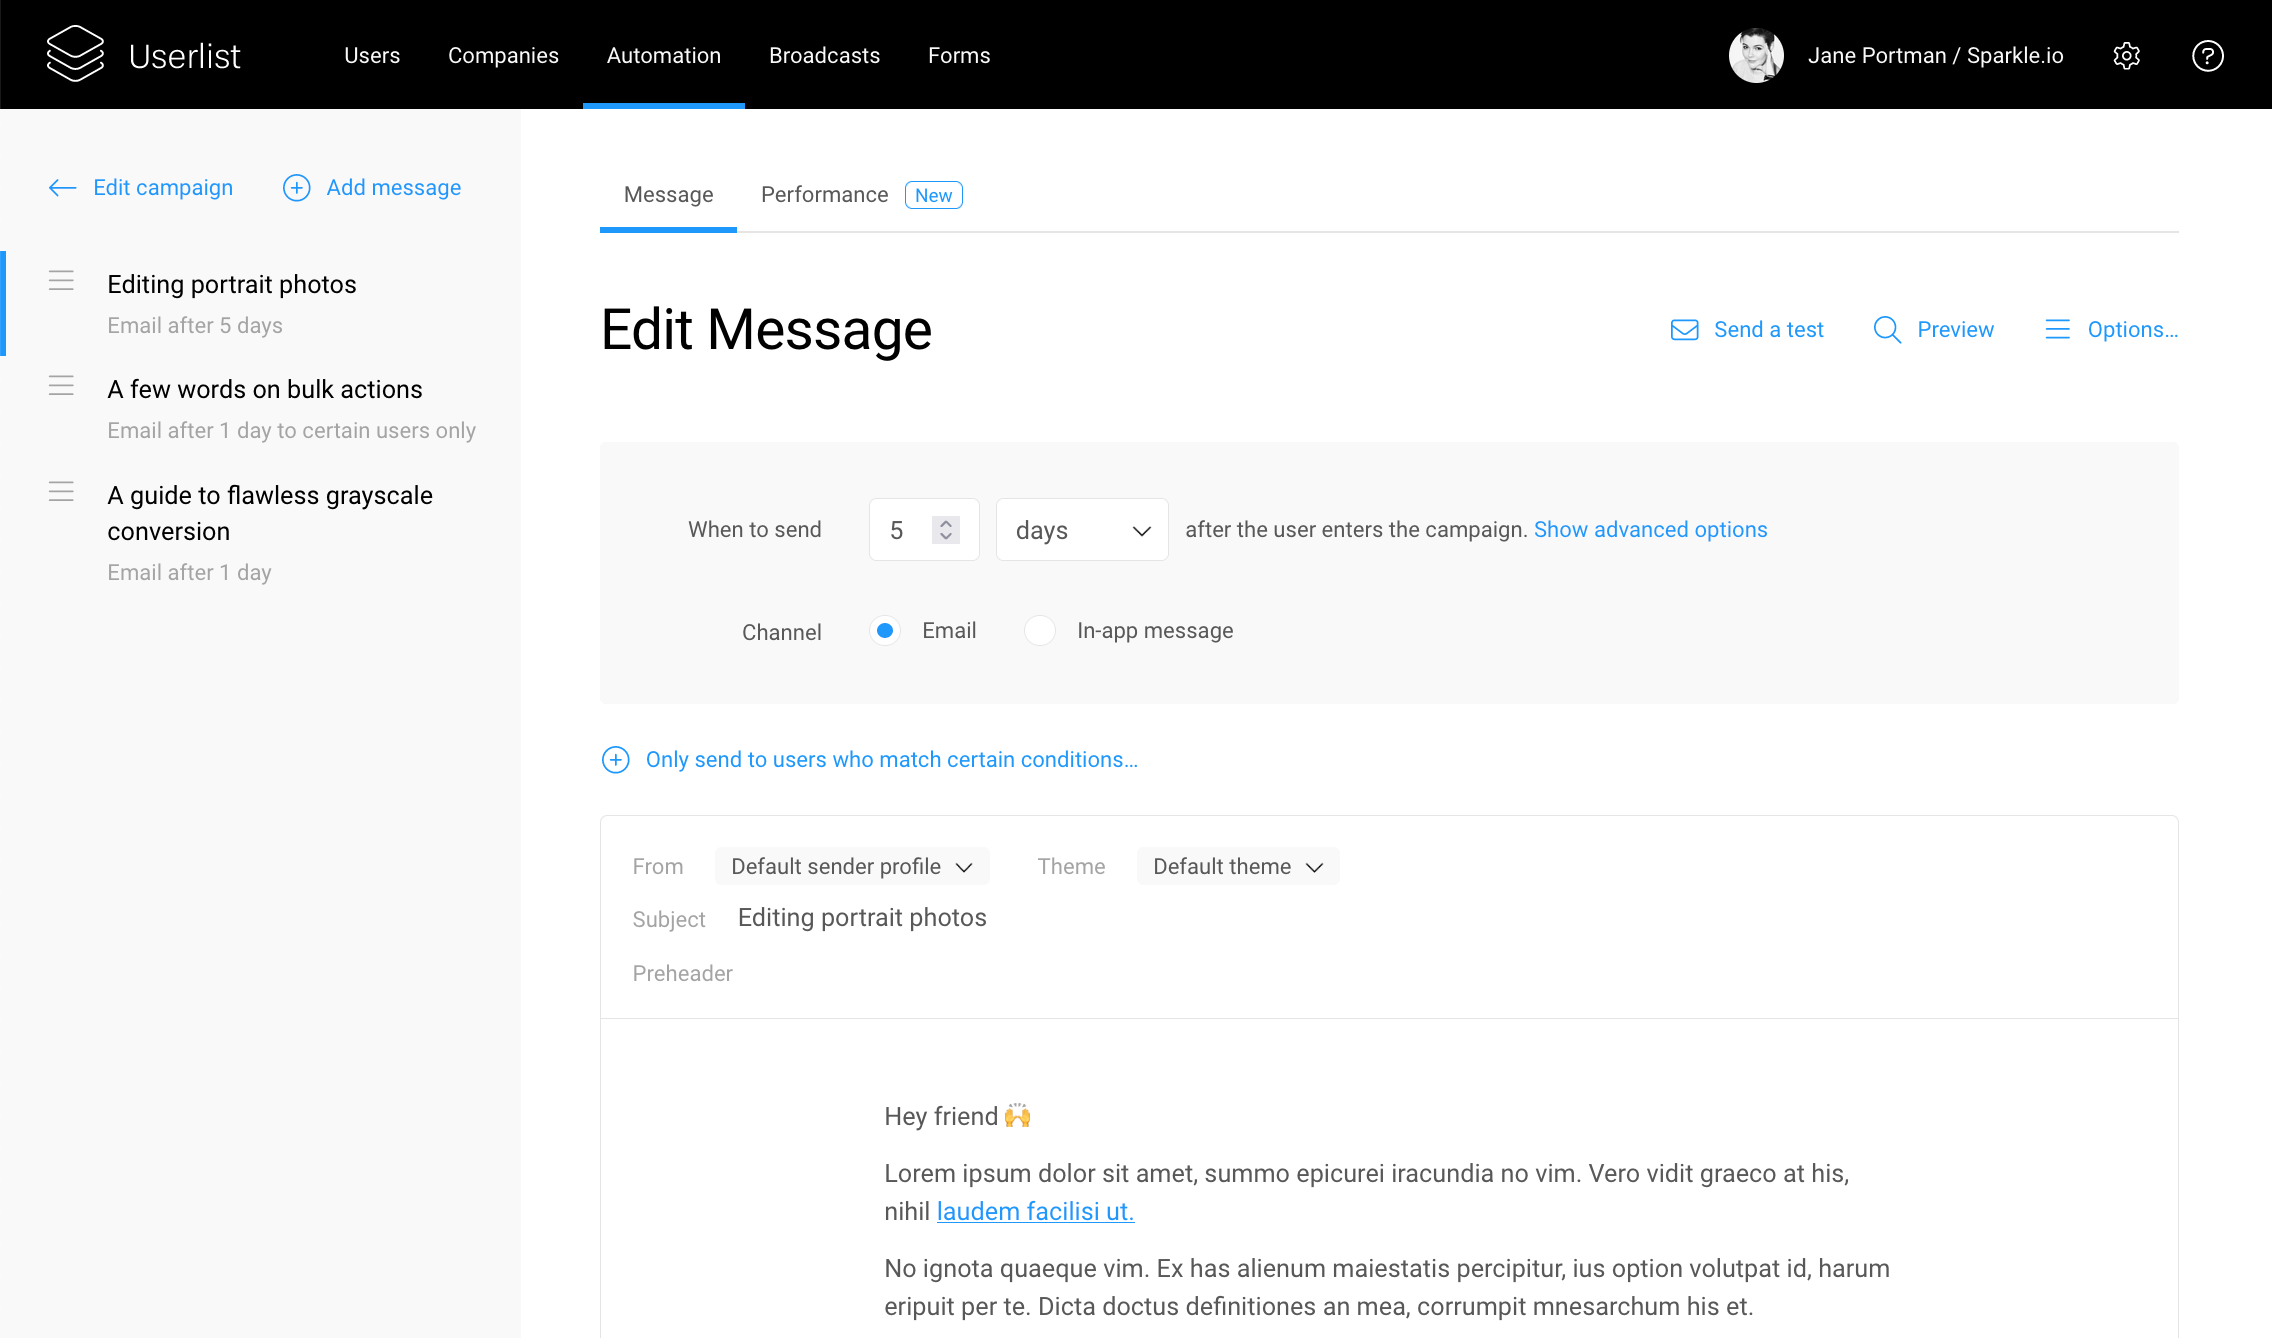
The message page has two tabs:
- Message — your workspace for composing the message. More on this below.
- Performance — a detailed performance report for this specific message. Learn more about performance reporting here.
In the message composer, you’re working with the “email body” — actual email content. Before sending, we’ll add the footer section, which you can customize in general company settings, and wrap the message into a theme.
Working with blocks
Unlike heavy template builders, our Dynamic Composer works with lightweight blocks. You can create an entire email without leaving your keyboard.
To add a new block, type ‘/’ and select the desired block with up and down keys. Or simply keep typing to filter by block name.
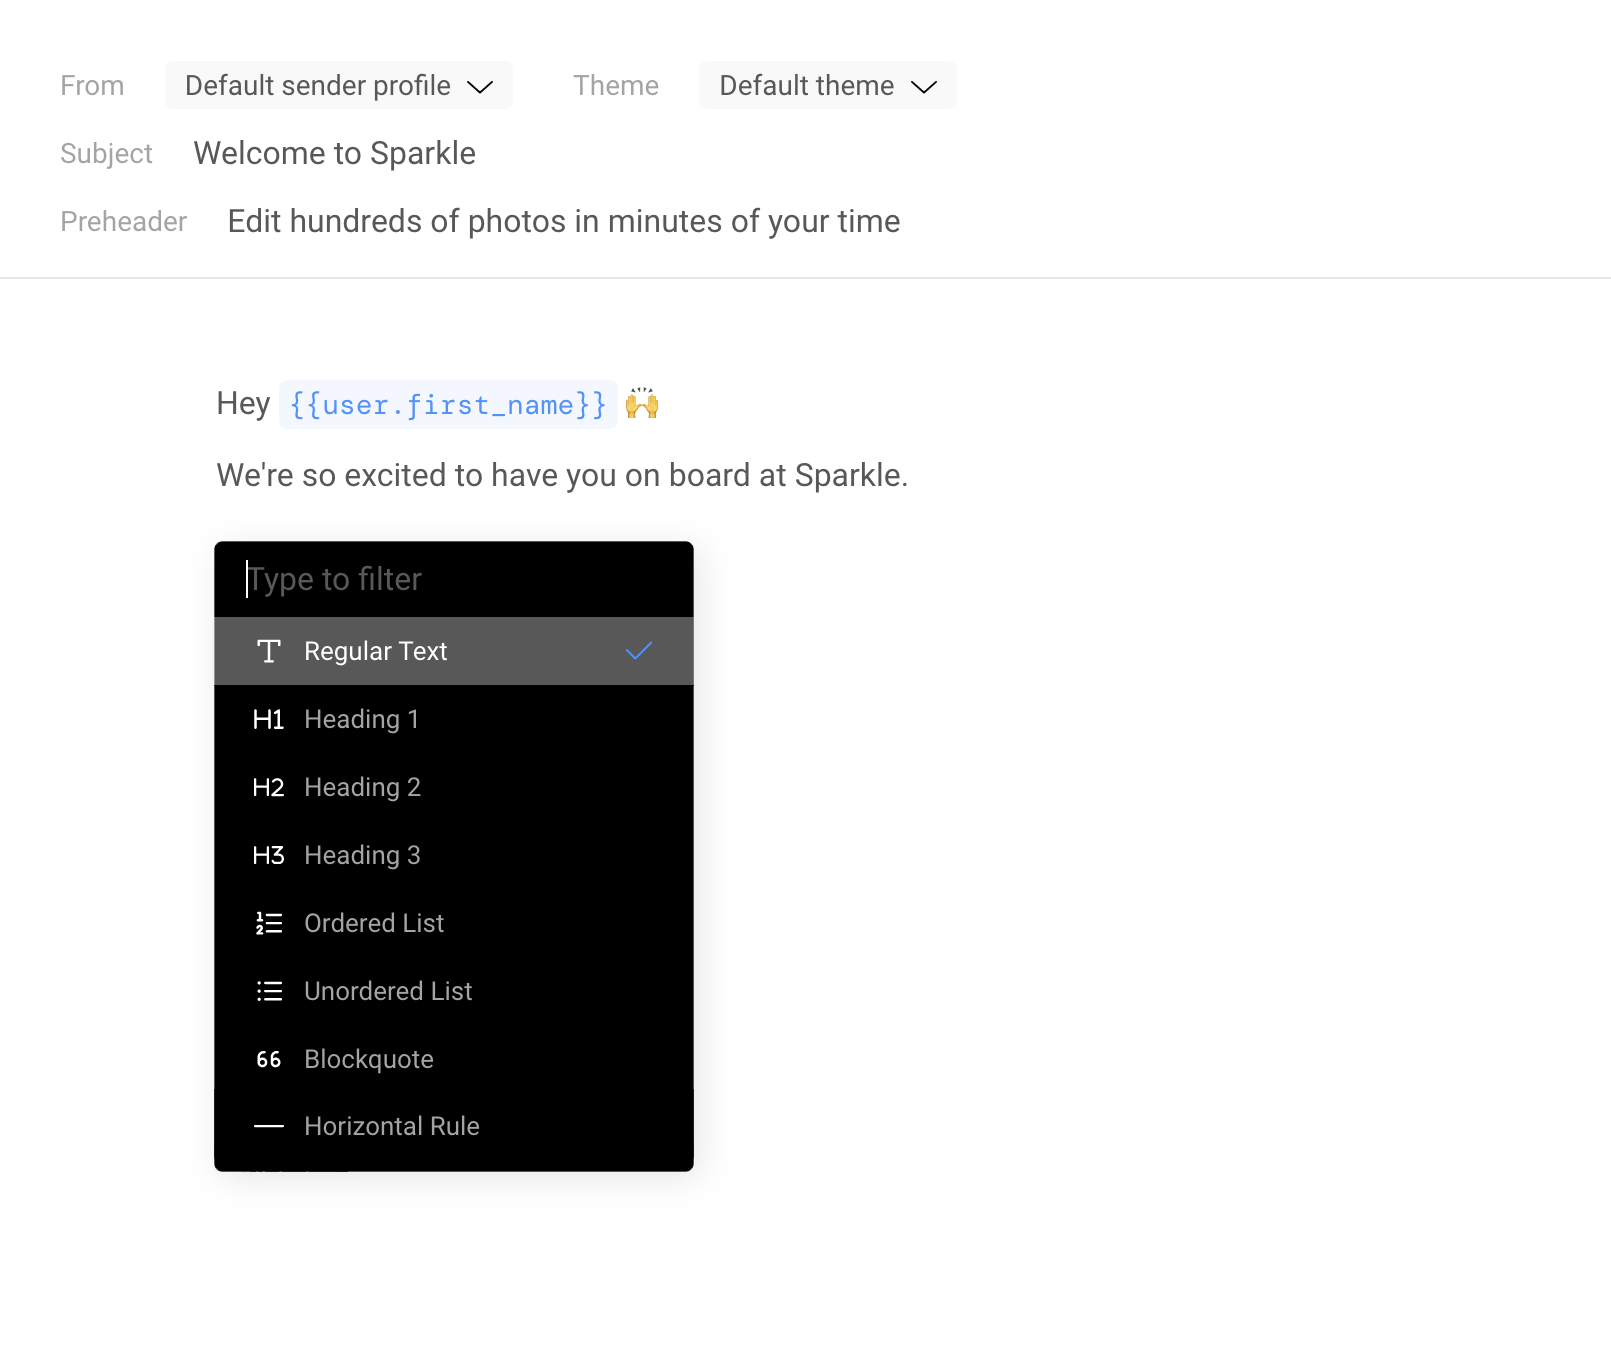
Block types include:
- Regular text
- Headlines H1-H3
- Ordered and unordered lists
- Blockquotes
- Horizontal rule
- Image
- Variable
- Snippet
- Button
Uploading images. File size for images is limited to 2MB per file. You can use any of these popular image formats: PNG, GIF, JPEG, SVG, WebP.
Using keyboard shortcuts
Instead of using the dropdown block menu, you can type using Markdown shortcuts.
Here are some popular shortcuts:
#,##,###for headlines H1-H3*italics***bold**- Asterisk or dash for an unordered list
1.for an ordered list>for a blockquote---for a horizontal rule
Or you can paste your content directly from your Markdown editor or Google Docs. We'll preserve all the necessary styling.
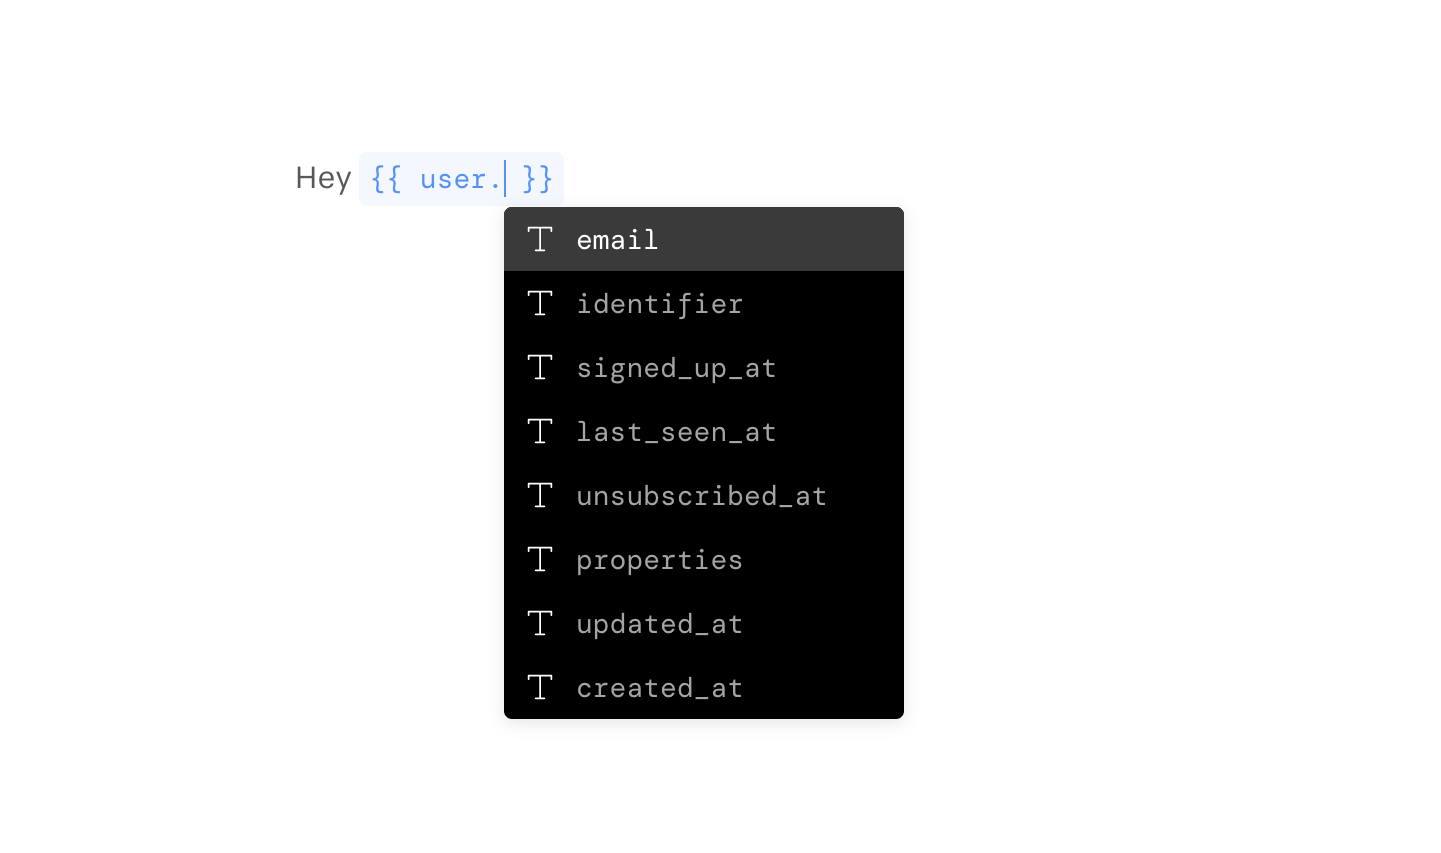
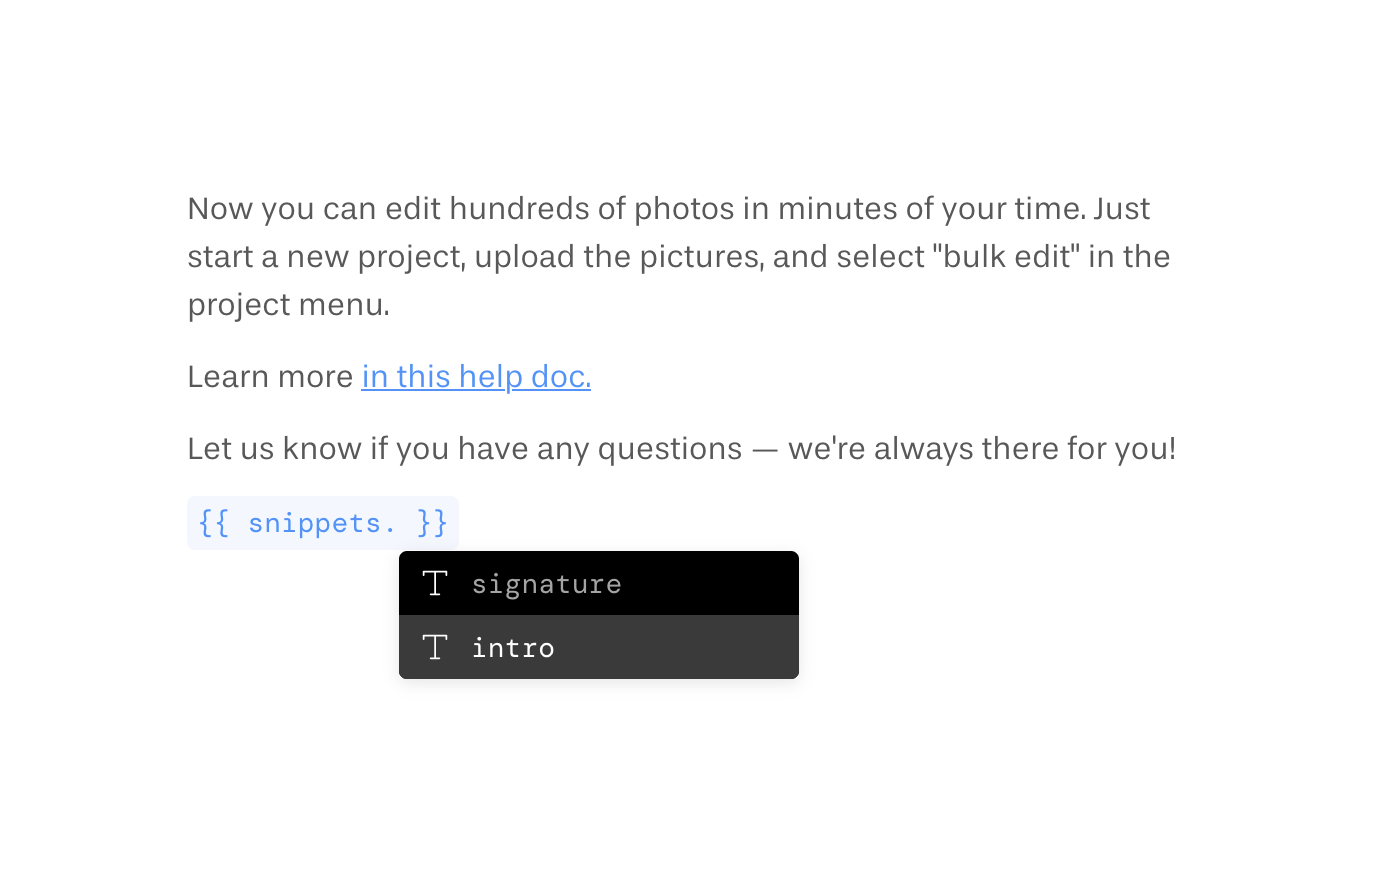
Personalizing your emails with customer data
You can add customer data to your emails using Liquid tags. Our composer helps you do that using autofill.
To add a tag, start typing {{ and a dropdown menu will appear. First you'll select what object you're referring (user, company, snippets, etc) and then use keyboard keys to select the right property.
Here's how you add a user property:
Here's how you add Snippets — reusable bits of text:
Setting message conditions
You can choose to only send a message to a specific subset of users. To do that, click "Only send to users who match specific conditions…" in the top area of the screen, and the filters will appear. This feature allows you to use behavior data to skip irrelevant messages, which is hugely helpful (e.g. in onboarding campaigns).
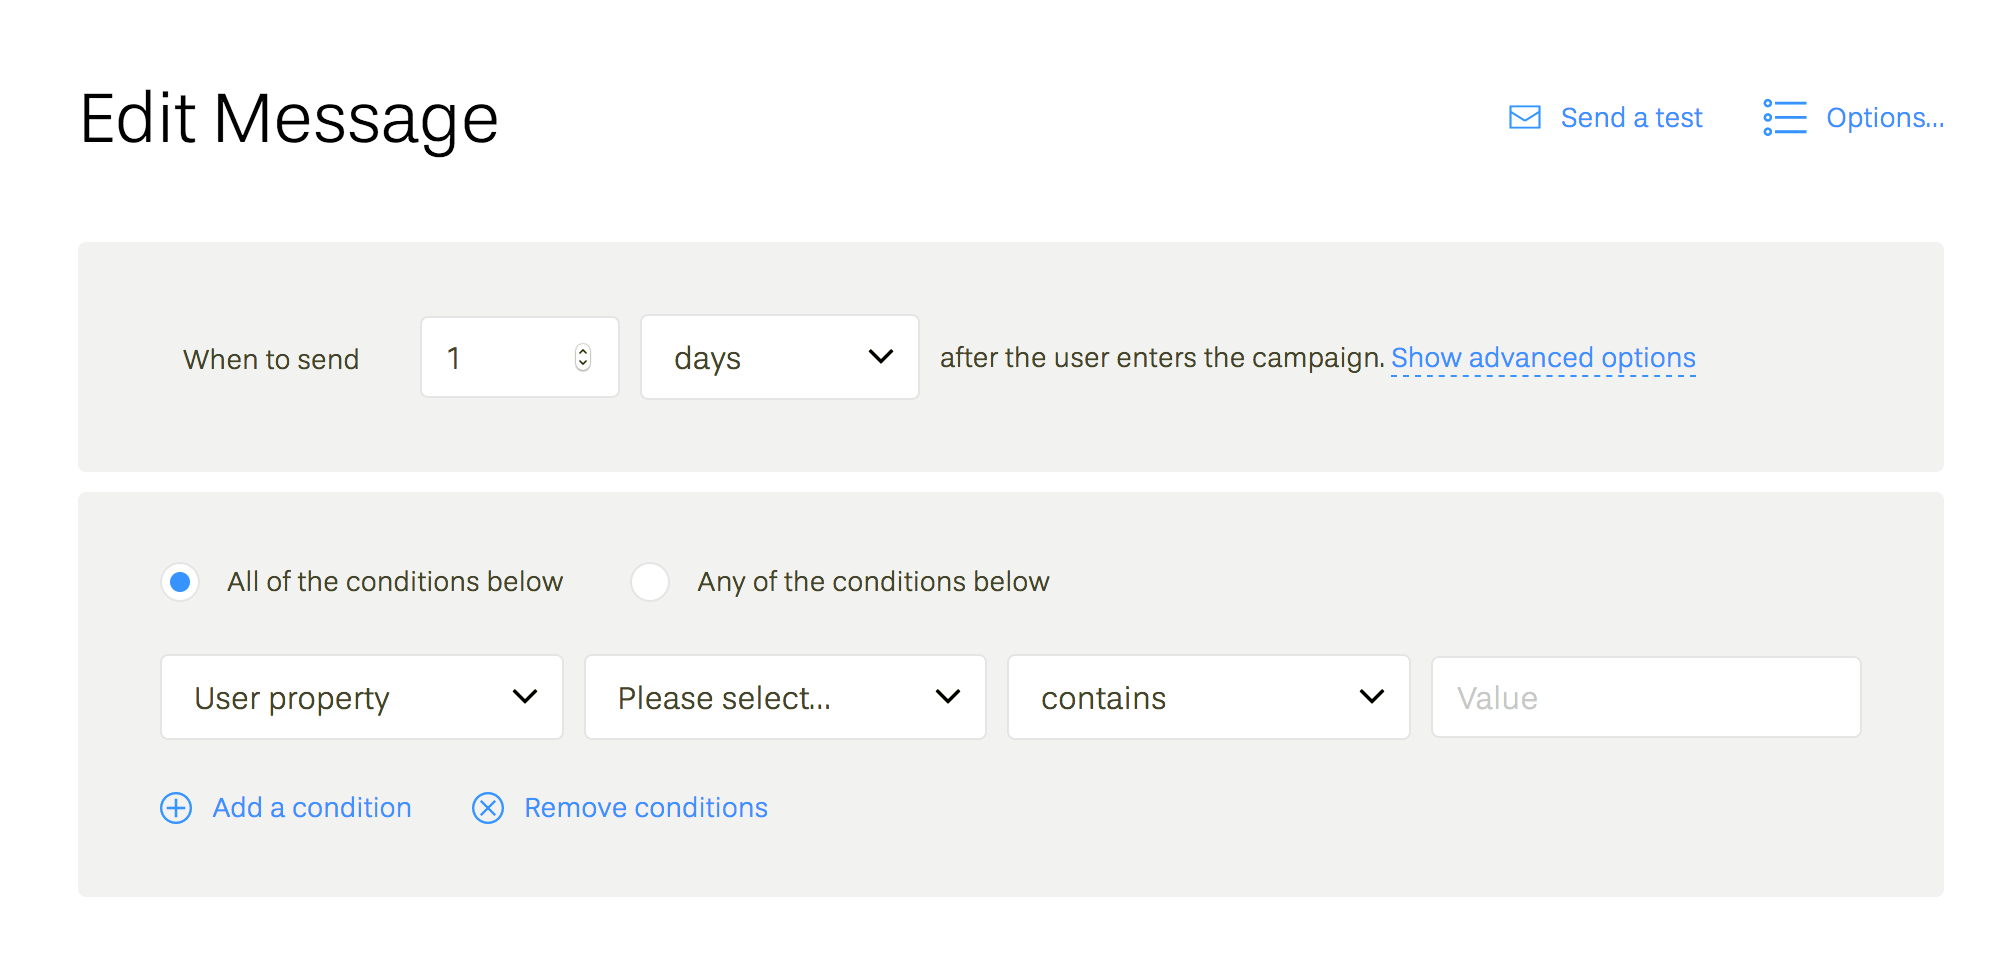
You can also choose what days of the week you want this message delivered on. To view these options, click "Show advanced options" next to the time delay settings.
We calculate this by moving from the "last message sent" time to X days into the future as per delay set, and then — if it doesn't fall into the desired day — keep adding one more day until it matches on of the sending days.
How to send a message e.g. every Sunday. Imagine you have an evergreen newsletter campaign, so you want all messages to go out on Sundays 7 days apart. How do you set it up?
- Make sure all other days of the week are unchecked, so that the message is only sent on Sundays.
- Set them 6 days after the previous message. It minimizes the chance of a potential delay that would cause those emails to go out two weeks apart (if the sending takes too long and rolls into a Monday).
Sending a test message
You can always test any message live in your inbox using the test feature. "Send a test" link is available in the top right corner of the screen.
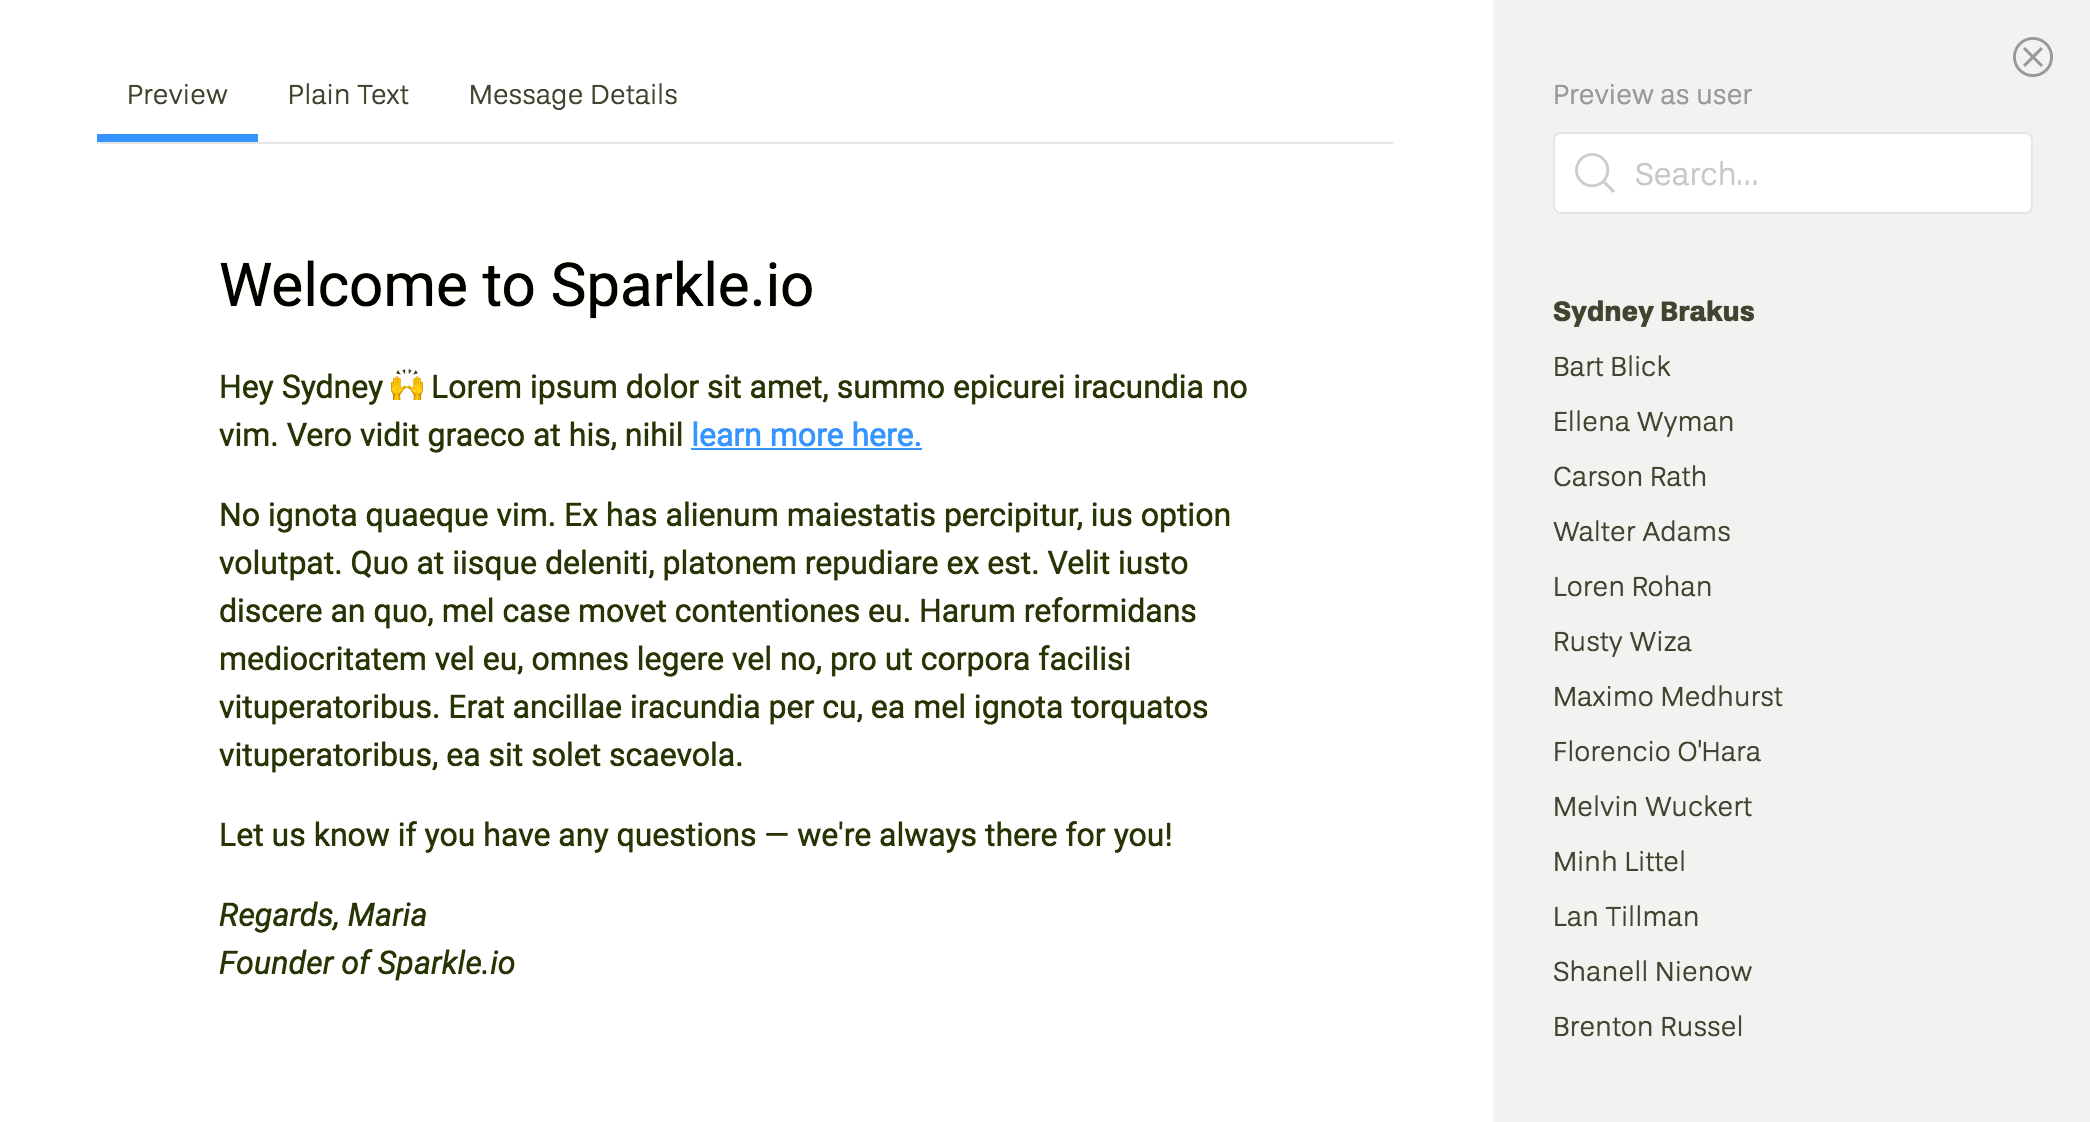
Previewing your messages
This feature allows you to preview your messages using data from any individual user. This is particularly helpful if you need to test Liquid tags, snippets, and other variable parts of your message. To open the preview window, click "Preview" in the top right corner of the screen.
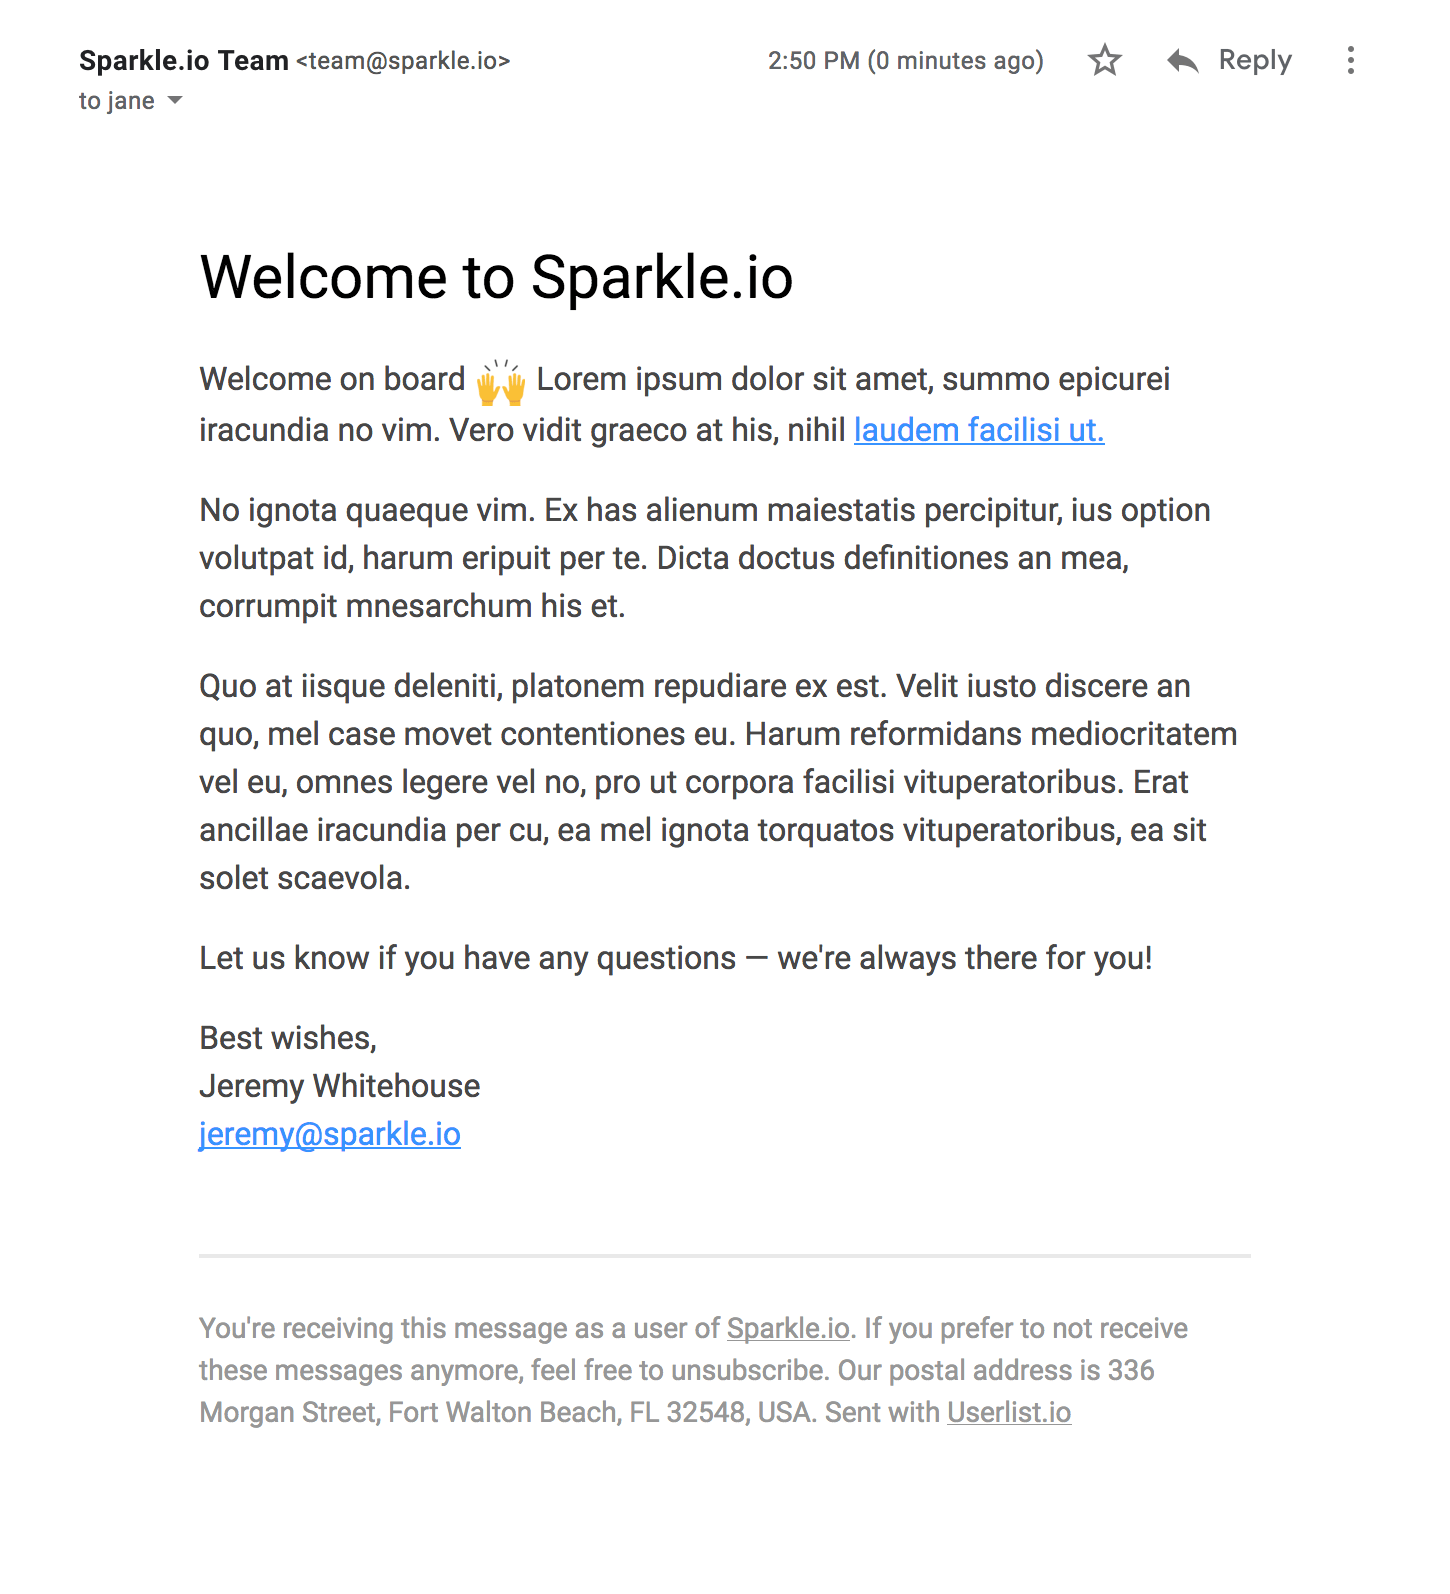
How will my messages look and feel?
Our default template looks like a simple text email, but slightly more polished. If you prefer sending long-form emails or articles, then you’ll appreciate nicely formatted headers (H1-H4), lists, etc. Here’s a snapshot of how a sample email would look in your inbox:
Custom themes
While we still encourage you to keep things simple, Userlist can support multiple themes. You can manage themes in your settings.
Among the themes, you'll find:
- Basic — our default "lighly styled" template. You can customize the accent color.
- Plain — super-basic, as if your emails were sent from Gmail.
- Branded — a heavier email template with customizable background colors and your logo in the headline.
- Custom — access to the theme HTML, for much more control.
Here's an example of a Branded theme:

After you're done with customization, you can then pick one of these themes for each individual message inside campaigns and broadcasts.
Themes are currently in closed beta. Please let us know if you'd like to enable that in your account.