Using Different Node Types
In this guide you’ll learn about different node types and how you can use them to create behavior-based workflows. See this article to learn how to create and edit workflows.
Triggers
Trigger
A trigger is a moment in time when the user enters the workflow. For example, workflow can start once they join a segment or perform a custom event.
Once the user joins the workflow, it doesn’t matter whether they meet that criteria any longer: they’ve already started moving forward.
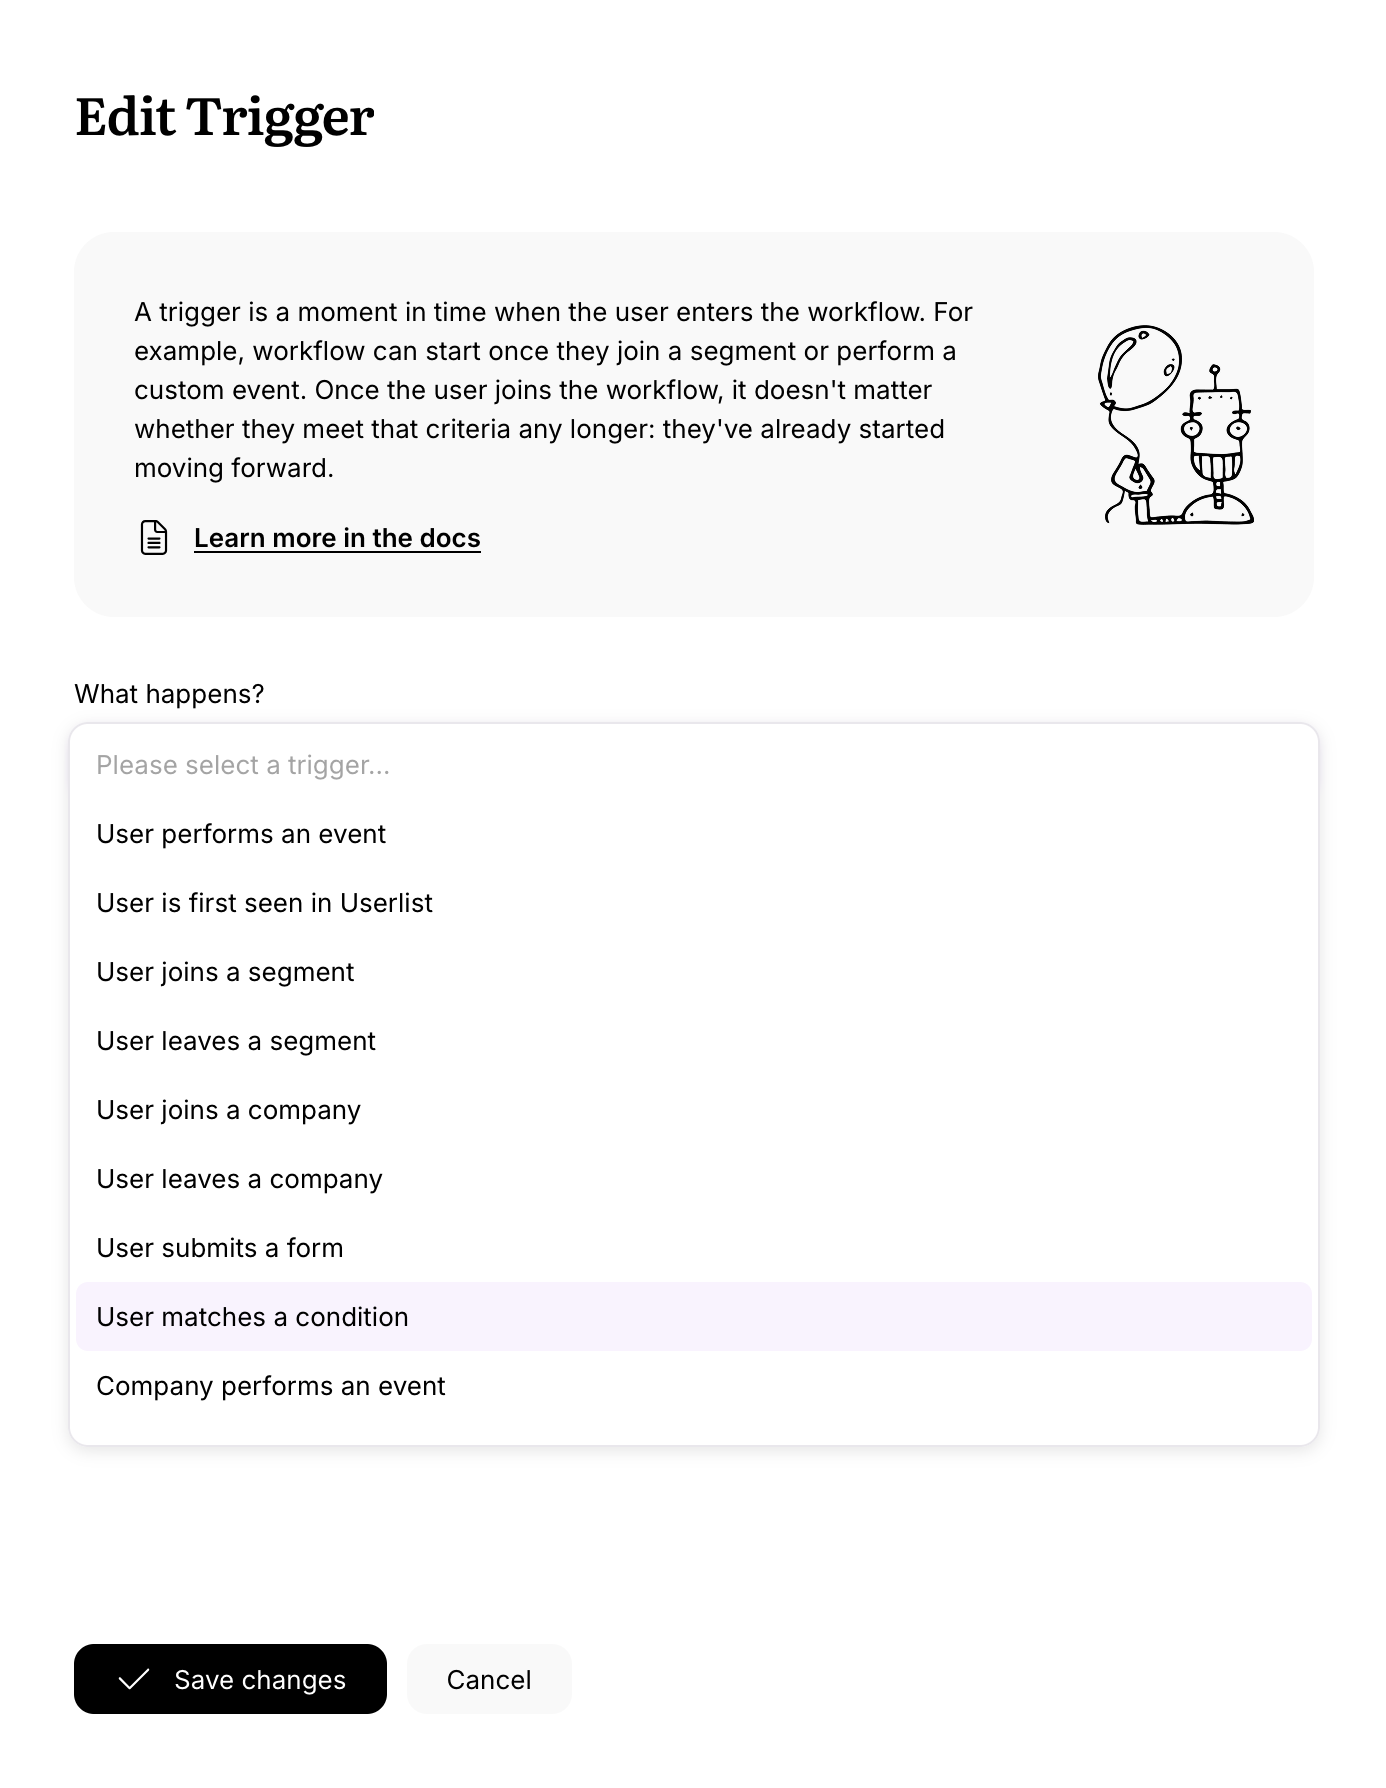
Learn more about workflow triggers in this article.
Actions
Send Email
This node allows you to send an email message to the user.
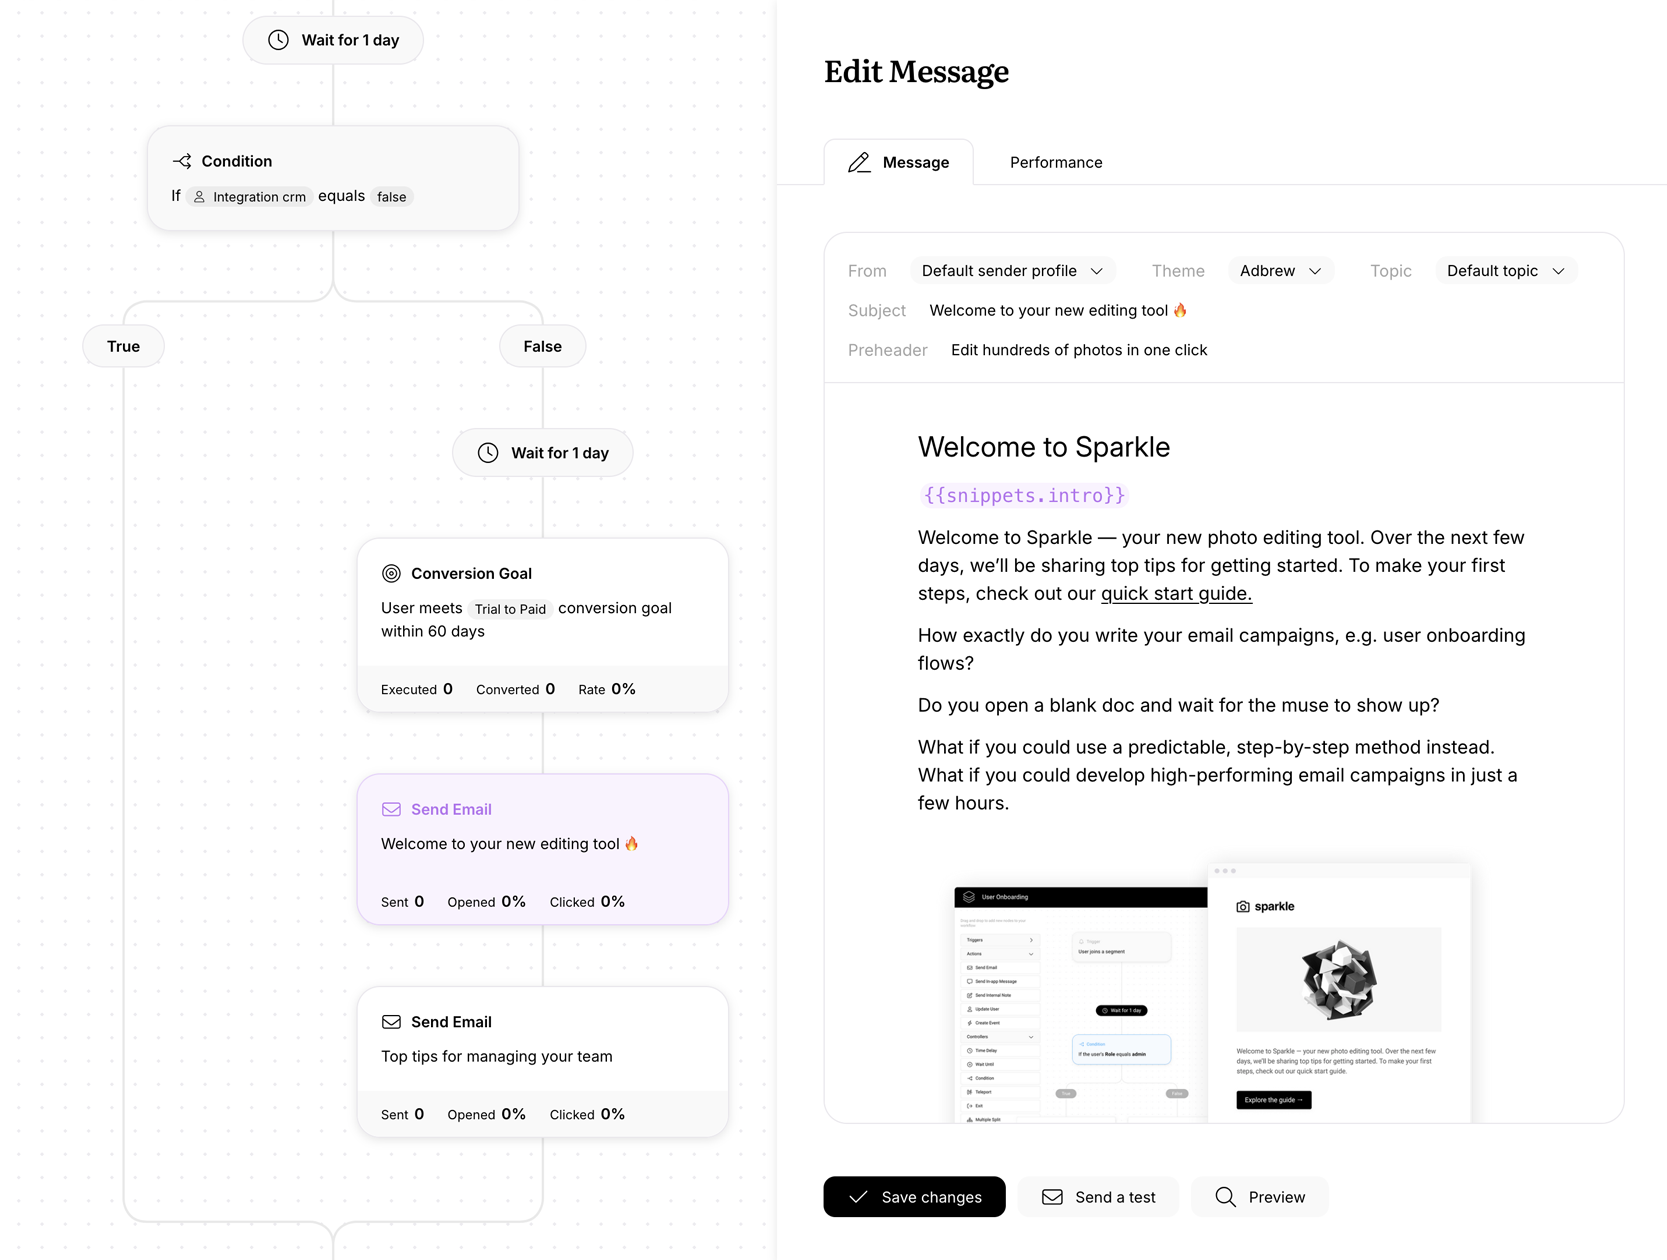
To see message stats, head over to the Performance tab and select the desired time period.
See these articles for details:
Send In-app Message
This node allows you to send an in-app message to the user. These messages are perfect for conveying non-critical information, when you don’t want to bother your customers with a proper email. Keep in mind that in-app messages expire after 14 days if they aren’t read.
Send Internal Note
This node allows you to send internal notifications to your team members via email. For example, you can let them know about a promising trial or a customer with high churn risk.
These emails will be sent from Userlist to the recipient you specify. You can edit the body of the email similar to regular messages, and include Liquid tags with properties for this specific user.
At the moment, we only allow sending such note to one email address at a time. To include another address, simply add another node next to this one.
Update User
This node allows you to update one or more properties in user’s profile. This can work similar to tagging users, but in a more structured way. For example, in your lead magnet workflow triggered by a form submission you can assign a lead_magnet property with the value describing what lead magnet they received.
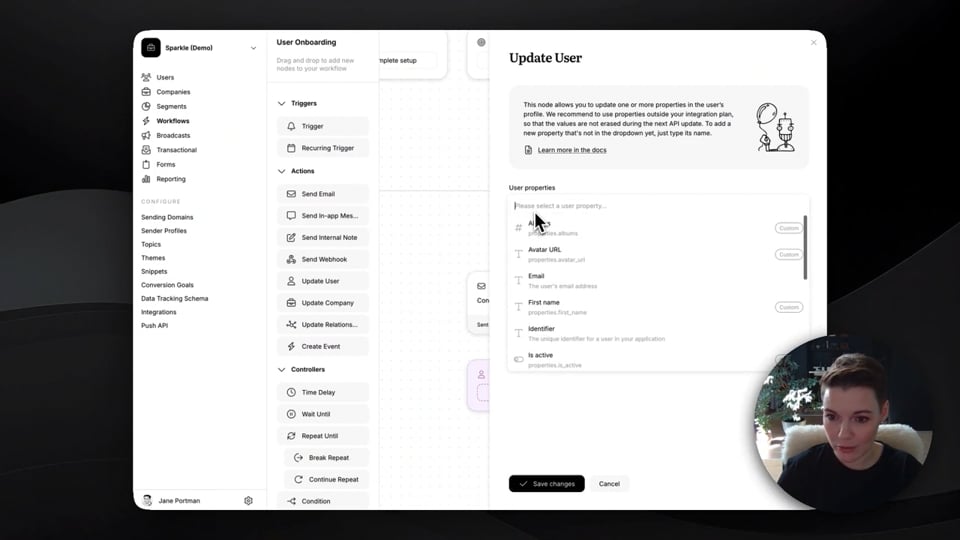
To add a new property that’s not in the dropdown yet, just type its name.
At the moment, we only allow updating strings, numbers, and booleans to static values. We deliberately ignore date, array, and object types. You also can’t do anything dynamic like incrementing or appending.
We recommend to use properties outside your integration plan, so that the values are not overwritten during the next API update.
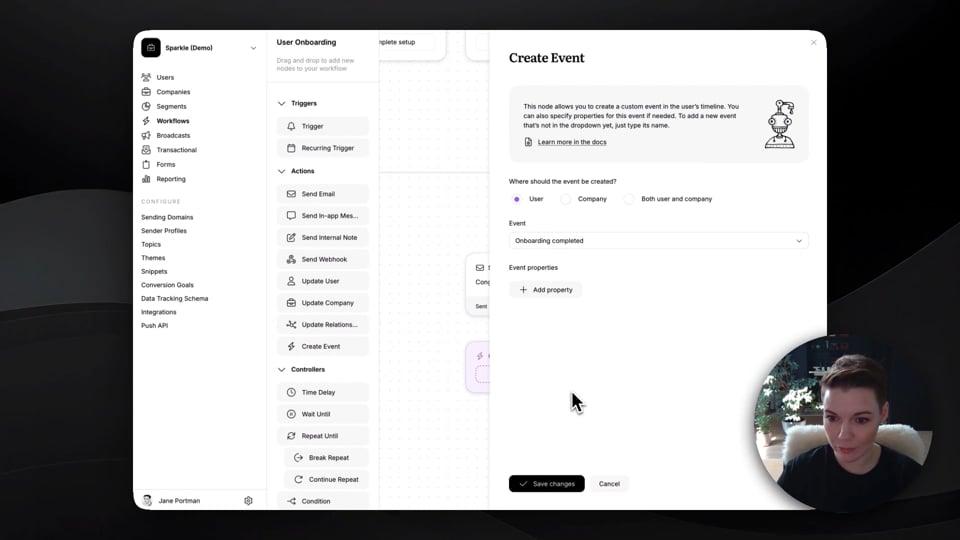
Create Event
This node allows you to create one or more custom events in the user’s timeline. To add a new event that’s not in the dropdown yet, just type its name.
For this, you can safely use events from your integration plan, because they live in the timeline and won’t overwritten.
Send Webhook
This node allows you to send an HTTP request to an external server. You can use it to integrate with third-party services or trigger custom actions.
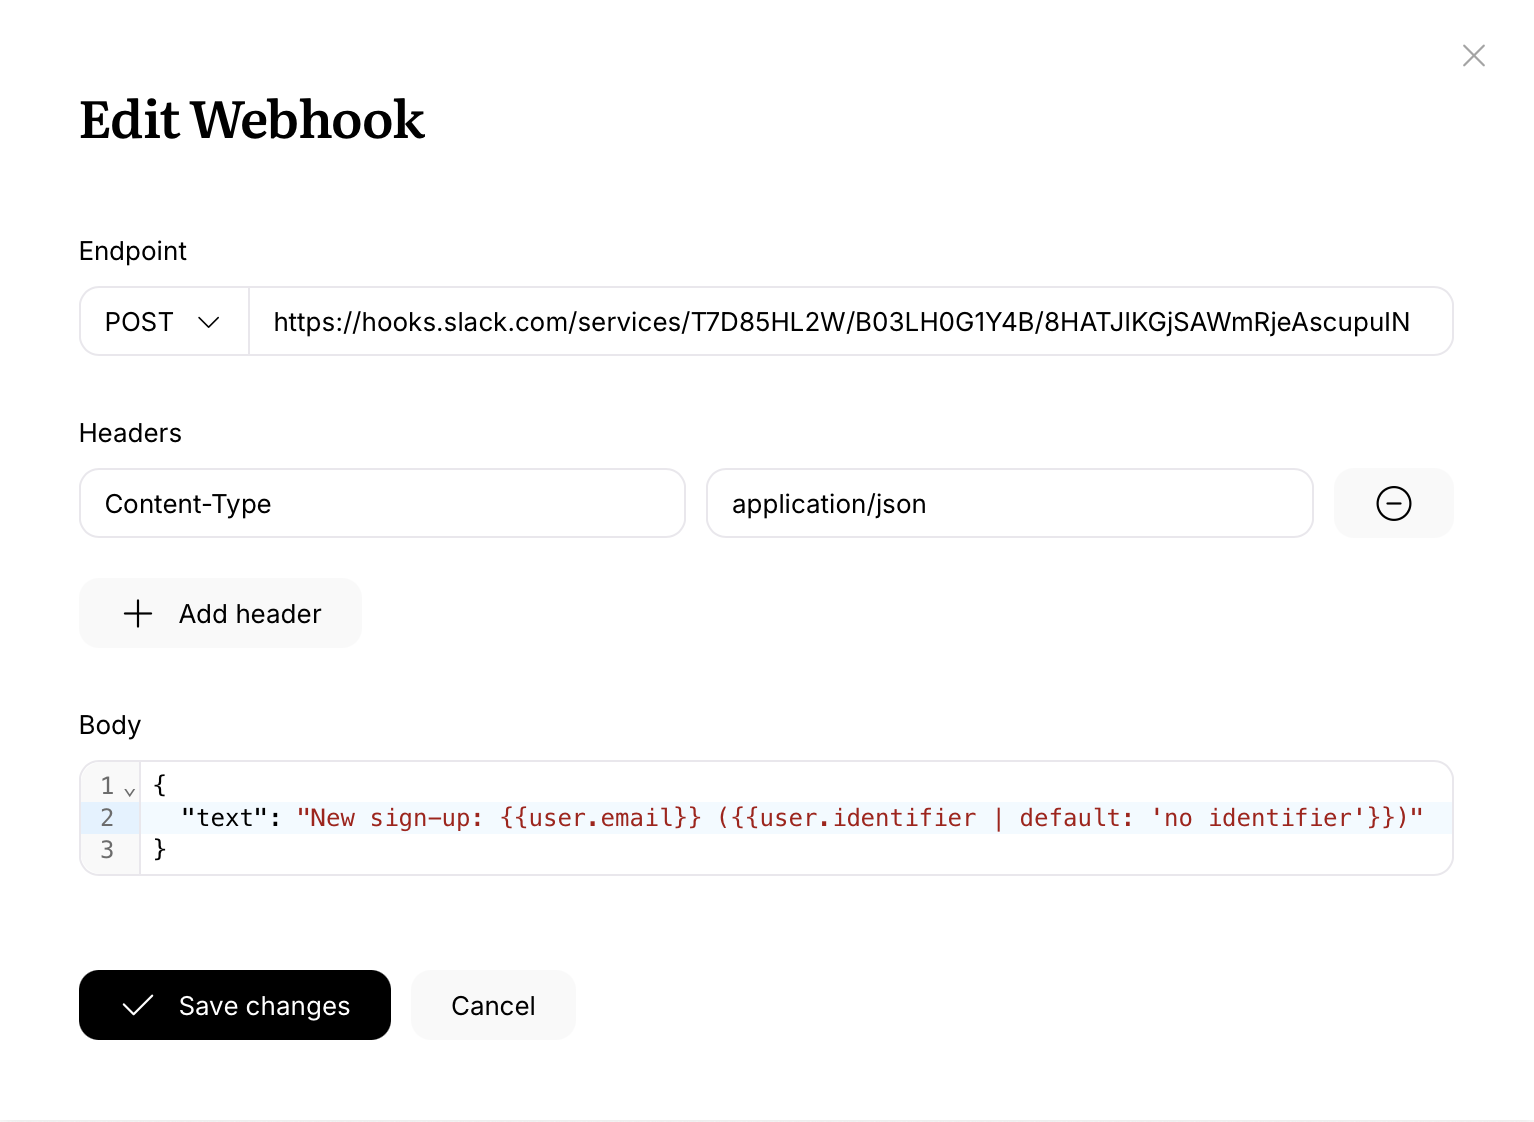
Learn more about webhooks in this article.
To receive a firehose of all events of a specific type from Userlist, you can use the webhooks integration instead of this node.
Controllers
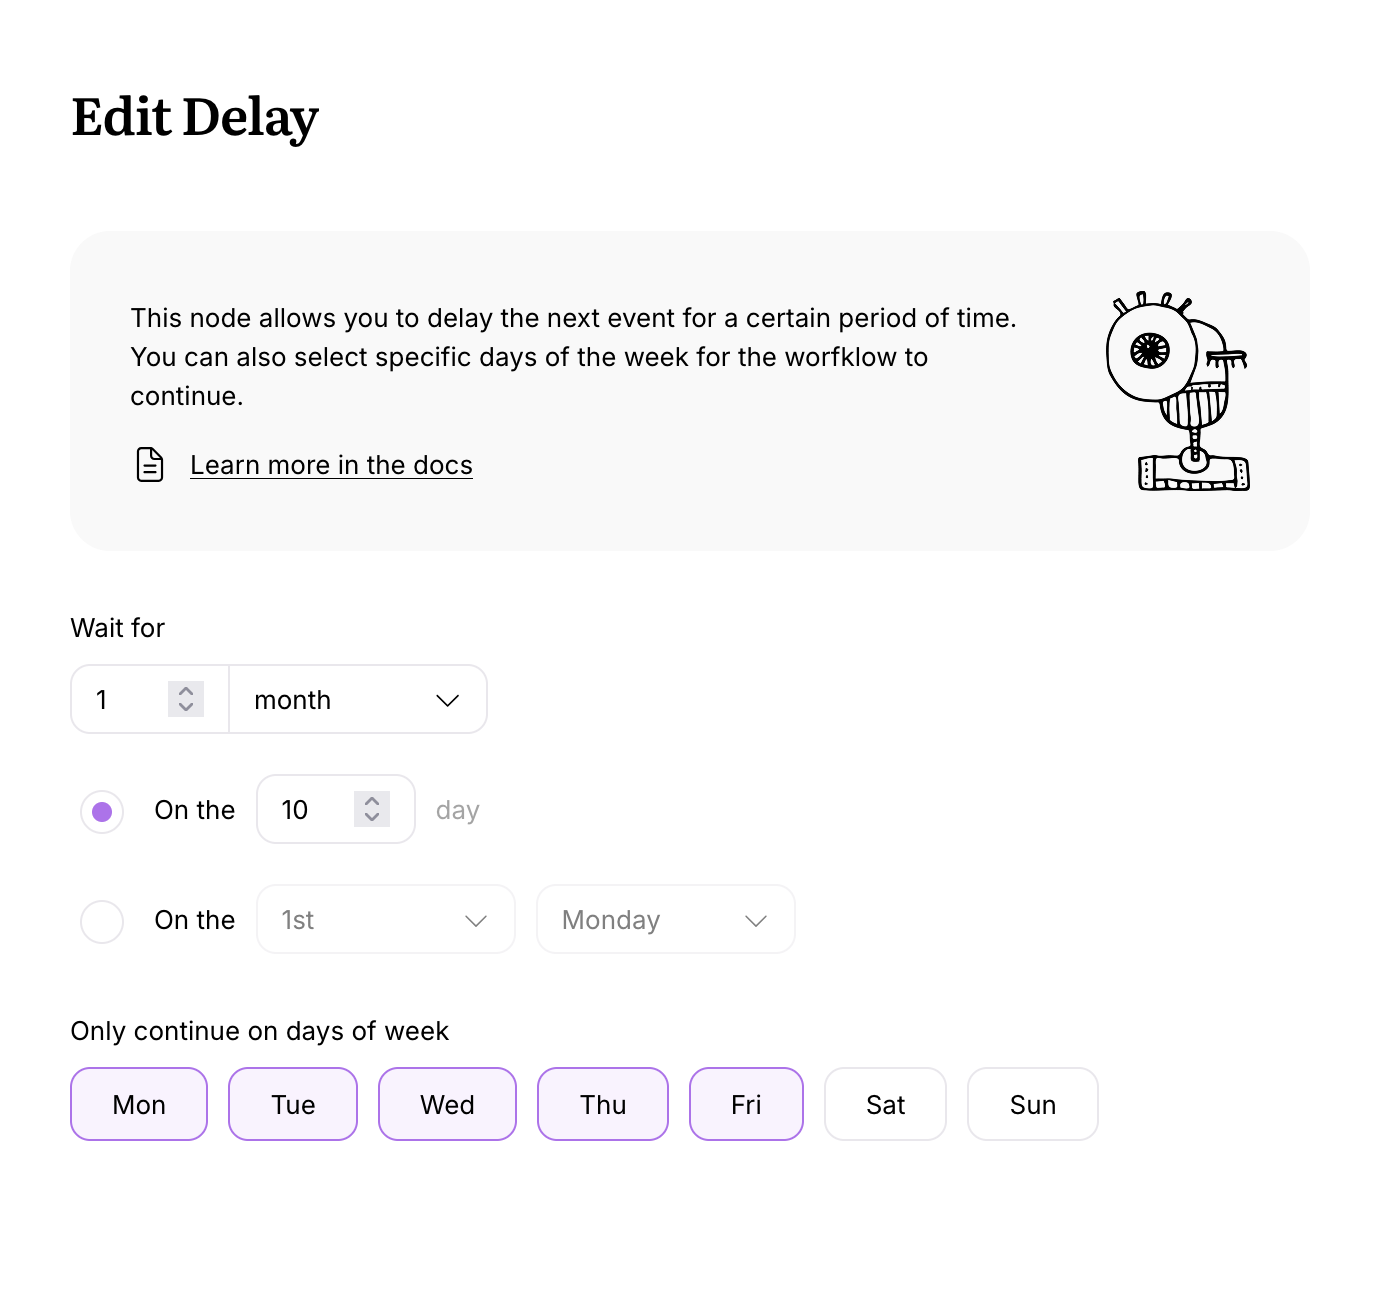
Time Delay
This node allows you to delay the next event for a certain period of time. You can also select specific days of the week for the worfklow to continue. When a user arrives at such node, they’ll stay there for the given delay duration.
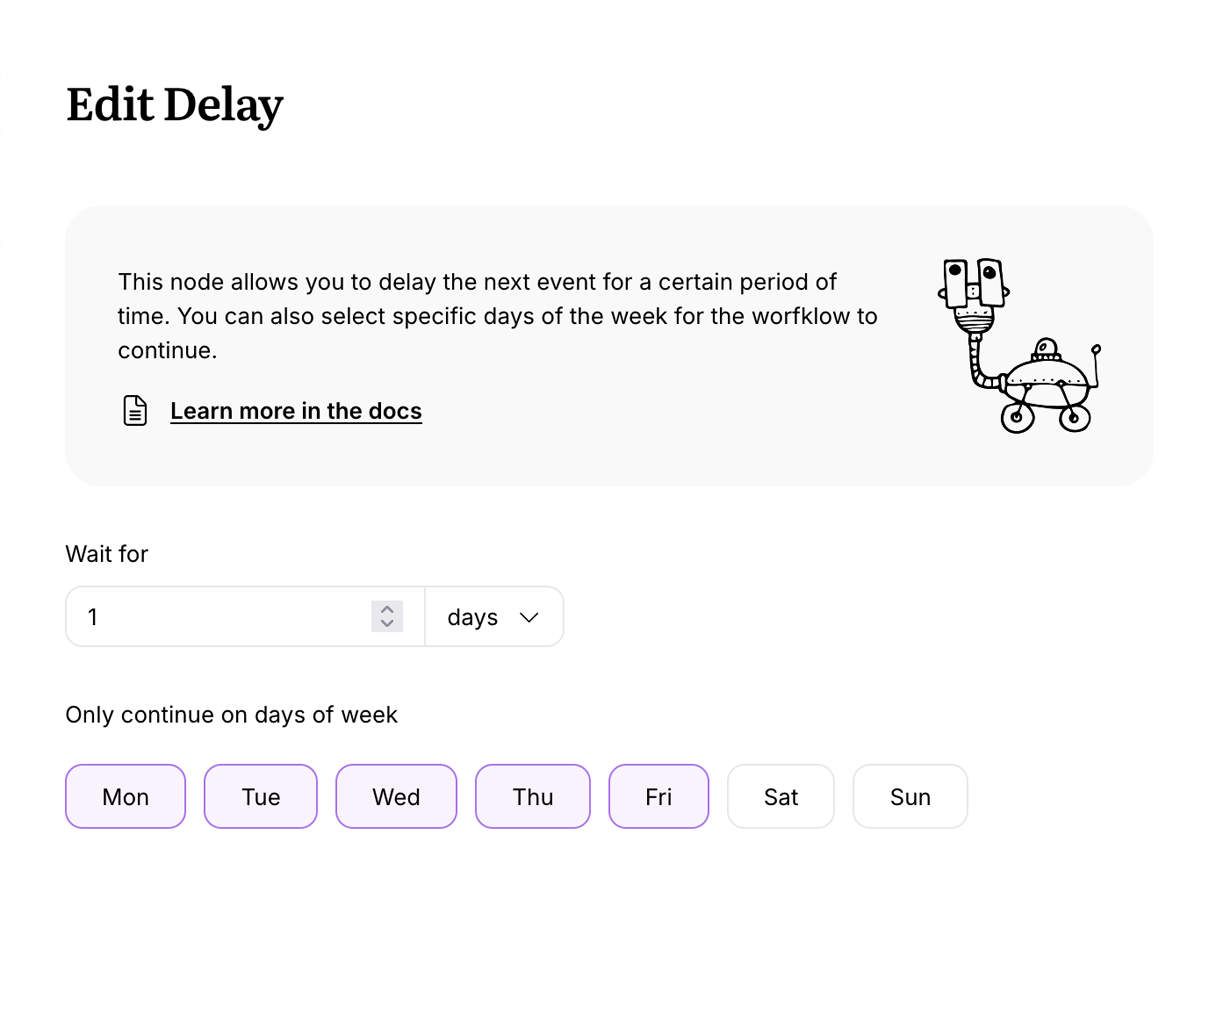
When you select “month” as a period, you’ll see advanced settings. For example, you can select a certain day of the month, or a specific day of a certain week (e.g. first Monday).
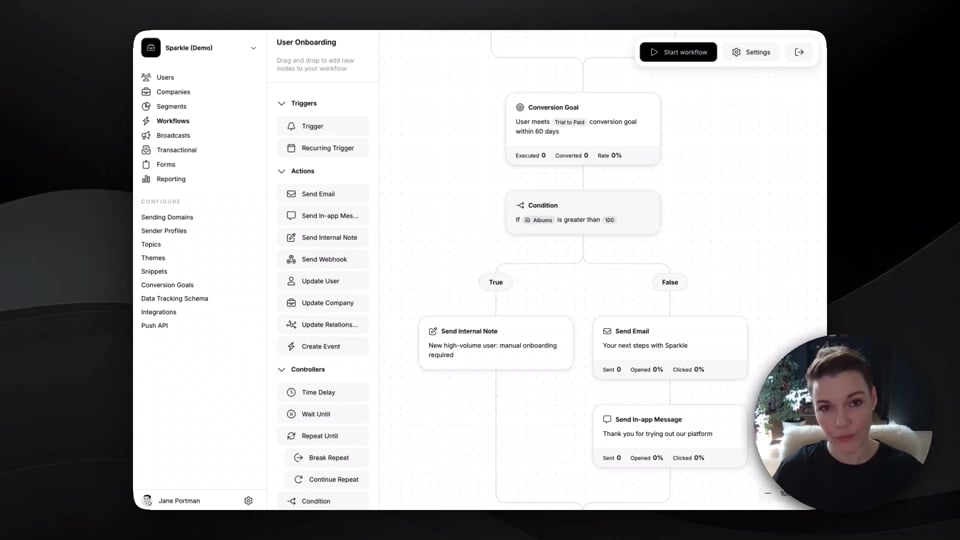
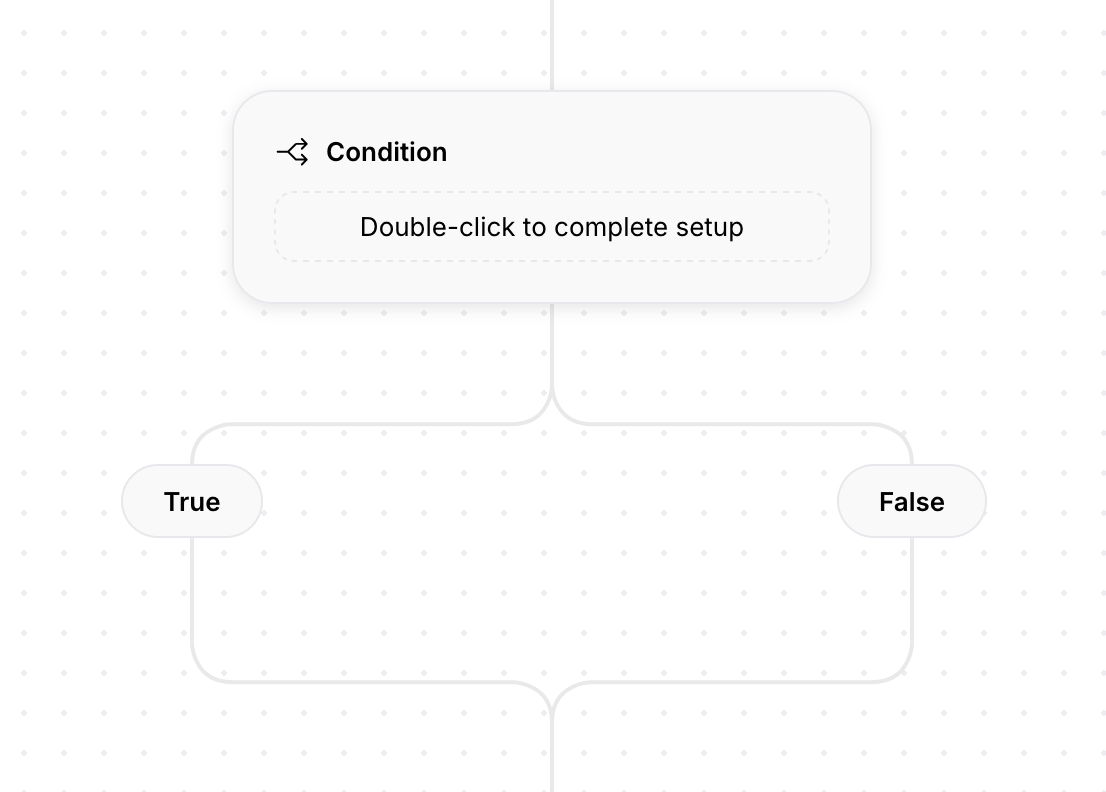
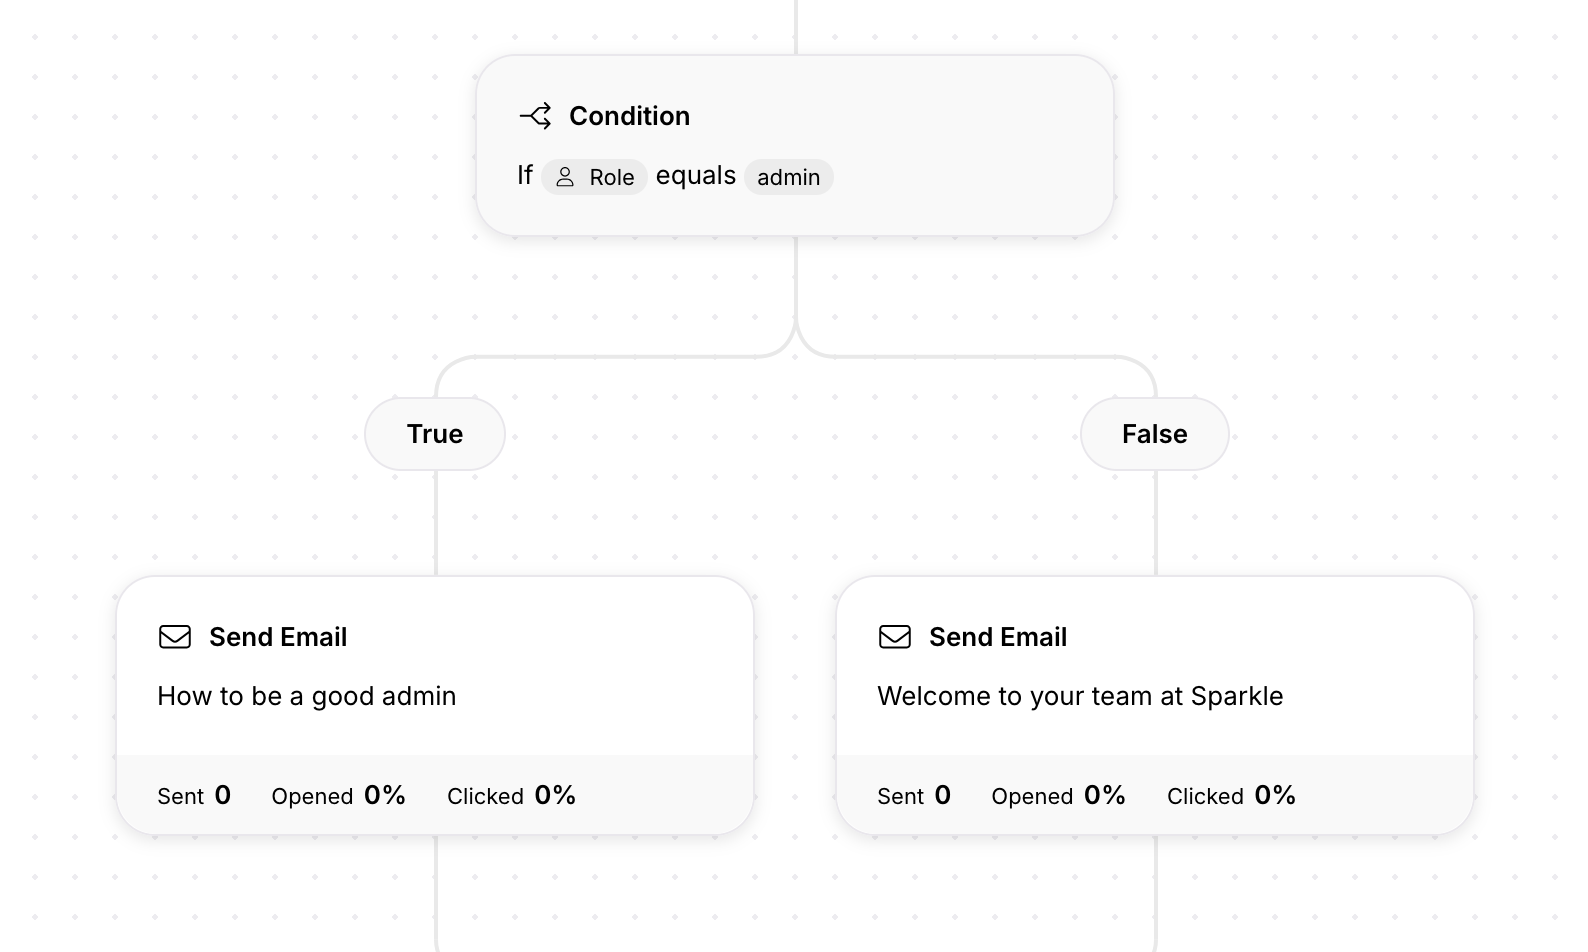
Condition
This node allows you to split the workflow in two paths based on a certain condition being true or false. For example, you can create a path for users who have started using a certain feature, and those who haven’t.
Conditions work similar to filters. You can create conditions based on user properties, events, segments, email behavior, forms, etc.
Here’s how a blank condition looks after you place it into the workflow:
Then you can add multiple nodes, like time delays and messages, or even other conditions, to both branches:
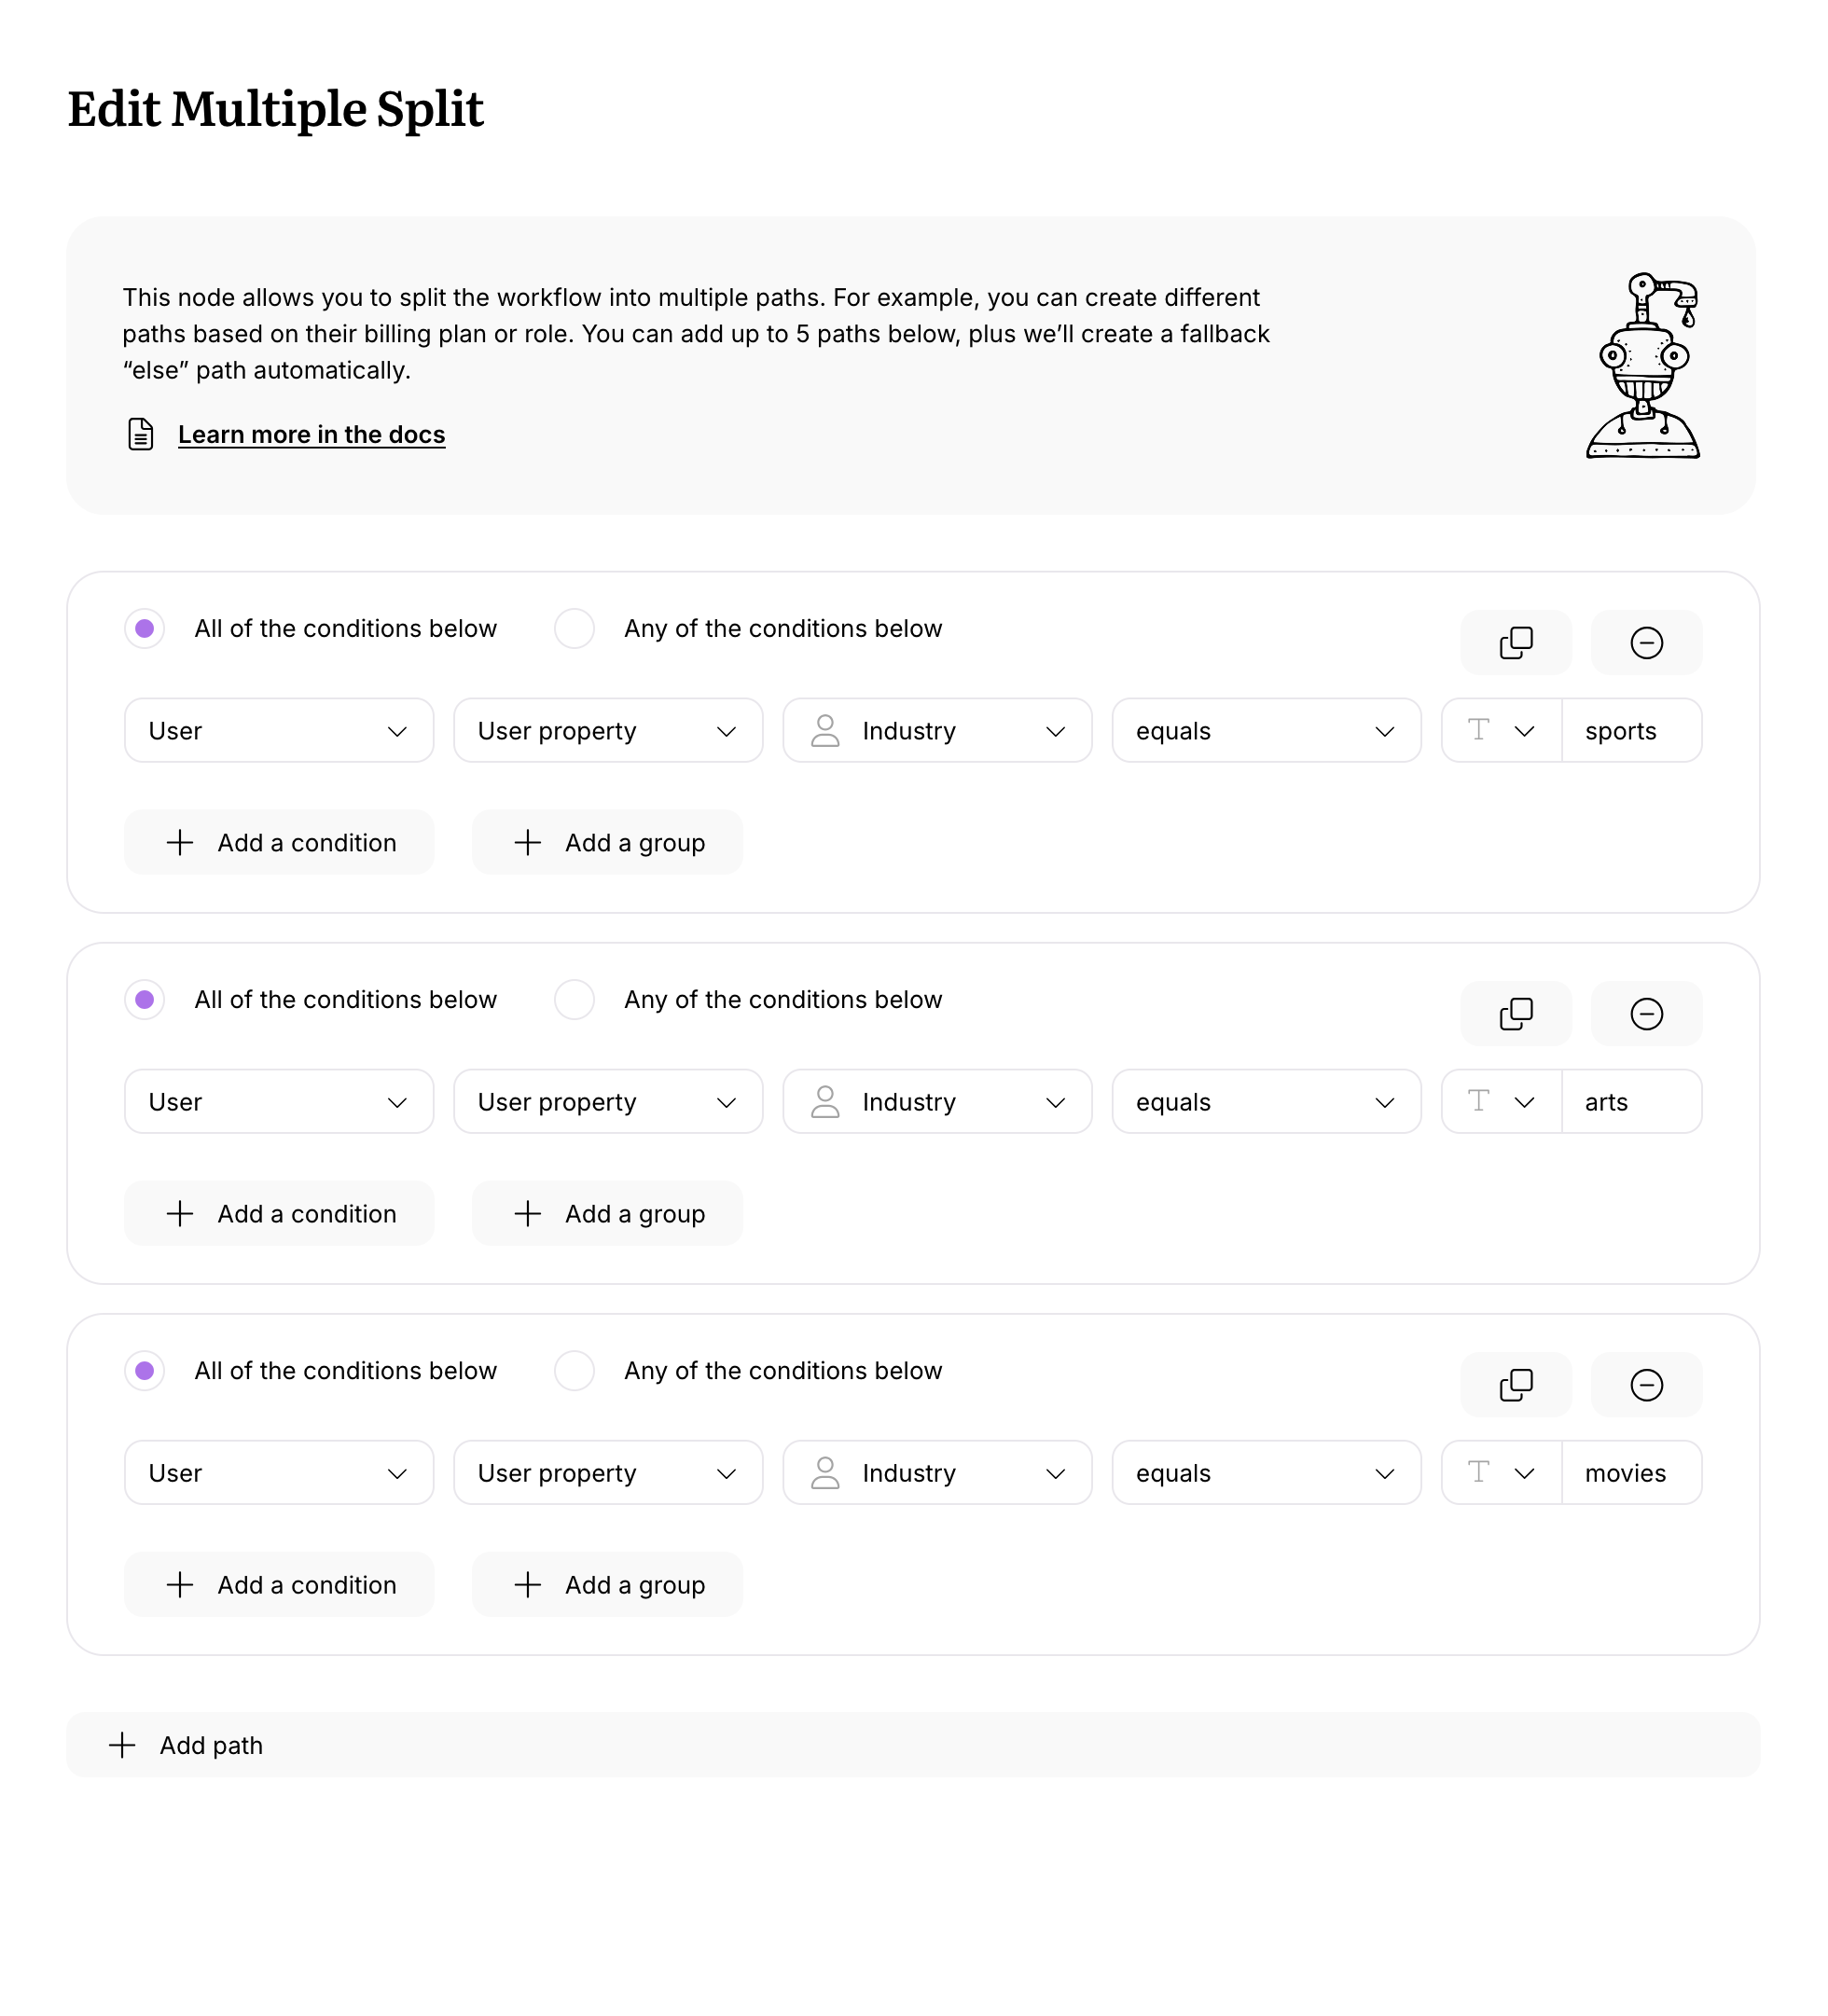
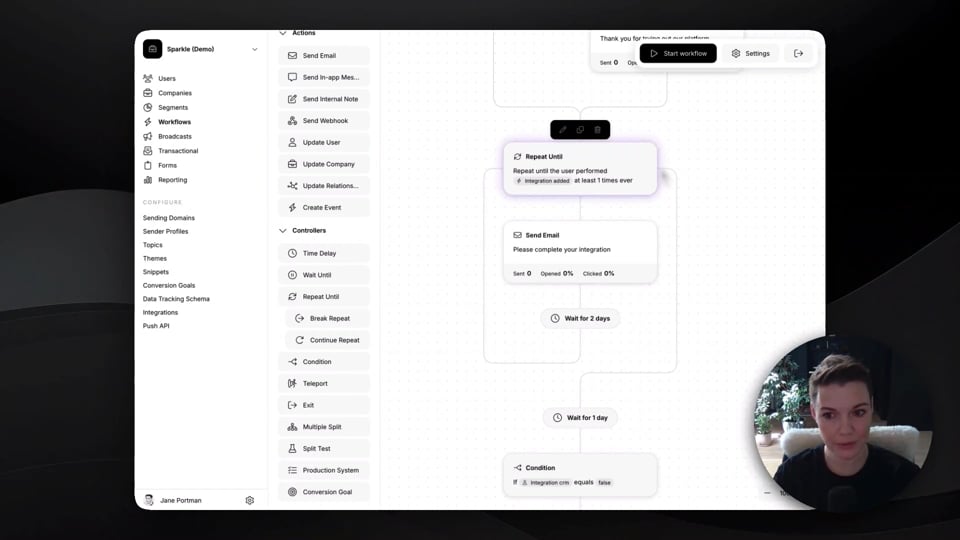
Multiple Split
This node allows you to split the workflow into multiple paths. For example, you can create different paths based on their billing plan or role. You can add up to 5 paths, plus we’ll create a fallback “else” path automatically.
Multiple split works based on one property. First, you select that property. Then you specify its possible values to configure each path.
In the example below, the multiple split is based on the user property role.
Wait Until
This node allows you to delay the next event until something specific happens. For example, you can wait until they start using a certain feature, or become a paying customer.
Repeat Until
This node keeps repeating your actions until the desired condition is met. Think of this as a cycle or a loop.
Don’t forget to include a Time Delay node inside to set the desired frequency.
When the user enters the cycle for the first time, we’ll check the condition before allowing them in. In the example below, if the user’s plan property equals professional, we will not enter the loop and will not send any emails.
If plan doesn’t equal professional yet, we will send the email, wait for 30 days, and check the condition again.

These additional nodes allow to break the cycle:
- Continue Repeat — stops the execution of the current iteration and starts the next iteration (if the condition allows that).
- Break Repeat — stops execution of the Repeat Until cycle entirely and continues to the next node in your workflow.
Split Test
This node randomly splits the workflow into several paths, so that you can A/B test different journeys for each path. You can have anywhere from 2 to 5 paths with different percentages.
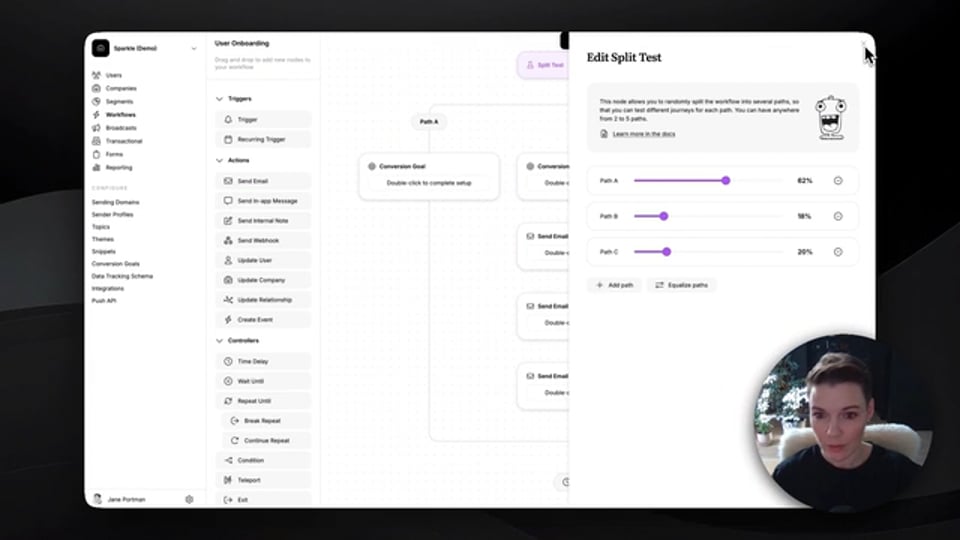
As you drag the slider, we’ll adjust percentages on other paths. To distribute users equally, press “Equalize paths” link on the bottom.
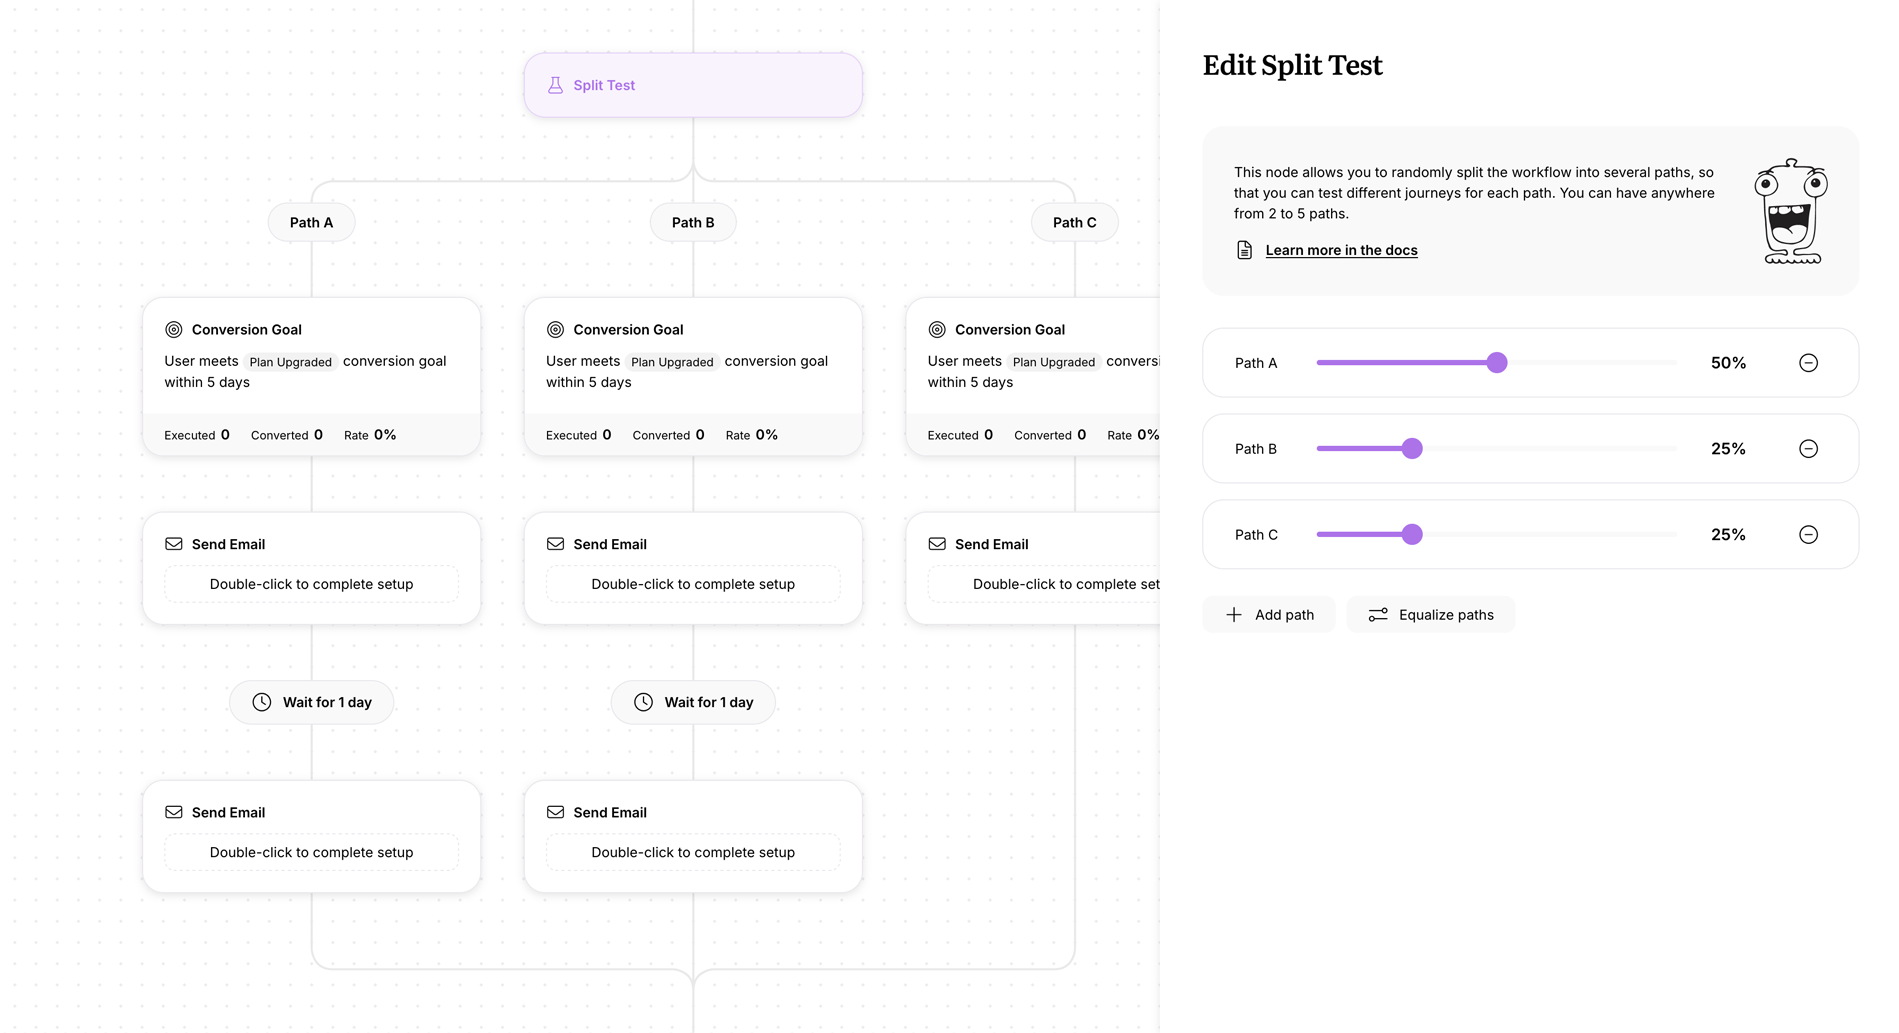
Users are distrubuted into these paths on a random basis. If the workflow is repeatable and the same user goes through it more than once, the next time we’ll try to put the user into a different group.
Learn how to use this node for running A/B tests in this article.
Conversion Goal
This node helps you measure conversion rates right inside your workflows without using third-party analytics software. Once the user reaches this node, we’ll start a conversion window. If the user completes the goal at least once during this period, this will count as a conversion.
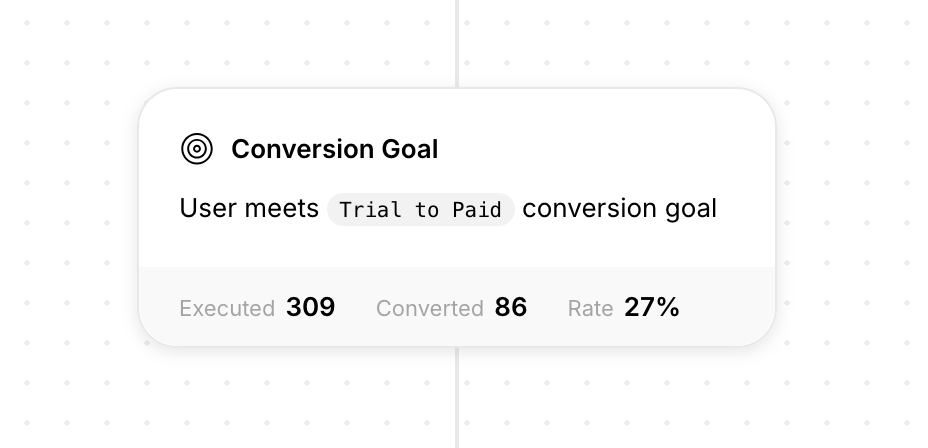
Learn more about conversion goals in this article.
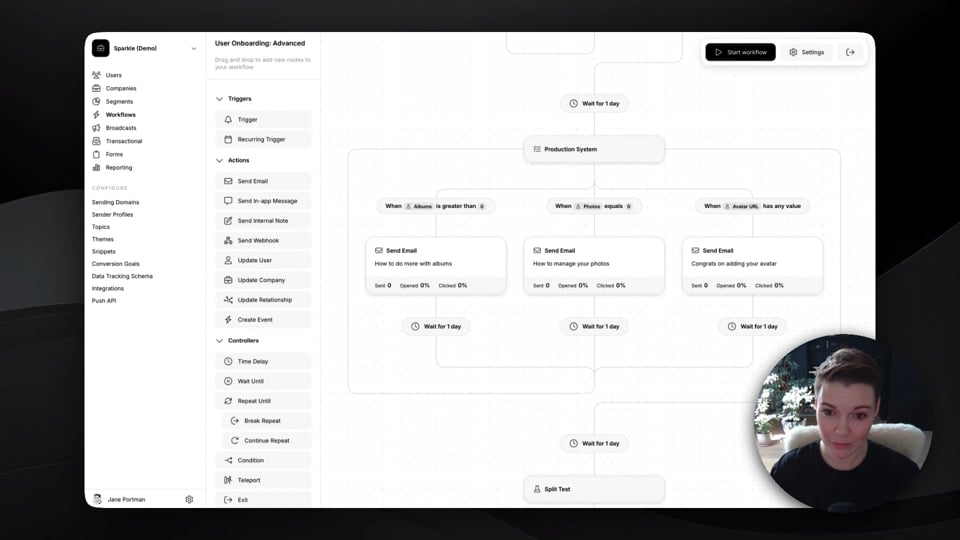
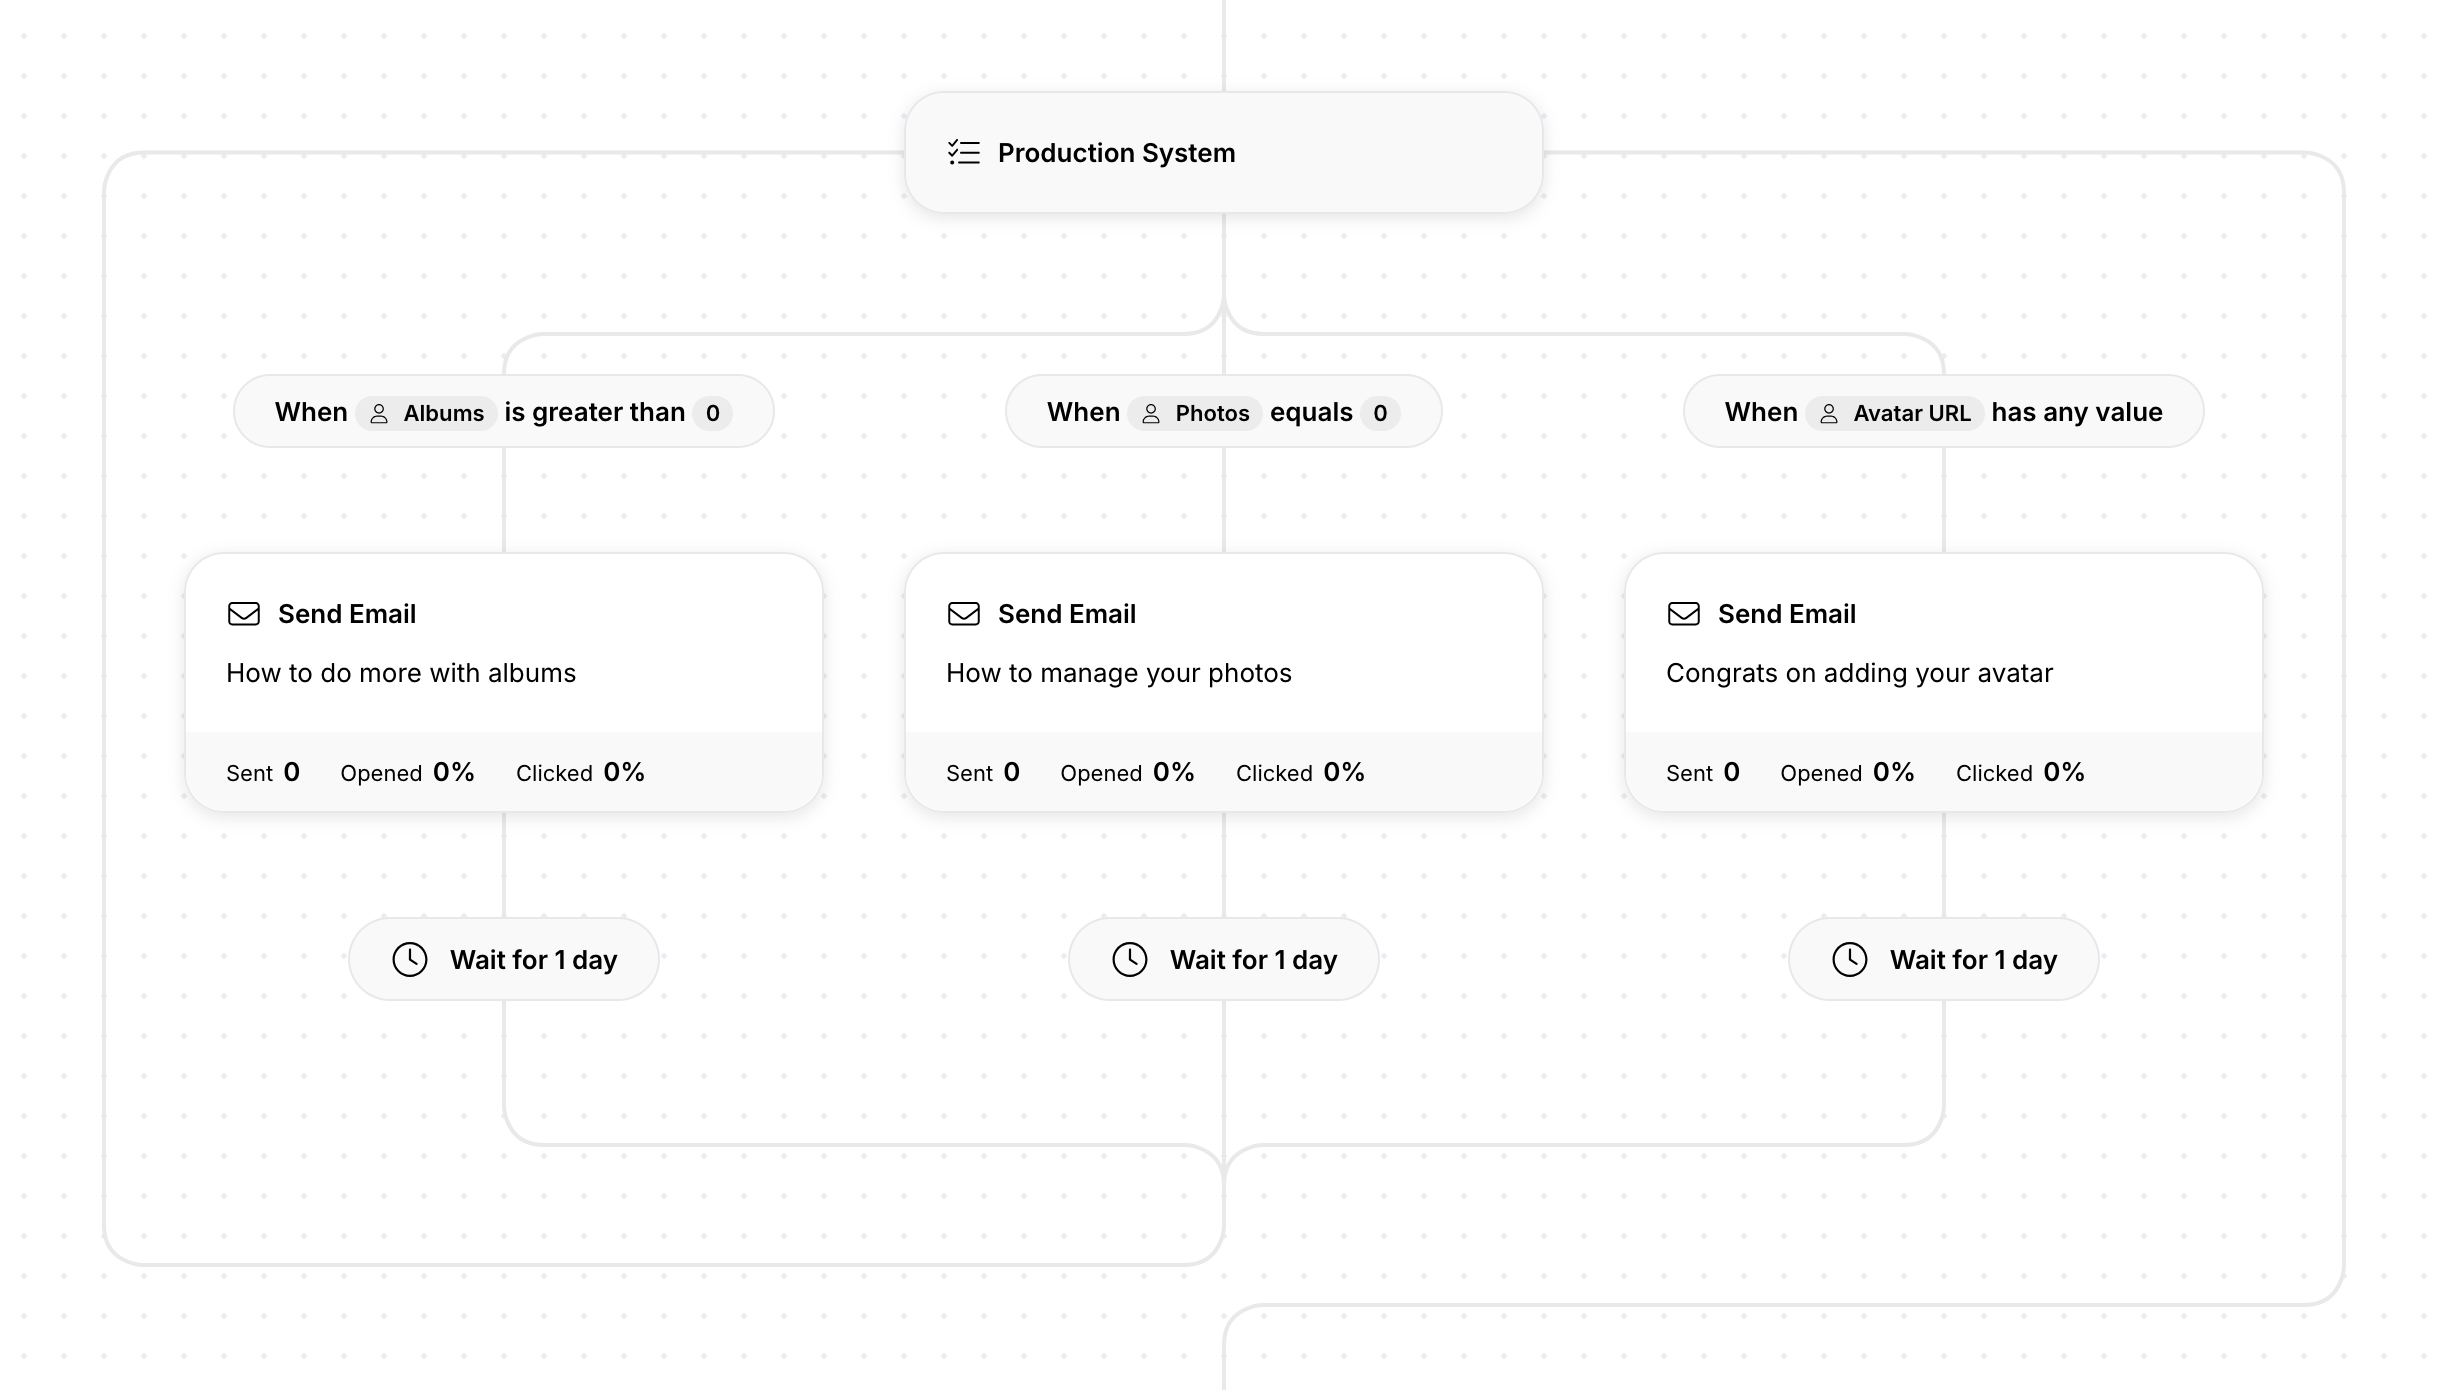
Production System
Use this node when you’re not sure what order of actions the user will take.
This node checks all paths one by one, from left to right, until it finds a path that can be executed. After that, path conditions are tested again.
- Each path will only be executed once.
- The user will exit the production system only after all paths have been executed.
- If any of the path conditions stays false, the system will keep testing it.
- Don’t forget to include a Time Delay node inside to ensure the desired frequency.
In the example below, we want to provide advanced tips on three features (albums, photos, and filters). But we only want to send these tips if the feature is already used.
So we use a production system with three paths. Each path contains a condition (the user started using this feature), an email that promotes this feature, and a time delay.
Exiting the production system. Be careful: if the user doesn’t eventually use all three features, they will stay at this point and won’t move on. So you should either place this production system closer to the end of your workflow, or add a Teleport below to pull the users out.
Teleport
This node accelerates (pulls) the user into its location from a location above, as soon as they meet the teleport condition.
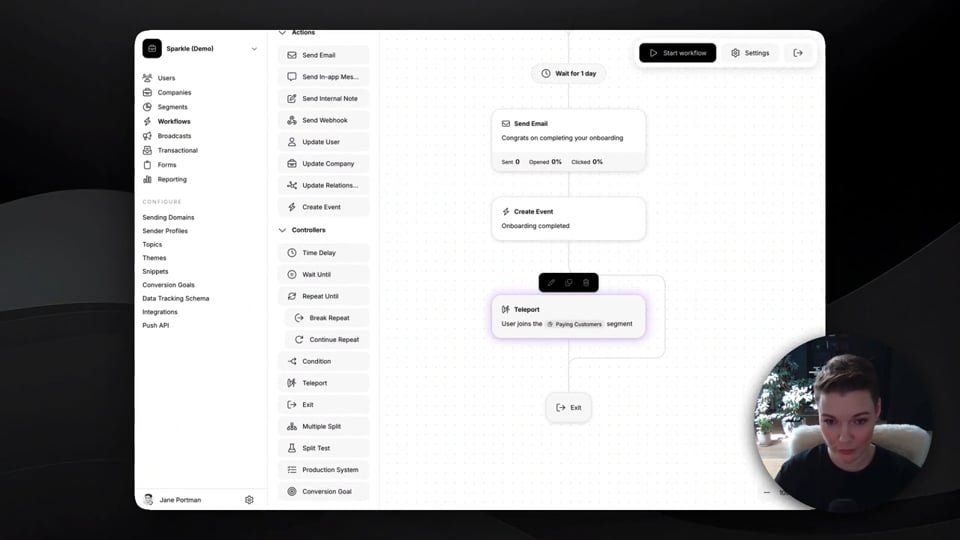
For example, you can place a teleport right before a workflow exit. This way you will have an exit condition that stops the campaign immediately.
If the teleport is placed within a branch of a condition or split node, the teleport will only pull users from locations within the current branch. It is not possible to pull users to locations that they wouldn’t be able to reach otherwise.
Exit
This node allows you to stop execution of a worfklow. Once a user reaches this node, the workflow will stop immediately and cannot be resumed.
Your workflow should have at least one main exit, which is added automatically in the bottom. To create additonal exits, drag an Exit node from the left-side menu to the desired location.
Exit conditions. If you need one big exit condition for your workflow — similar to exit conditions in legacy campaigns — you need to place that condition into a Teleport node before the main exit.