Getting Started with Workflows
Workflows are the heart of your automation. They allow you to build complex automation campaigns using a visual builder. With workflows, you can do many great things:
- Get a better visual understanding of your automations
- Create complex condition splits
- Easily duplicate, edit, and move around your messages
- Enjoy advanced features like A/B testing and conversion goals
Creating a workflow
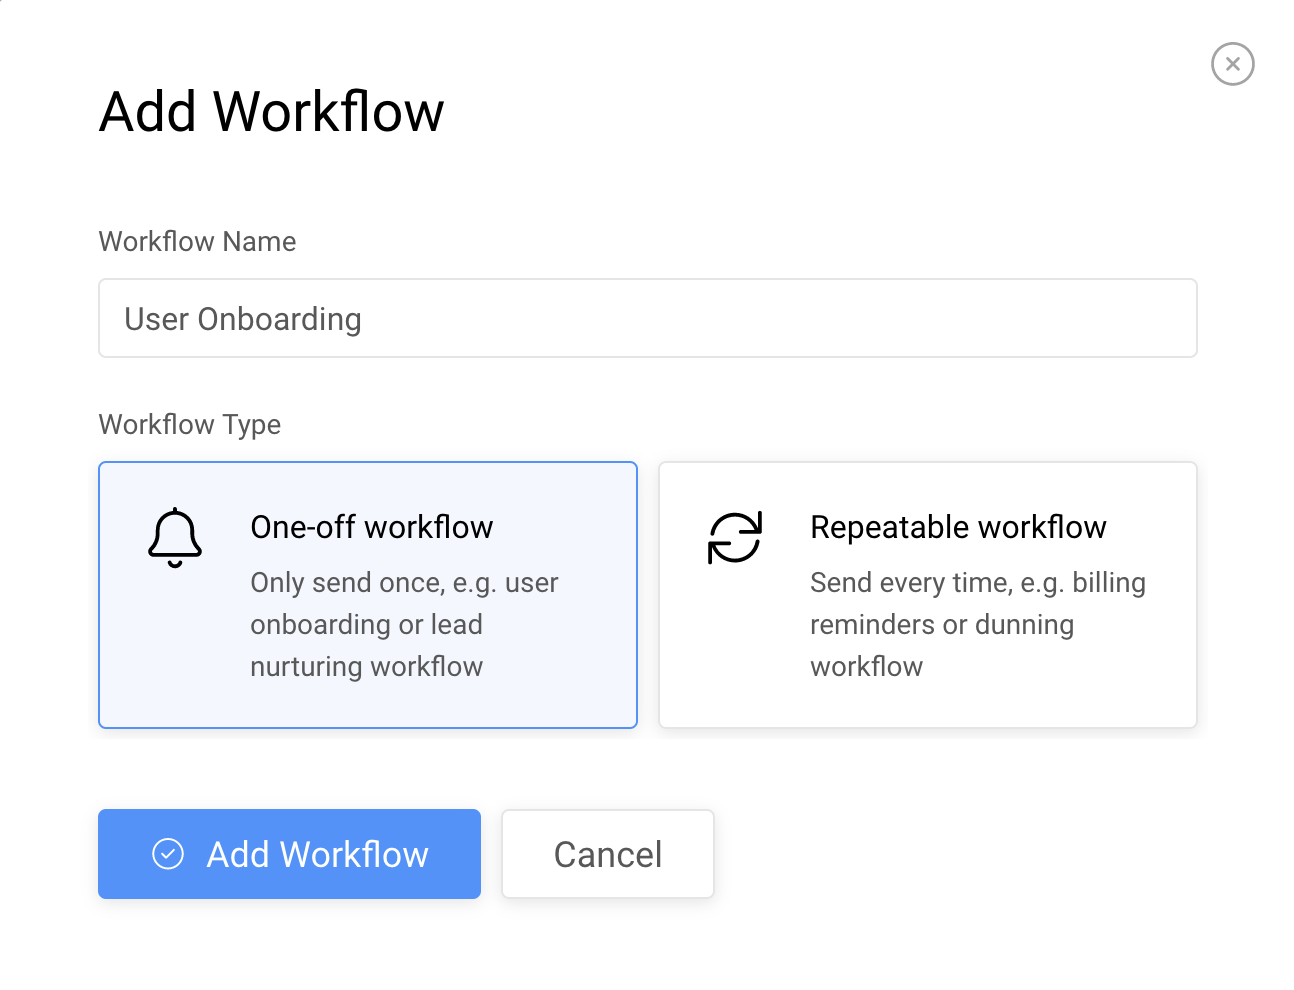
First, head over to Workflows in your top navigation. Then click the “Add Workflow” button in the top right corner of the screen.

You need to fill out the workflow name, and select a type: one-off or repeatable.
These settings can be edited at any other time — just open the workflow builder and click the setttings icon in the top right corner.
Workflow types
- One-off workflows (the most popular type) can only be sent once. The same user can never enter such workflow twice. Most of your workflows like user onboarding or lead nurture will be of this type.
- Repeatable workflows can be sent multiple times. We'll start a repeatable workflow every time a trigger happens (unless the user is already in the workflow). For example, you can use repeatable workflows for your billing reminders or failed payment recovery.
Repeatable workflows have a sending limit. Regardless of how many times the trigger occurs, we'll send one message per day maximum. This is to prevent unwanted (or accidental) email overload for your users.
Editing a workflow
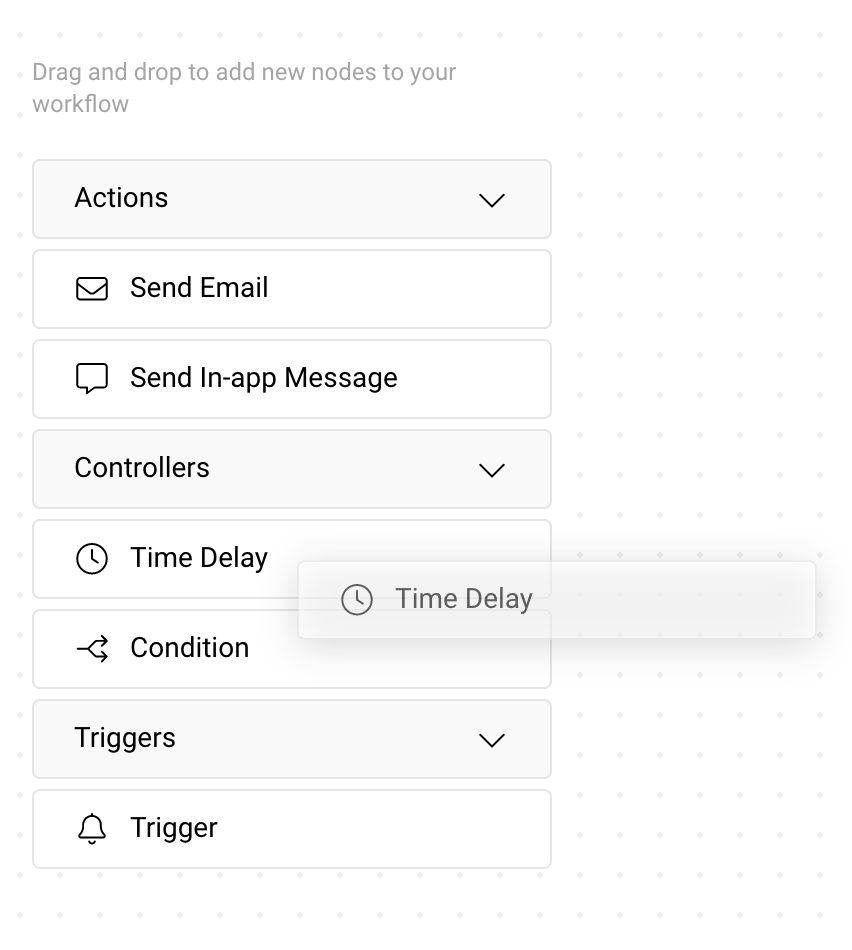
On the left side of your screen you’ll see a menu with various node types, like triggers, actions, and controllers. See this article for the detailed overview of different node types.

Drag the nodes to the work area to create your workflow.
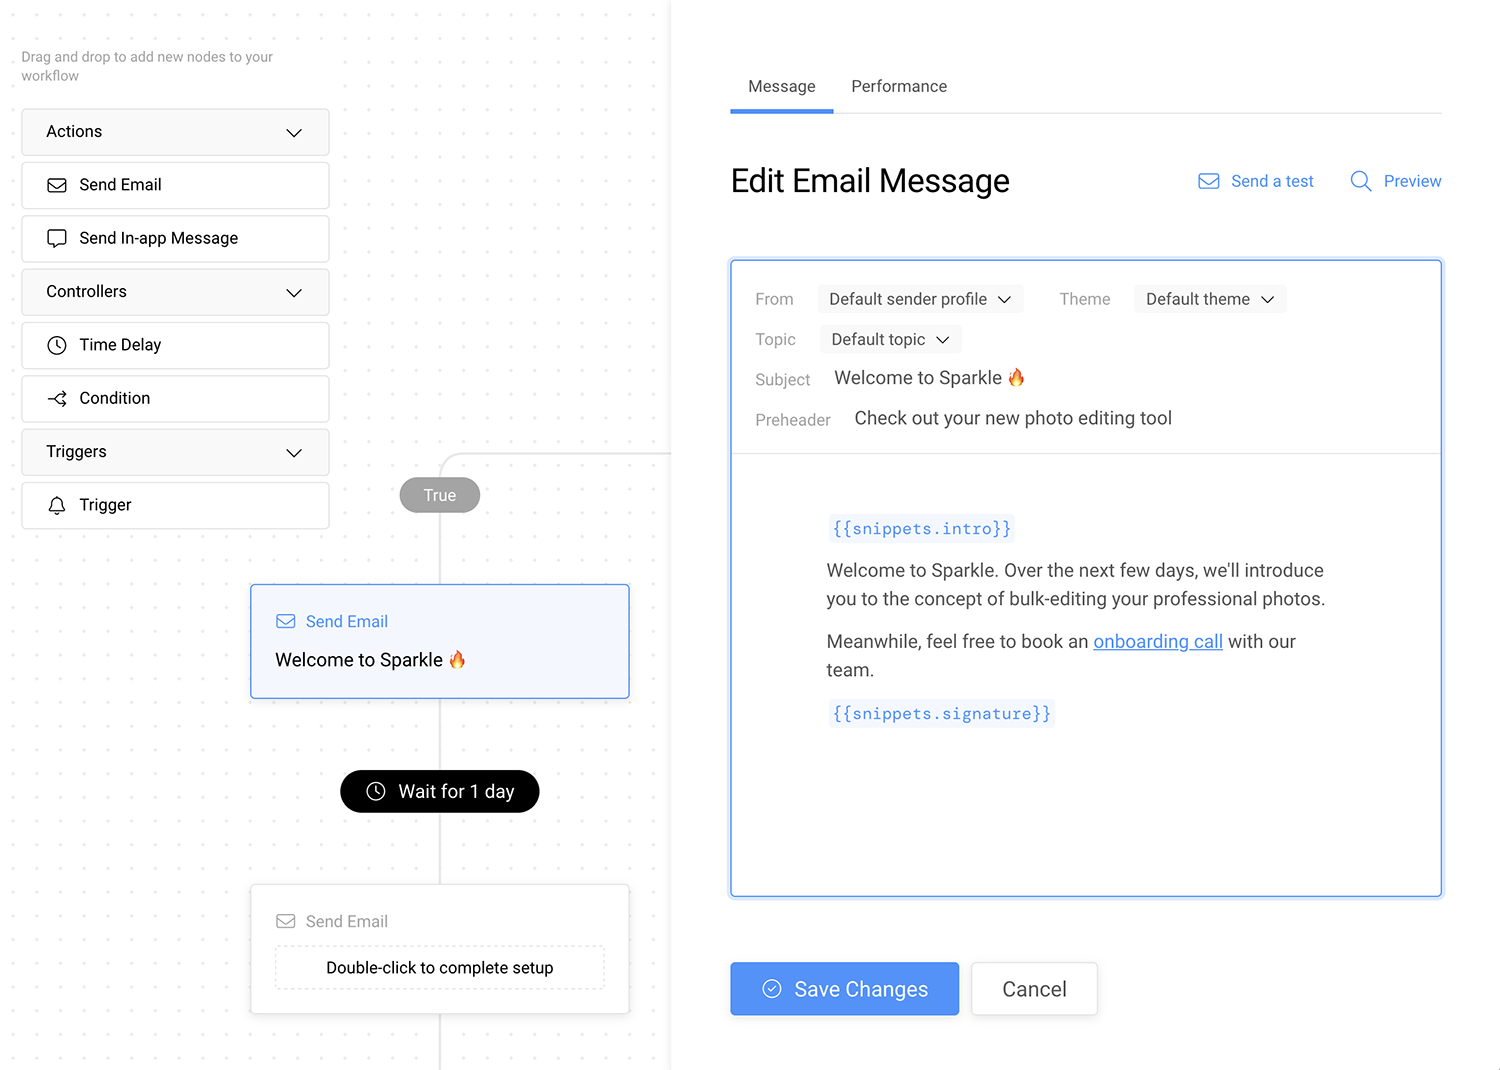
Once the node is placed, double-click the node to complete the setup. A panel with node options will appear. Here's an example of a Send Email node opened for editing.

The editing panel can be resized. To do that, hover over the vertical line and drag it to the desired width.
Starting and pausing a workflow
After you're done editing, you can start your workflow by clicking the green Start Workflow button in the top navigation.
While the workflow is live, you can still make small changes to it, e.g. edit message copy or tweak a subject line.
To make substantial changes to your workflow (like adding new messages), you'll need to pause it first. Please don't worry, we will suggest to pause if you try to do a big edit on a live workflow.
How we save your work. Edits to the workflow itself (e.g. workflow structure and the location of the nodes) are autosaved continuously, regardless of whether the workflow is live or paused. Edits to the nodes are saved using the "Save" button in their editing panel.