Forms
Forms help you collect email signups. This way you can grow your SaaS marketing email list through lead magnets, content upgrades, free courses, etc.
Creating a form
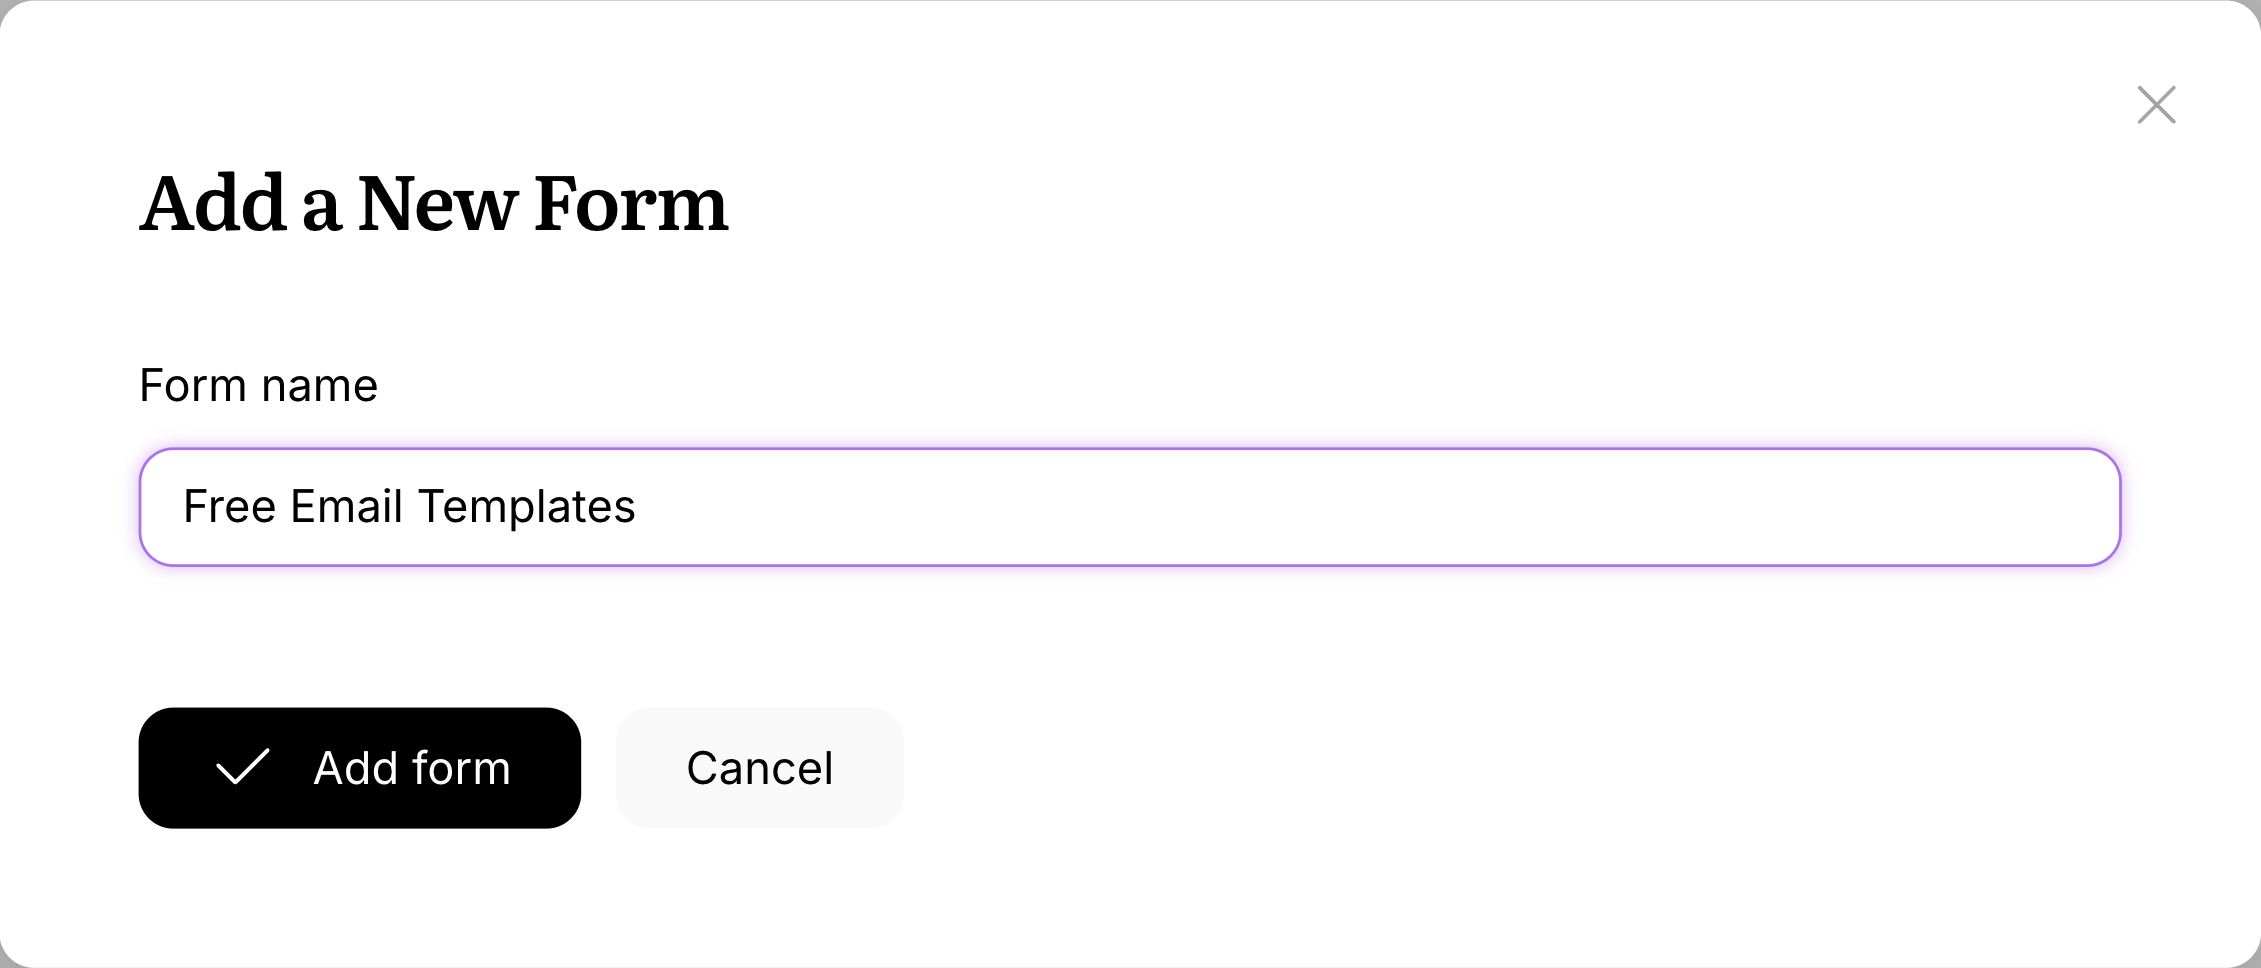
Go to Forms from the left-hand sidebar, then click Add Form in the top right corner. You’ll be prompted for the form name, which we’ll also display to the user.
After creating the form, you’ll land on the form Overview. Click Add field to open the field settings sidebar.
You can configure the following:
- Property: maps the field to a user property, so incoming data stays structured.
- Label: the field name shown to people filling out the form.
- Identifier: the internal field name used in form submissions.
- Type: controls the input type. String fields render as text inputs, Boolean fields as checkboxes, Date fields as date inputs, and Number fields as number inputs.
- Required: makes the field mandatory.
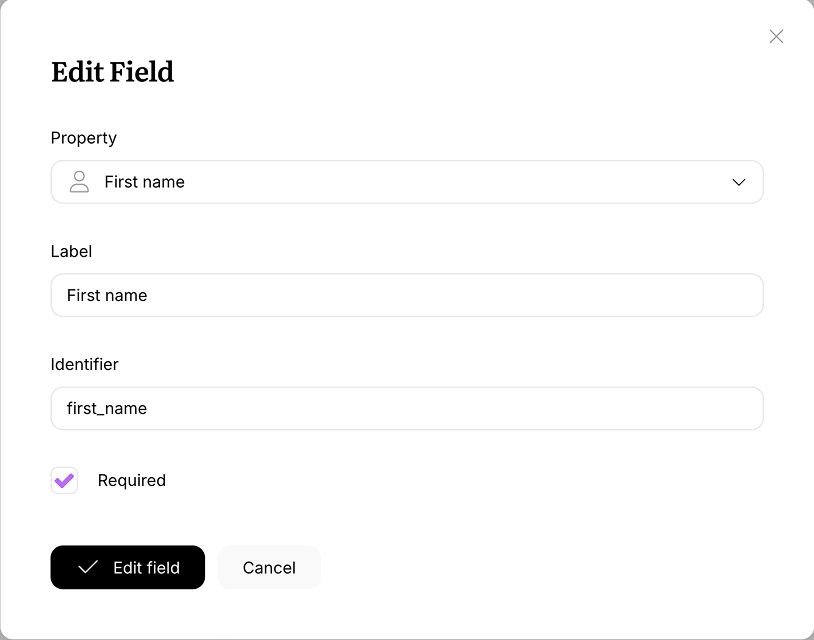
Click Add field in the bottom left to save the new field, or click Cancel to discard your changes. To update an existing field later, choose Edit field from its row actions.
Once you have multiple fields, you can reorder them using the handles on the left.
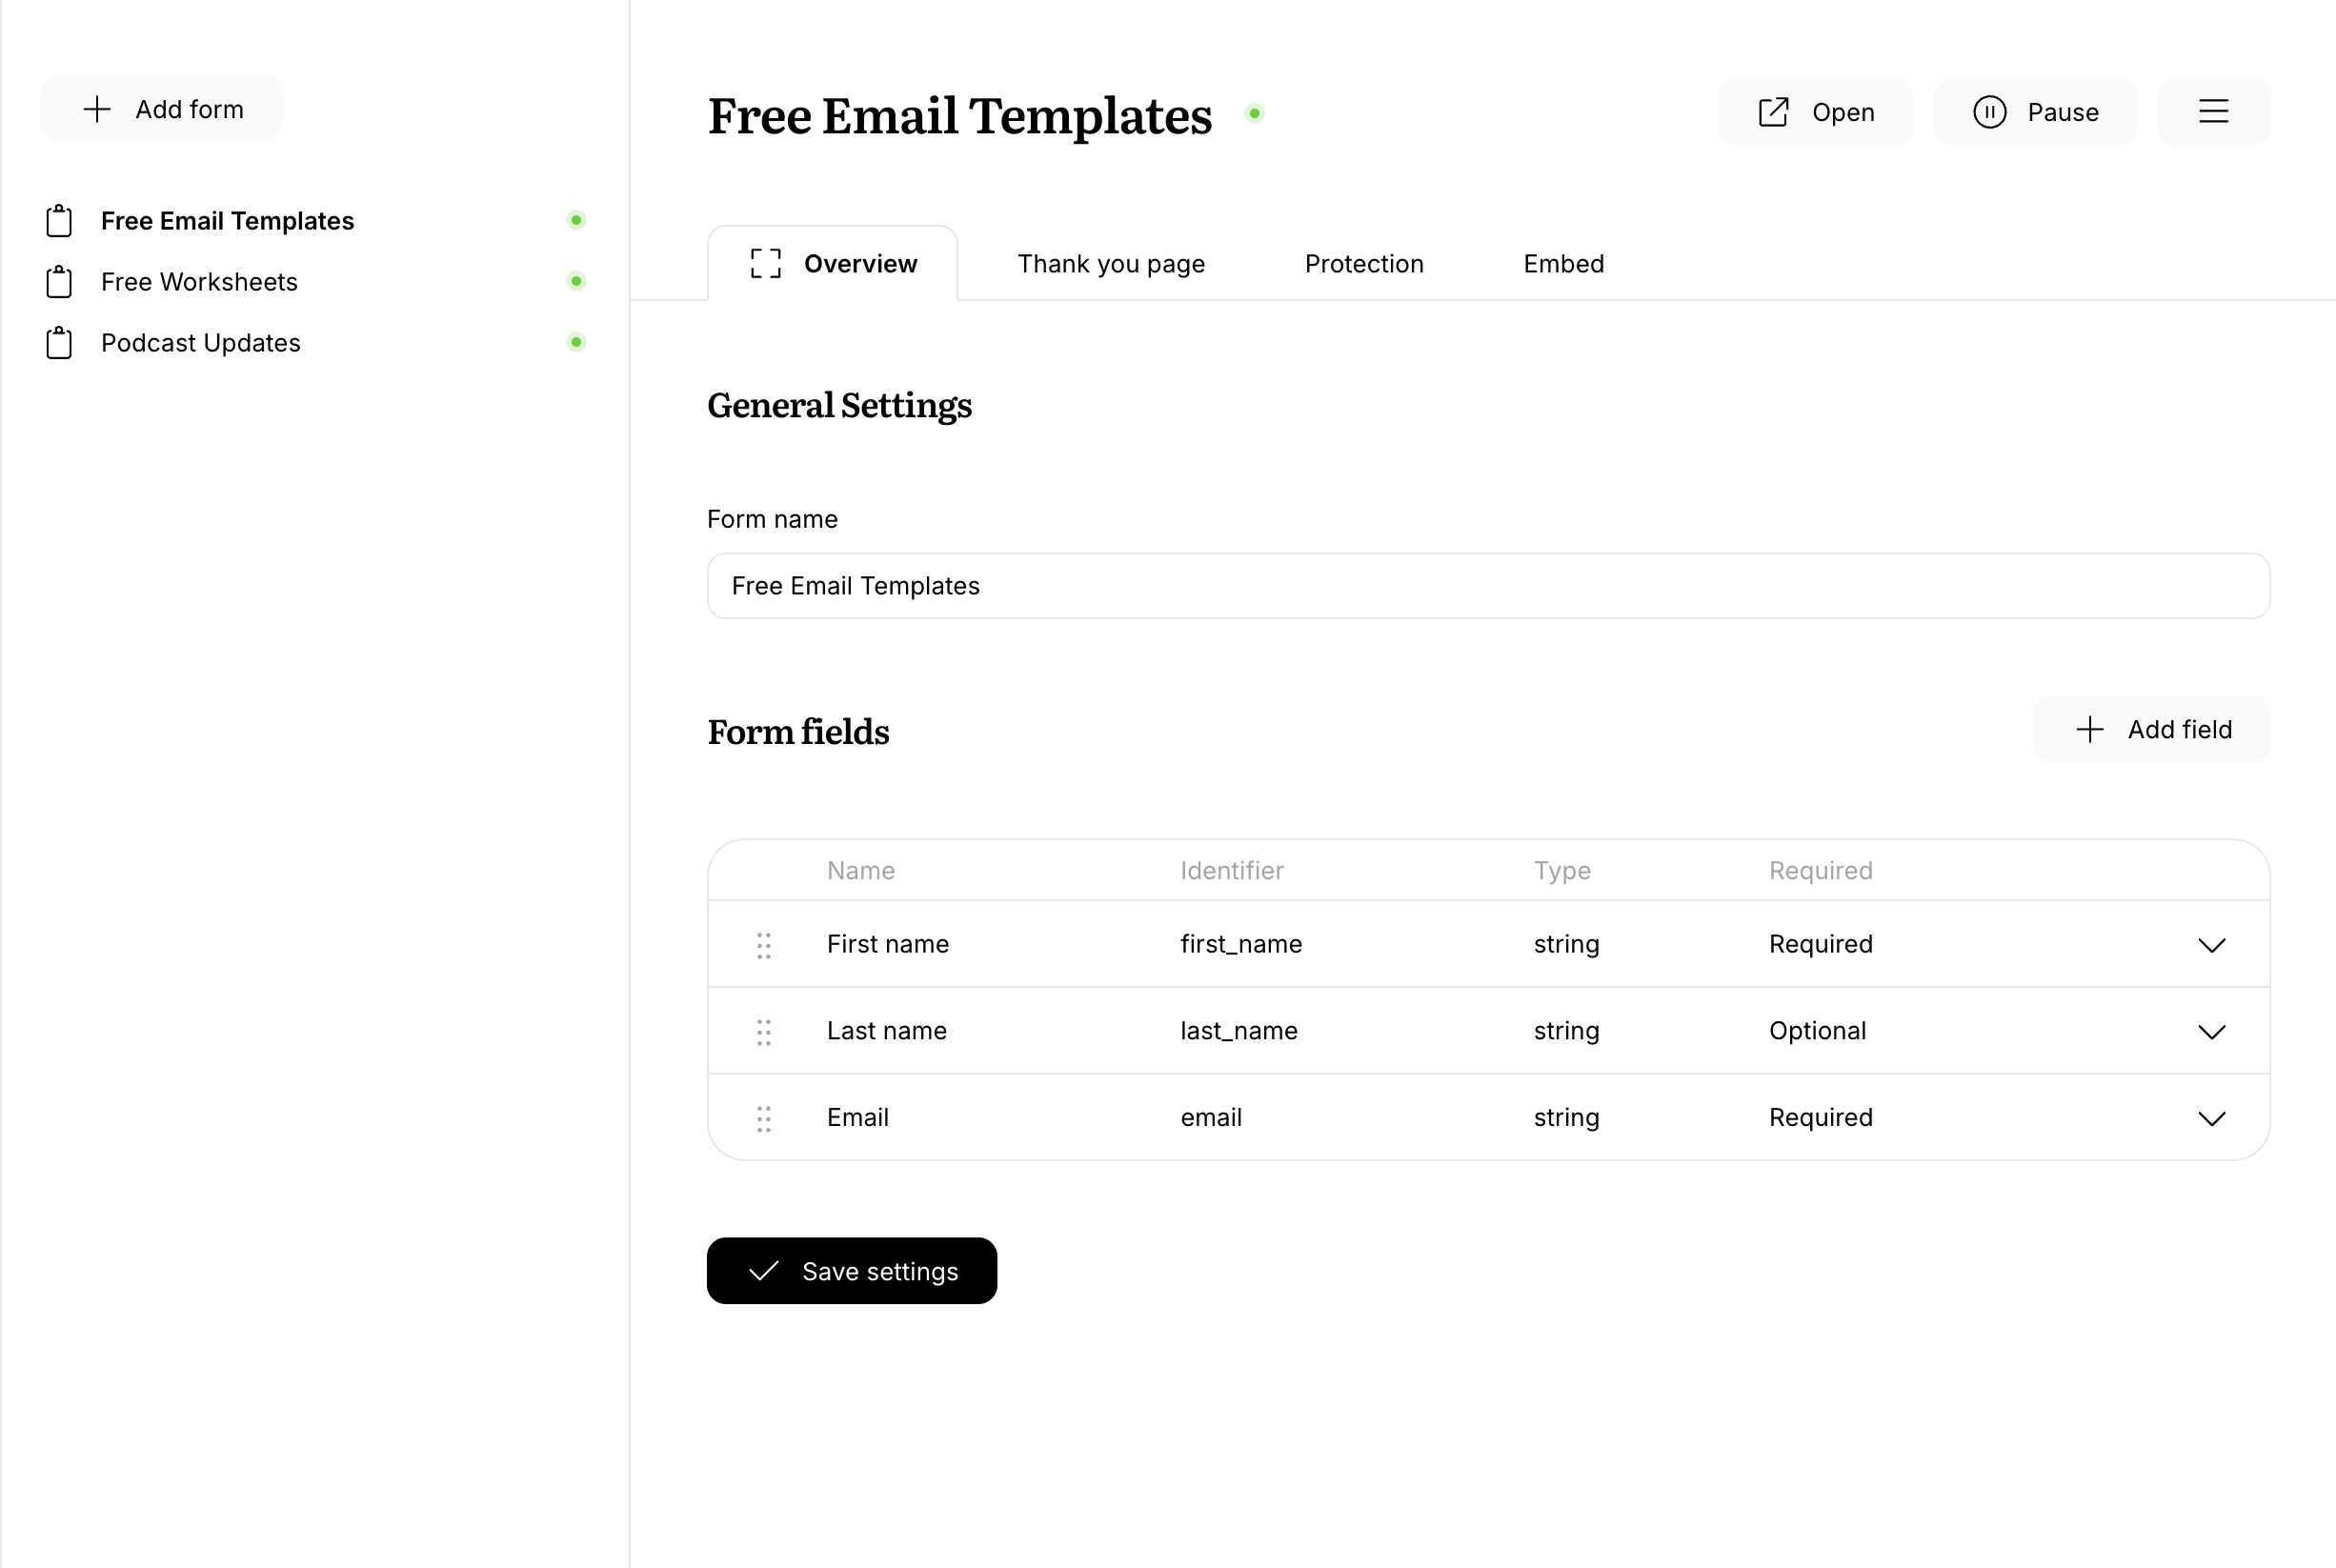
To rename the form, open the actions menu and choose Edit settings.
Activating and pausing a form
After you’re done setting up your form, click Activate to make it available. Until then, the form stays in draft mode and won’t accept submissions.
You can pause an active form at any time by clicking Pause. Paused forms stop accepting new submissions until you activate them again.
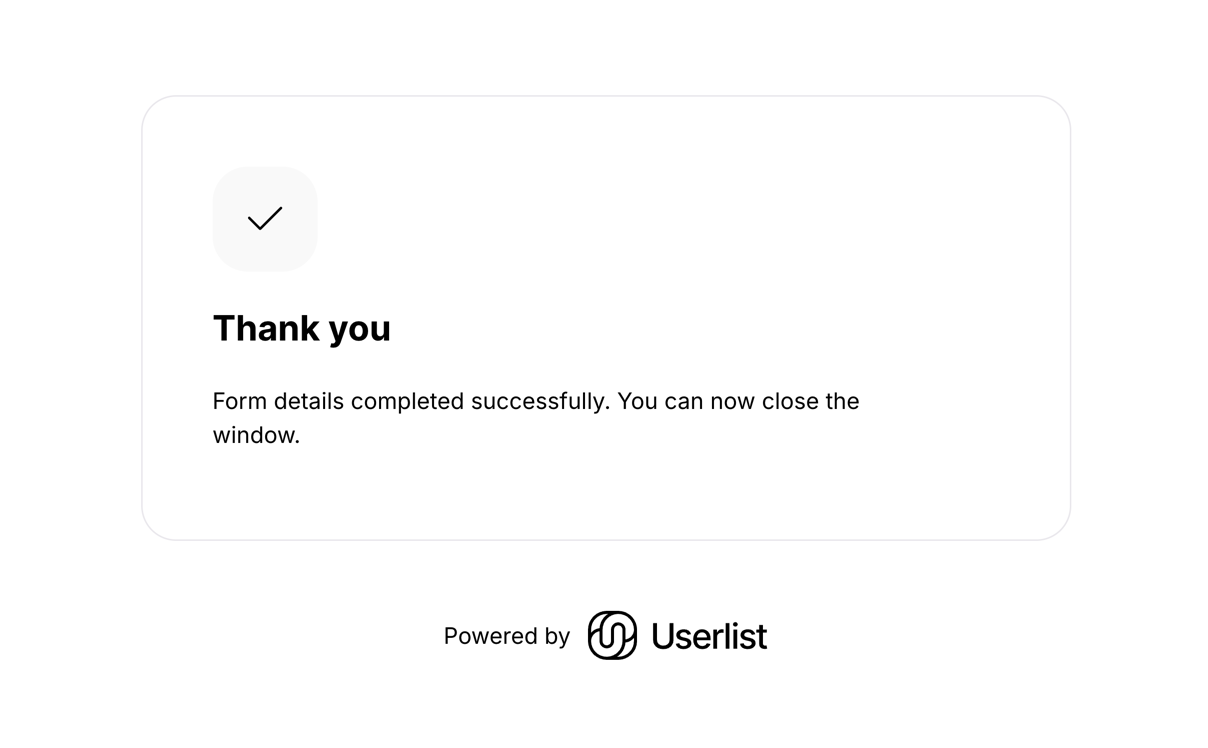
Setting up your thank-you page
After the user submits a form, they’ll be forwarded to a thank-you page. You have two options:
- Display the standard thank-you page and customize the copy to fit your needs
- Send the user to your custom URL
The standard thank-you page looks like this:
Embedding a form
Most often, you’ll need to embed a form into your website. To do that, please copy the HTML code from the Embed tab. The code is unstyled, so it should adapt to the default styles of your website. You can also customize the HTML to your needs.
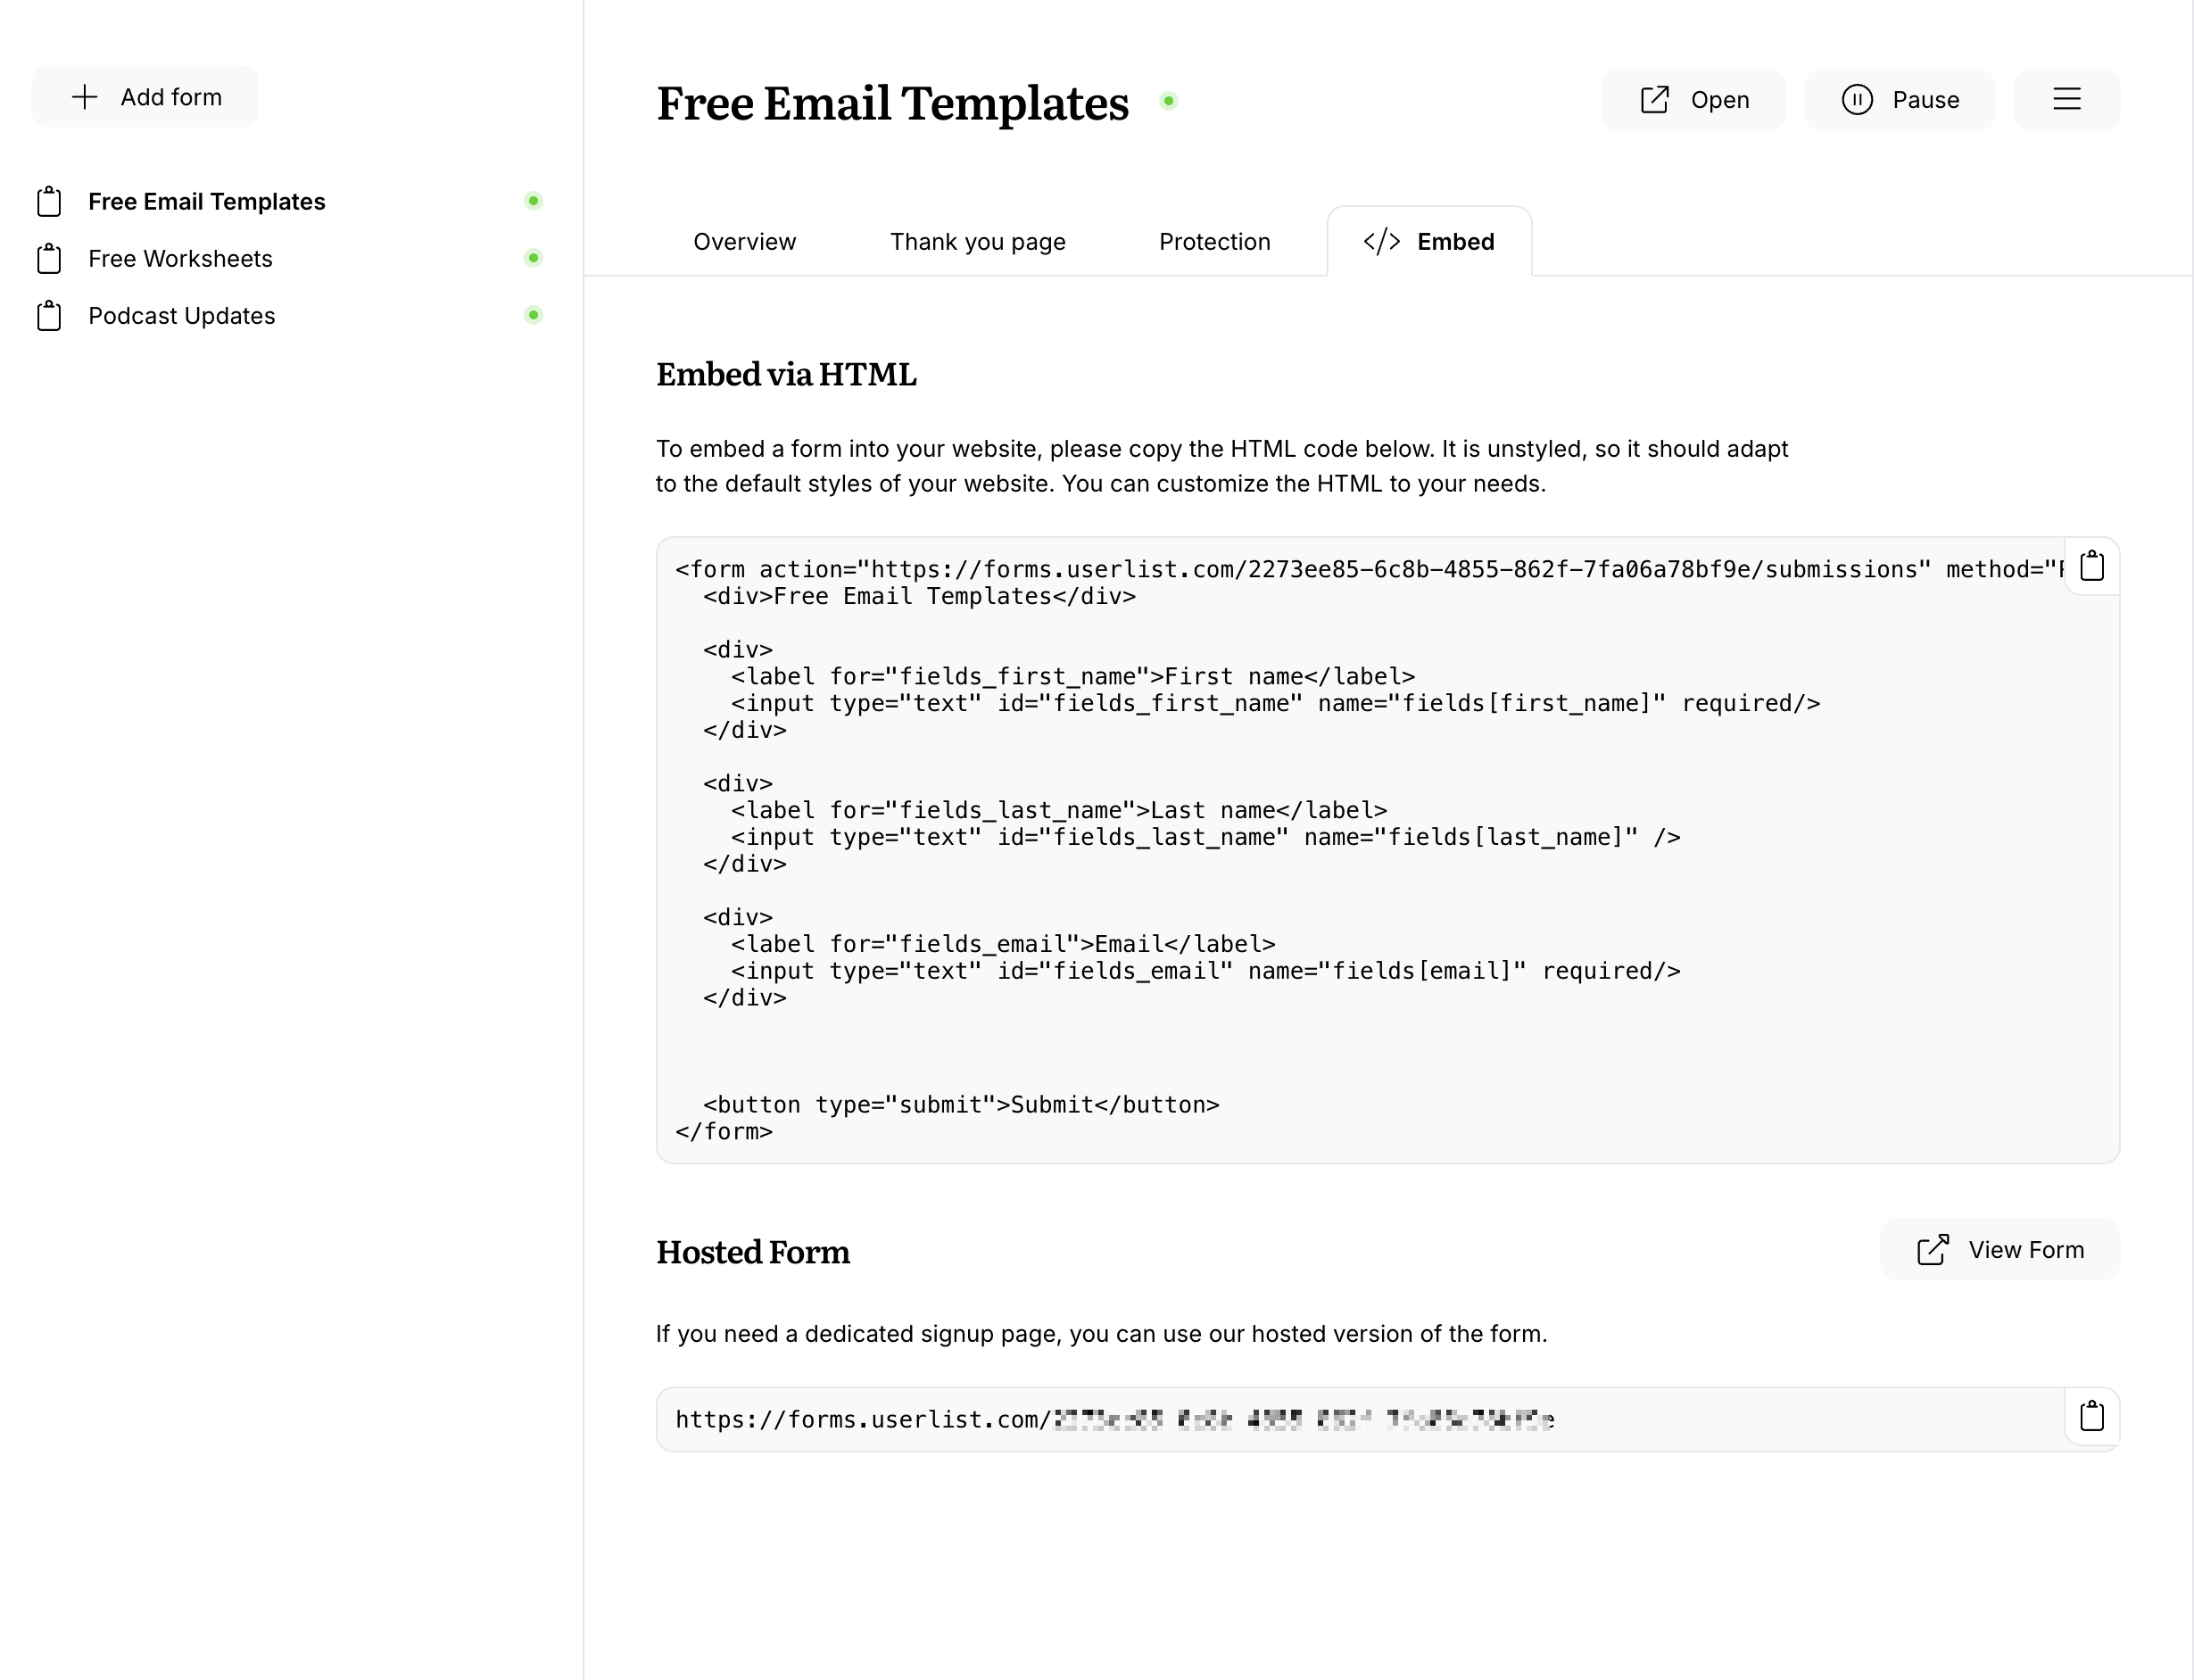
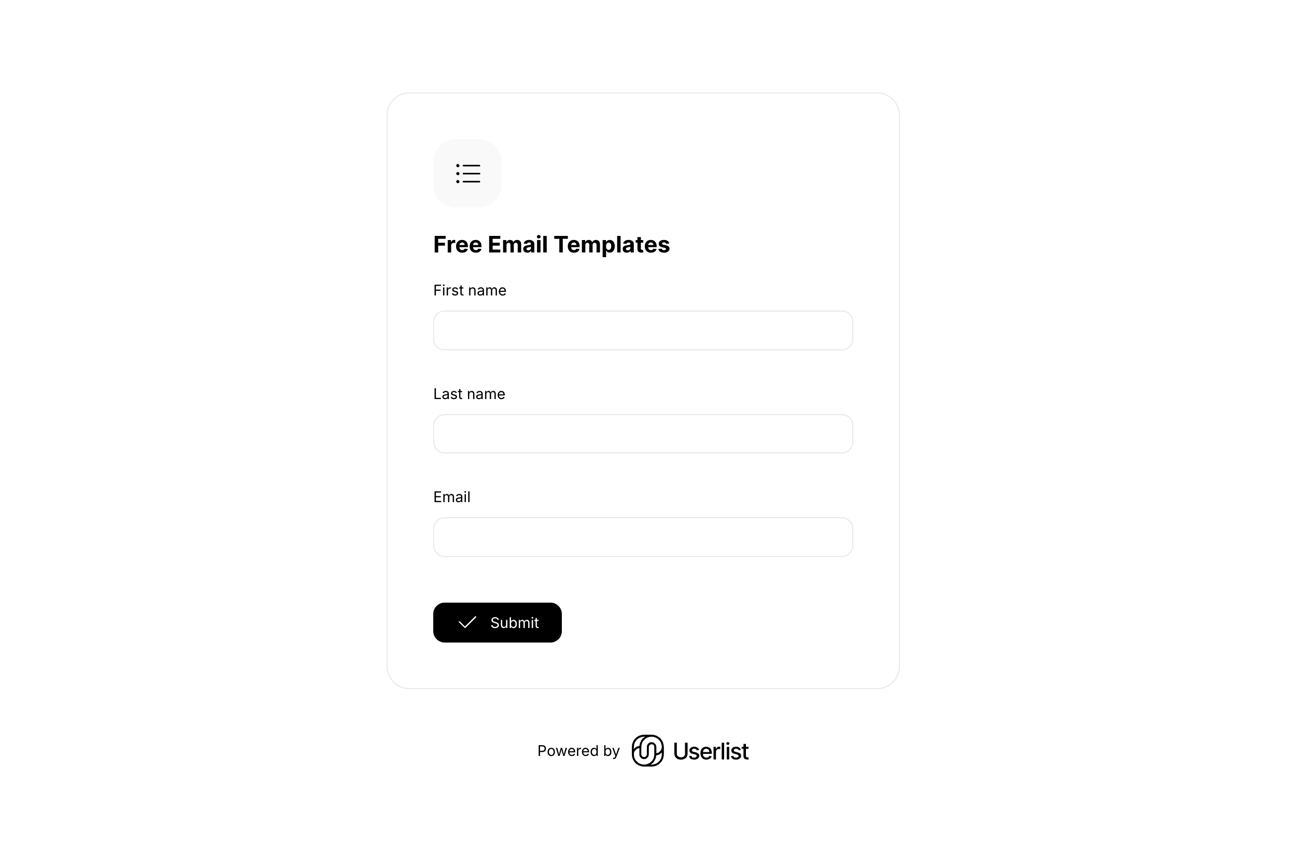
Using a hosted form
If you need a dedicated signup page, you can use our hosted version of the form. You can find the URL in the same Embed tab.
A hosted form page looks like this:
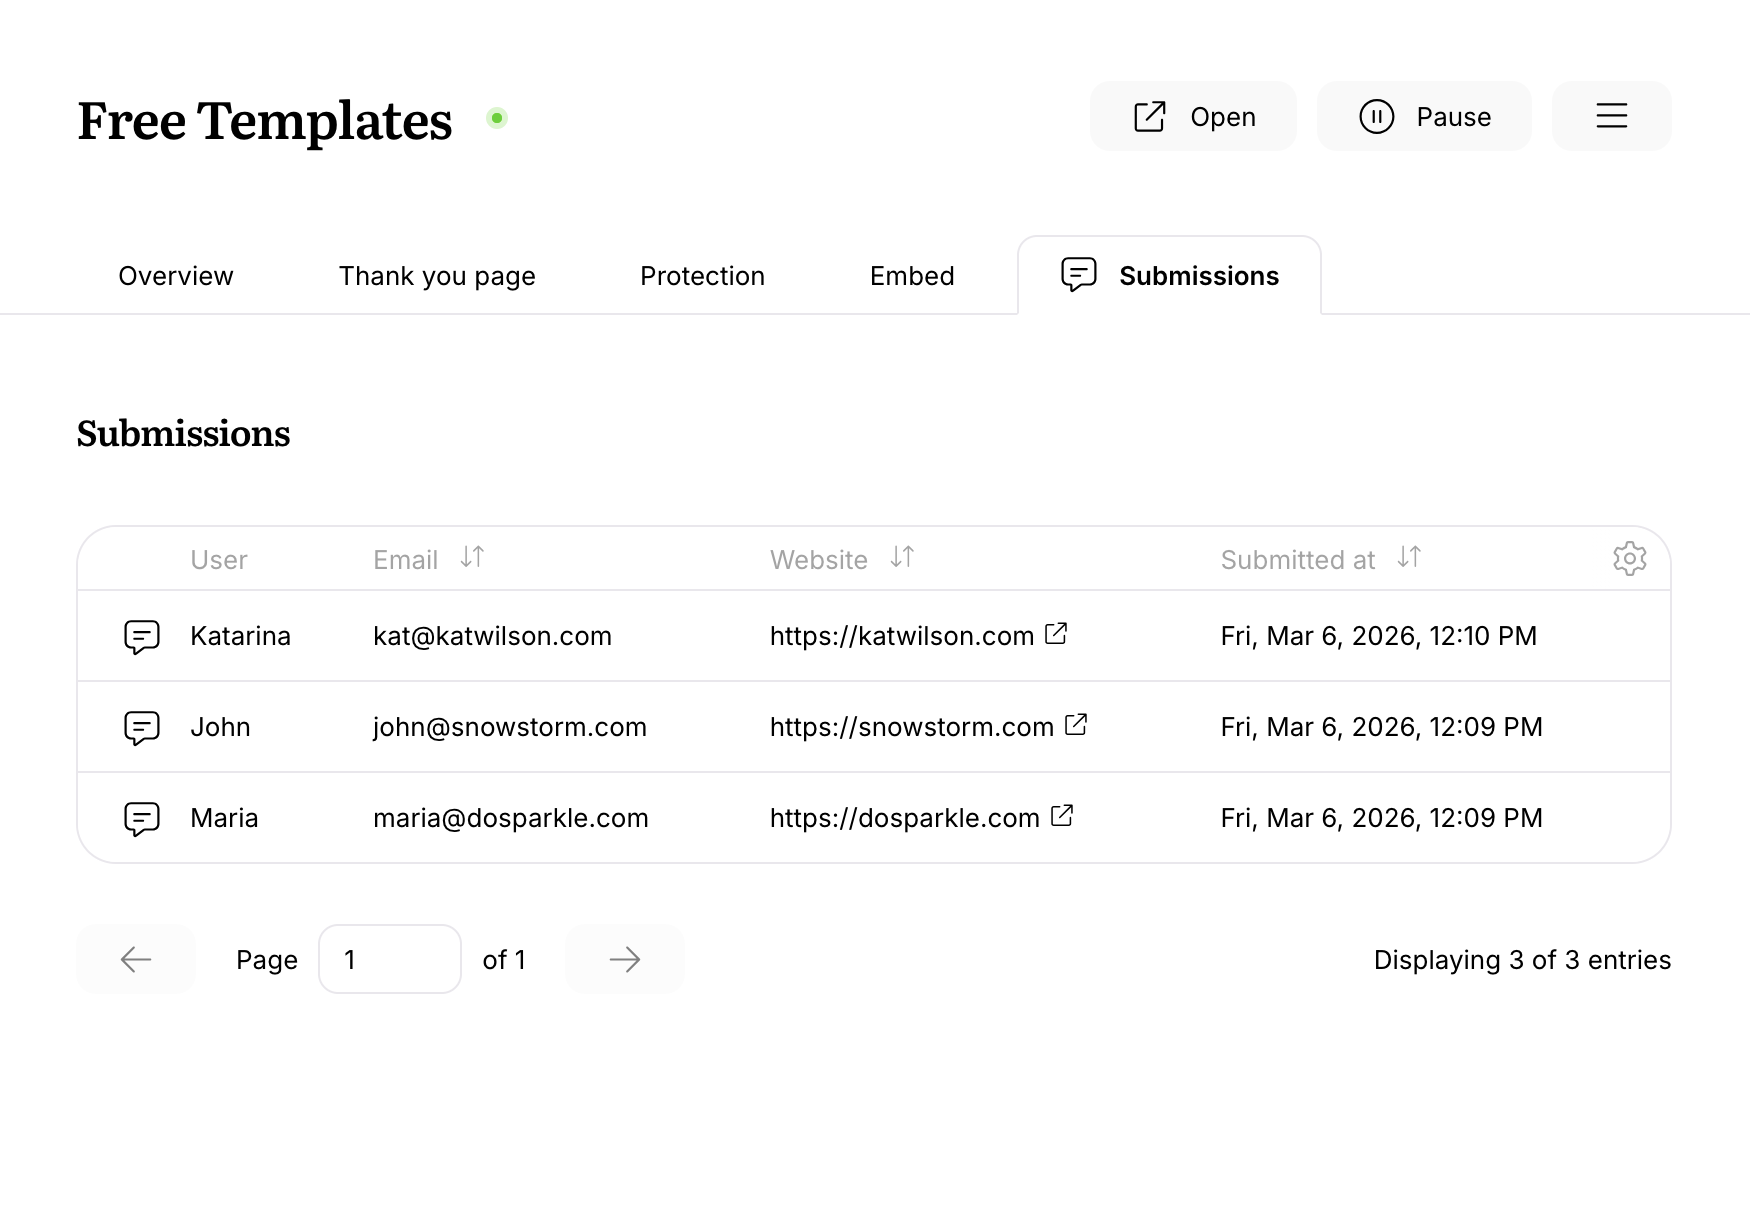
Managing form submissions
As form submissions (responses) start to roll in, you’ll find them in the Submissions tab. You can change the order of the columns in the table, or toggle them on/off.
Setting up a lead magnet
If you use your form for a lead magnet (a free course, download, content upgrade, etc) then you need to deliver that free asset. You can do this by triggering a workflow once this specific form is submitted.
- Head over to Workflows and create a new workflow.
- As a trigger, select “User submitted a form.” Then pick your form name.
- Add as many messages to your workflow as needed. It can be a single welcome email (for a download) or a longer sequence (for a free course). You can personalize these messages using Liquid.
Protecting a form with CAPTCHA
We try to filter out spam signups before they get added to your list and aggressively rate limit form submissions. However, especially with very simple forms, this is gets tricky and unwanted sign-ups can get through. To improve protection of your forms against list bombing attacks, you can enable CAPTCHA support on your forms.
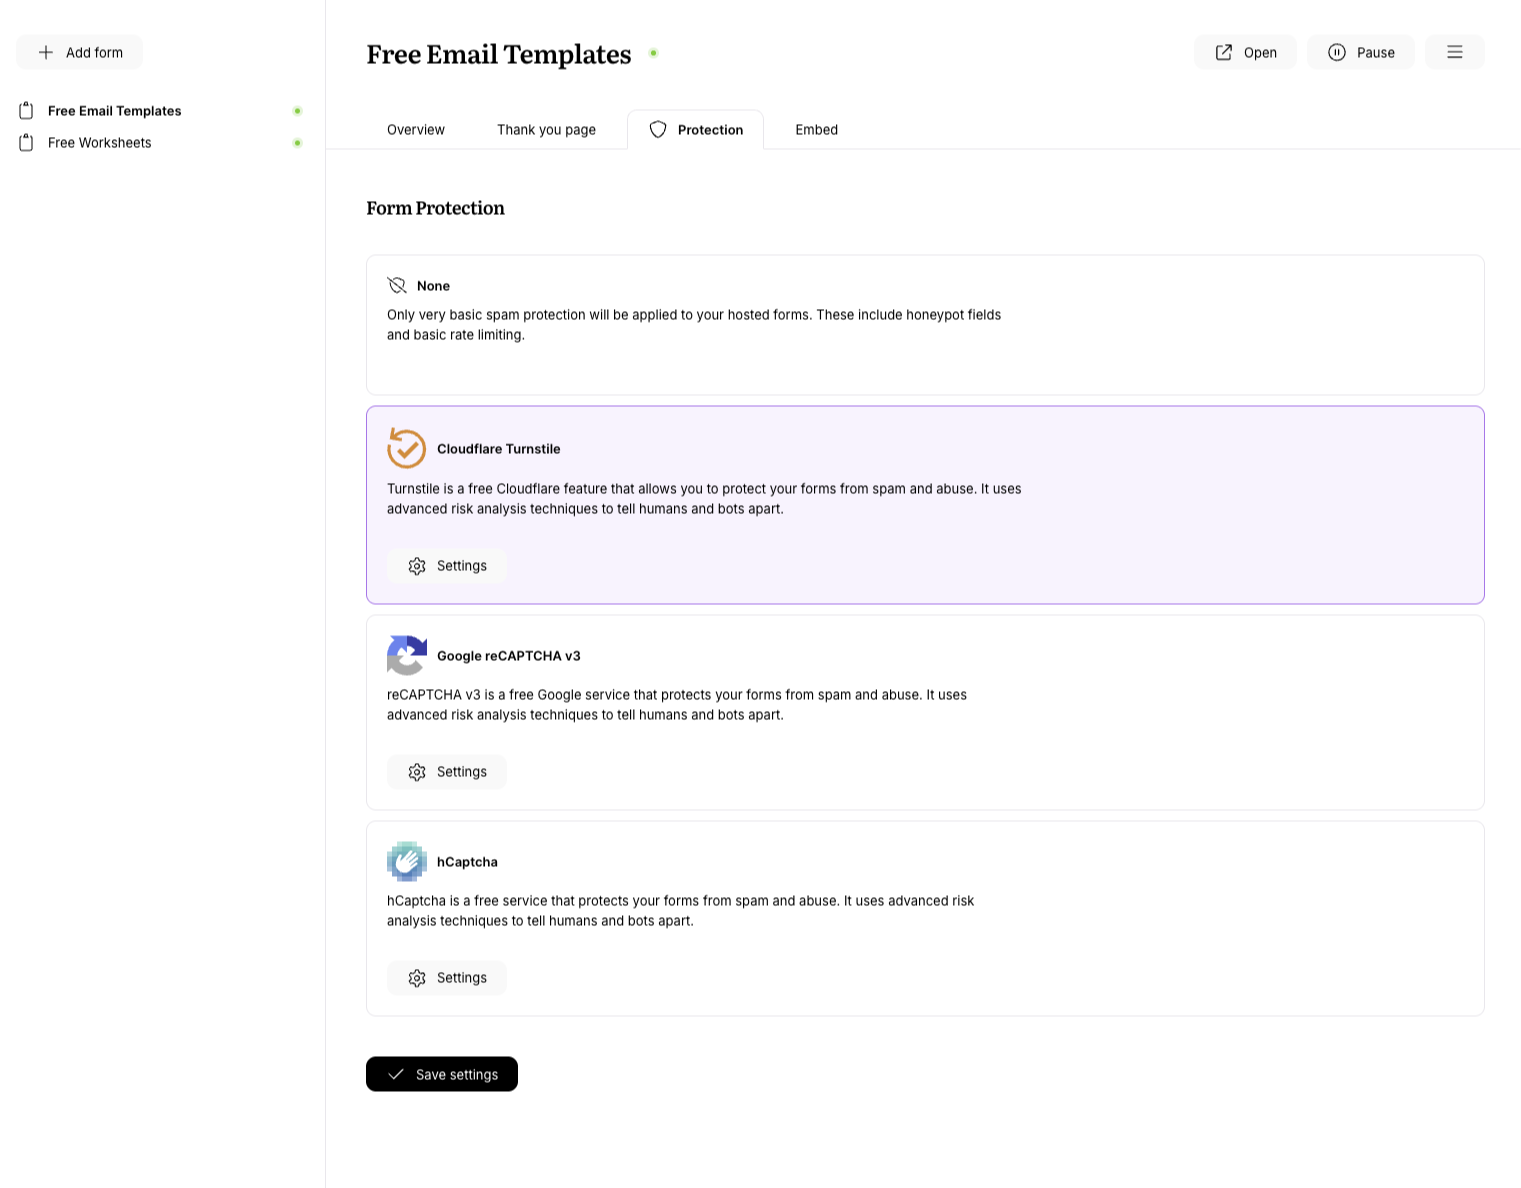
At the moment, we support the following CAPTCHA providers: hCaptcha, Google reCaptcha v3, and Cloudflare Turnstile.
Double opt-in
With double opt-in, new subscribers need to confirm their subscription before joining your email list. When enabled, they’ll receive a confirmation email. They will only appear on your list after they click the confirmation link in that email.
Double opt-in only applies to users that you send over without an identifier. So if you add new application users in the future (with an identifier) they will not receive an opt-in email, whereas your marketing leads (with an email but no identifier) would receive an opt-in email, imports included.
Double opt-in is currently in beta. If you’d like to enable the double opt-in feature in your account, please let us know at support@userlist.com.