Webhooks Integration
Webhooks let you receive real-time HTTP POST notifications whenever something happens in your Userlist account, such as when a user is created, a company is updated, or a message is clicked.
Use them to keep your tools in sync, trigger automations, and power analytics.
Setting up the integration
Step 1. Enable webhooks in Userlist
- Open your integration settings.
- Find the Webhooks integration and click Add Webhooks to enable the integration.
Step 2. Configure your webhook
- Click Add endpoint to create your first webhook.
- Enter a Endpoint URL (must be publicly accessible).
- Add a description (optional) for easy recognition later.
- Subscribe to events across four categories: Users, Companies, Relationships, and Messages. Choose which events (or categories) should trigger your webhook.
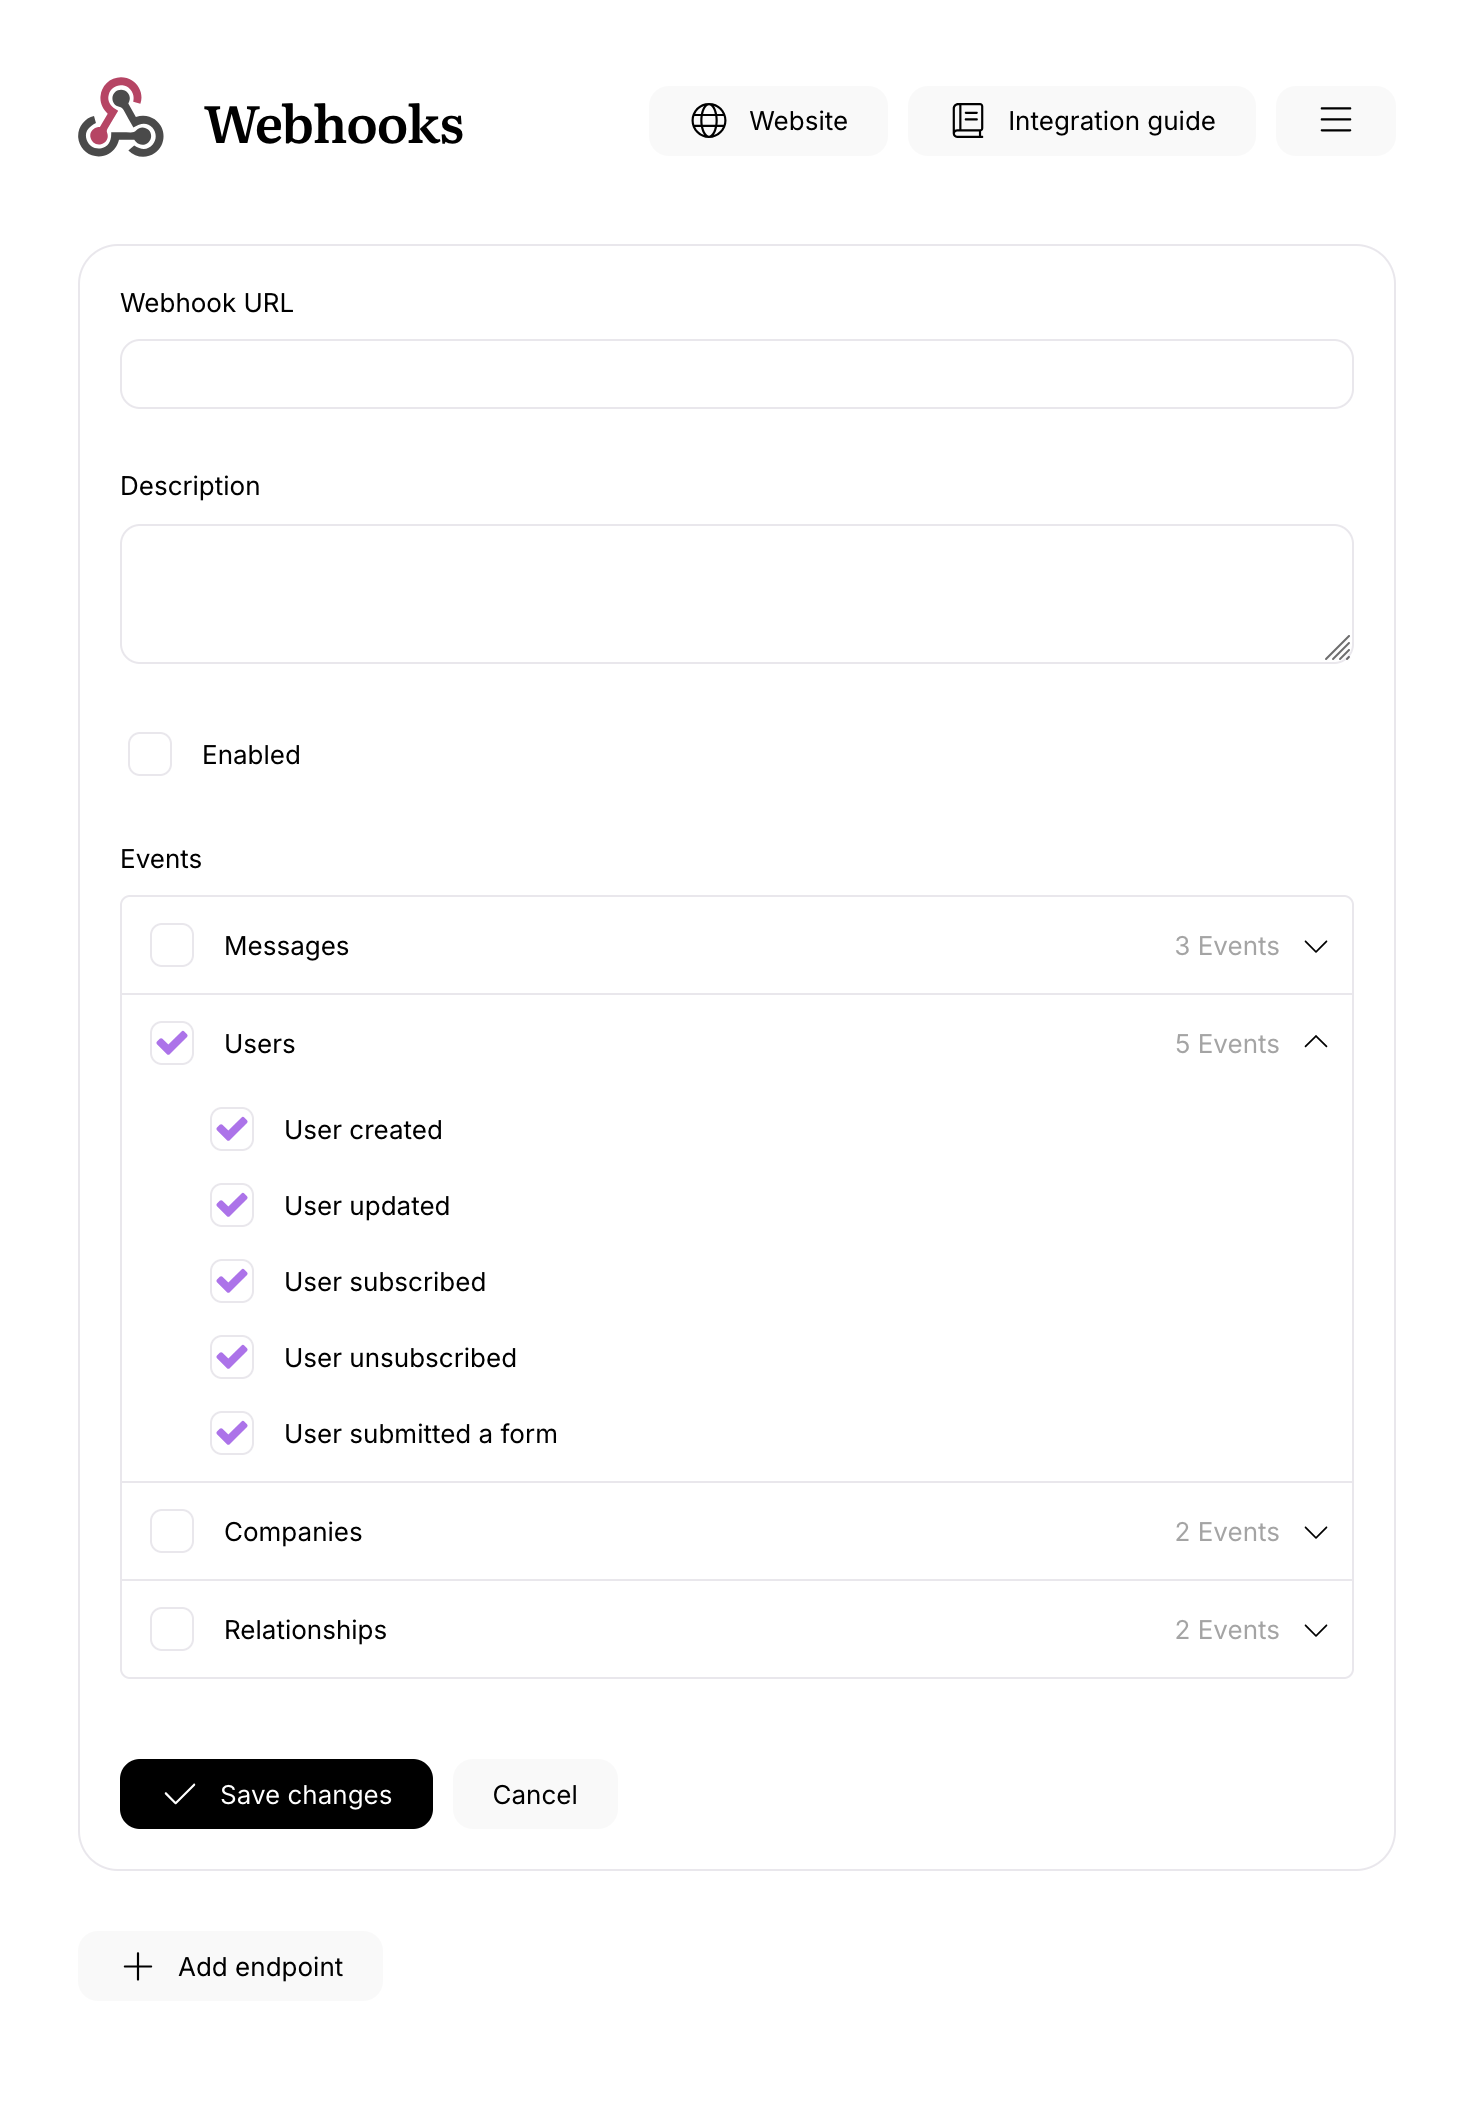
Step 3. Enable & save
- Select Enabled to start sending webhooks; clear it to pause deliveries (settings are preserved).
- Click Save to apply changes.
Deliveries start only after Enabled is selected and at least one event is chosen.
Payloads
You can learn more about the structure of webhook payloads in the Webhooks Reference section of our Developer Documentation.