How to Get Started with Userlist on Make
Our Make integration helps you connect Userlist with thousands of other apps and automate your workflows — no coding needed. It’s a powerful way to integrate Userlist seamlessly into your existing toolset. Data flows both ways, so you can send data into Userlist from other apps and use Userlist events to kick off workflows elsewhere. For example, here’s what you can do:
- Create new Userlist users from Typeform responses, Calendly events, or new rows in Google Sheets.
- Sync new webinar registrants from platforms like Crowdcast or Livestorm to Userlist.
- Keep subscribers in sync between Userlist and other email platforms like Mailchimp, Drip, Kit, and HubSpot.
- Push new or updated users from Userlist into your CRM, spreadsheet, or data warehouse.
- Trigger a Slack notification when a user joins a specific segment or submits a form.
How it works
To get started, create your free Make account.
In Make, automations are called scenarios. Each scenario includes a trigger (what starts the automation) and one or more actions (what happens next). You can mix-and-match steps from different tools and build complex flows—all in a visual drag-and-drop interface.
Userlist can act as both a trigger and an action in your scenarios. For example:
- Use a Userlist trigger to start a scenario when a user joins a segment, then send a Slack message as the action.
- Use a Google Sheets trigger to start a scenario when a new row is added, then create or update a user in Userlist as the action.
You can connect as many steps as you like, apply filters, and schedule runs on your terms.
For a deeper dive into how scenarios work, see Make’s official guide.
Connecting Userlist to Make
To connect your Userlist account to Make, you need to grab the API Token from your Userlist account and insert it in the Create a connection dialog in the Make module.
- In your Userlist account, head over to Integrations page, and enable the Make integration.
- Click View Settings to access the Push (API) key.
- Head over to Make and click Create a new scenario in your dashboard.
- Search for and select the Userlist app.
- Add any action from the list that pops up (e.g. Create or Update User).
- Click on the Create a connection button.
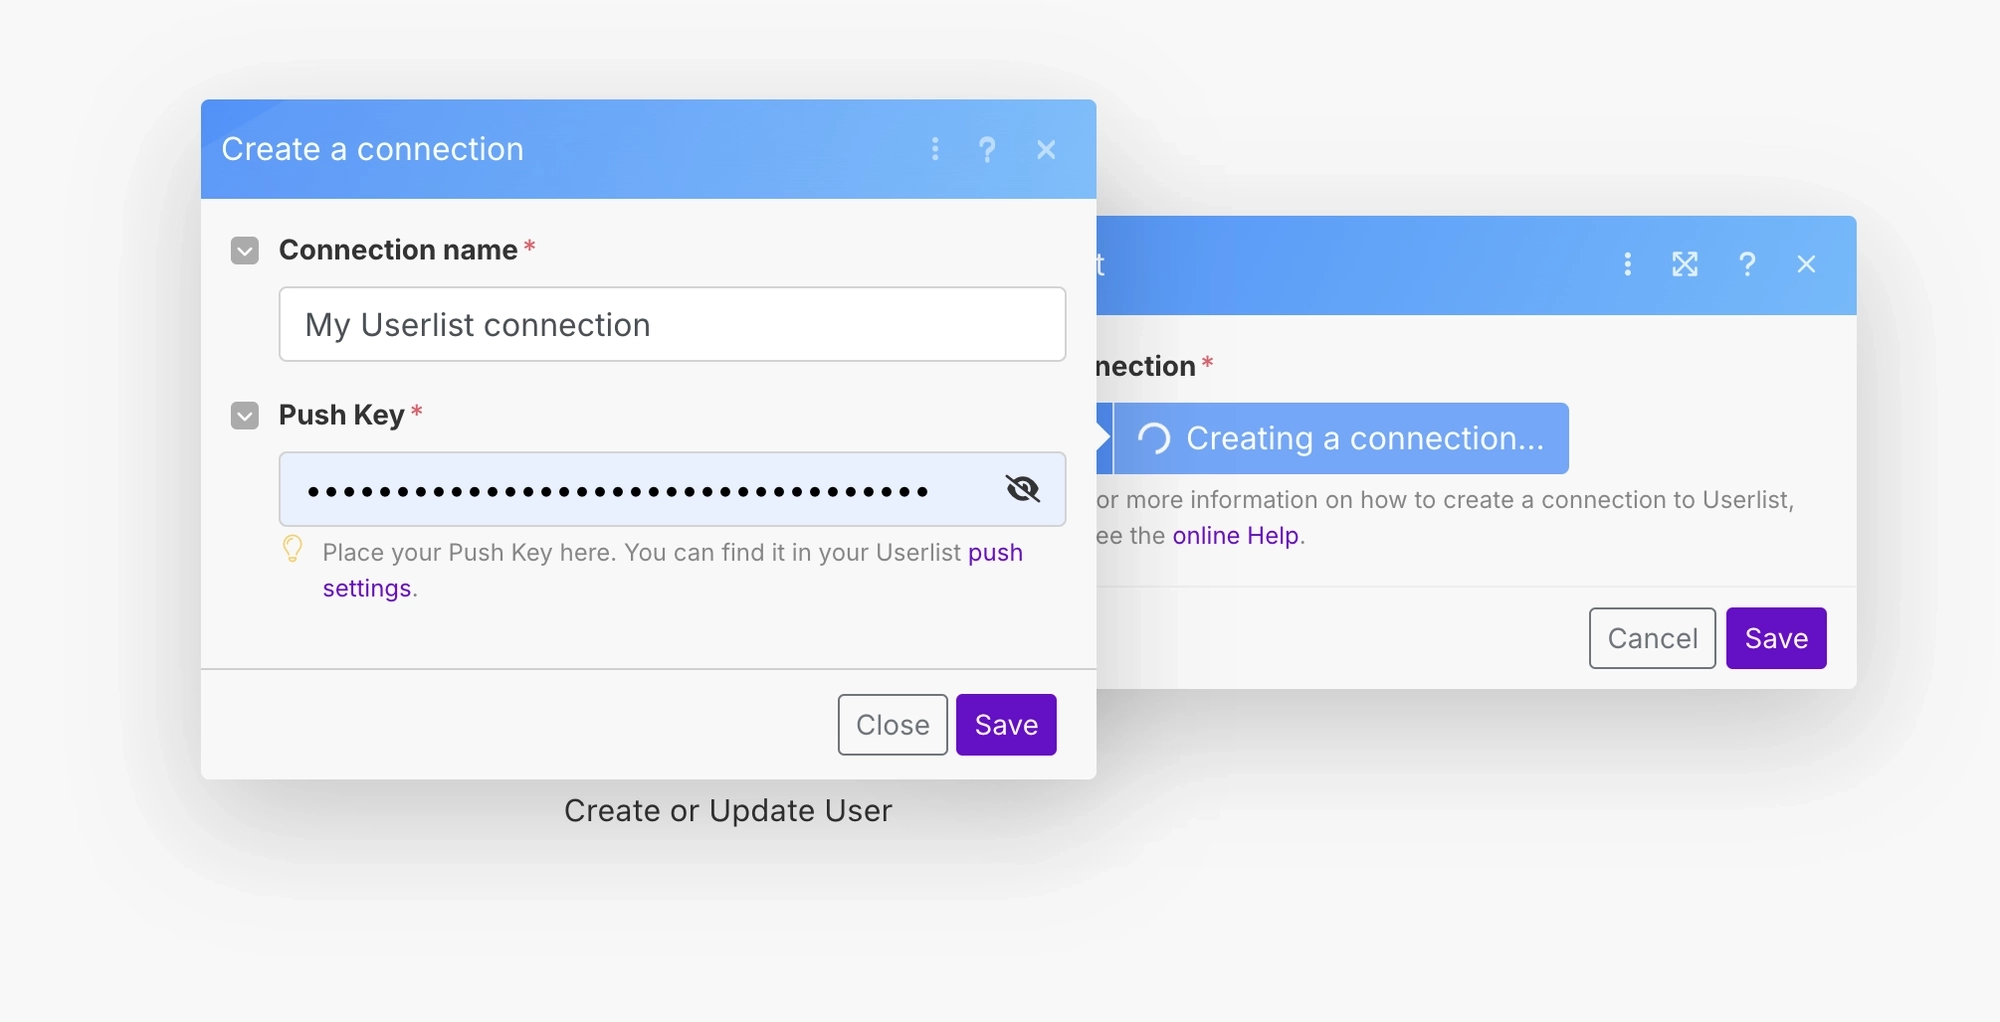
- In the "Connection name field”, enter a name for the connection.
- Enter the Push (API) Key copied in step 2, and click Save.
Your Userlist account is now connected to Make. You can reuse this connection in multiple scenarios.
Available actions in Make
- Create or Update User. Adds a new user or updates an existing one if the identifier is known.
- Delete User. Permanently removes a user from your Userlist account.
- Create or Update Company. Adds a new company or updates an existing one if the identifier is known.
- Delete Company. Permanently removes a company from your Userlist account.
- Create an Event. Logs a new event in Userlist to track user or company activities.
- Create or Update Relationship. Establishes or updates the link between a user and a company.
- Delete Relationship. Removes the existing link between a user and a company.
Available triggers in Make
Userlist can also act as the trigger for your scenarios, sending real-time updates to Make whenever something important happens in your account. Each trigger corresponds to a specific webhook event.
User triggers
- New User. Fires when a new user record is created in Userlist.
- Updated User. Fires when an existing user is updated (for example, properties, identifiers, or timestamps).
- User Subscribed. Fires when a user opts in to receive messages.
- User Unsubscribed. Fires when a user opts out of messages.
- User Joined Segment. Fires when a user enters the selected segment.
- User Left Segment. Fires when a user leaves a segment.
- User Custom Event. Fires when a user performs a custom event you track in Userlist.
- User Submitted a Form. Fires when a user submits one of your Userlist forms.
Company triggers
- New Company. Fires when a new company record is created.
- Updated Company. Fires when a company is updated.
- Company Joined Segment. Fires when a company enters the selected segment.
- Company Left Segment. Fires when a company leaves a segment.
- Company Custom Event. Fires when a company performs a custom event.
Relationship triggers
- New Relationship. Fires when a user–company relationship is created.
- Updated Relationship. Fires when a relationship is updated.
Example scenario: create or update a user in Userlist from Google Sheets
Let’s walk through a real-world example. In this tutorial, we’ll create a scenario where each new row in Google Sheets creates or updates a user in Userlist.
Step 0. Prepare your Google Sheet
Make sure your sheet includes the correct headers (identifier and/or an email at the very minimum) and the row being added includes an identifier and/or an email value. Here is an example:
| first_name | last_name | |
|---|---|---|
| jane.doe@example.com | Jane | Doe |
| john.doe@example.com | John | Doe |
Step 1. Create a new scenario in Make and add the trigger module
- In your Make dashboard, click Create a new scenario.
- Search and select “Google Sheets” to add it as a trigger module.
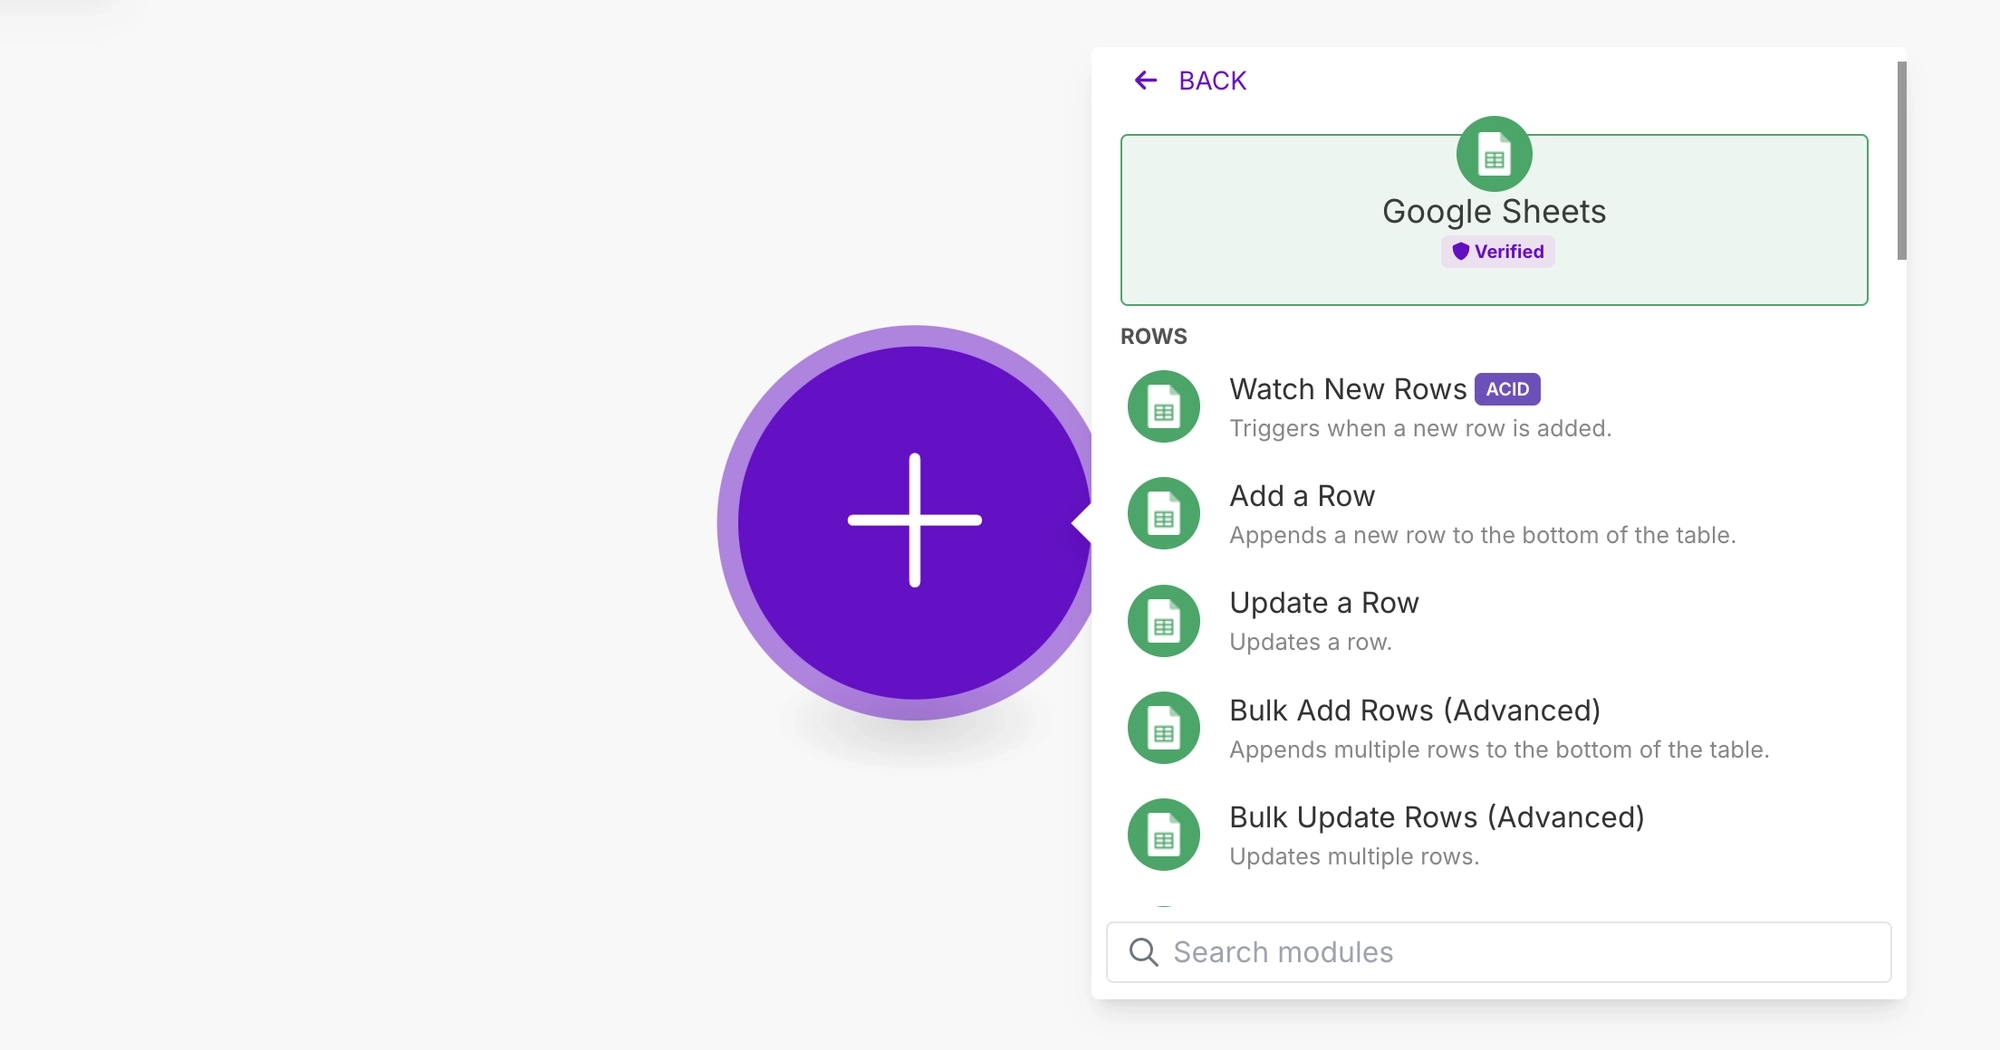
- Select Watch New Rows as the trigger event.
- Click Create a connection and follow the prompts to log in with your Google account.
- Select the spreadsheet and worksheet you want to watch.
- Under "Limit", set how many rows to process per cycle (start with 1 for testing).
- Choose where to start (e.g. "All").
- Save your settings.
Step 2. Add the Userlist module
- Click the
+icon to add a new module. - Search for and select the Userlist app.
- Choose the “Create or Update User” action.
- If you haven’t already, create a connection.
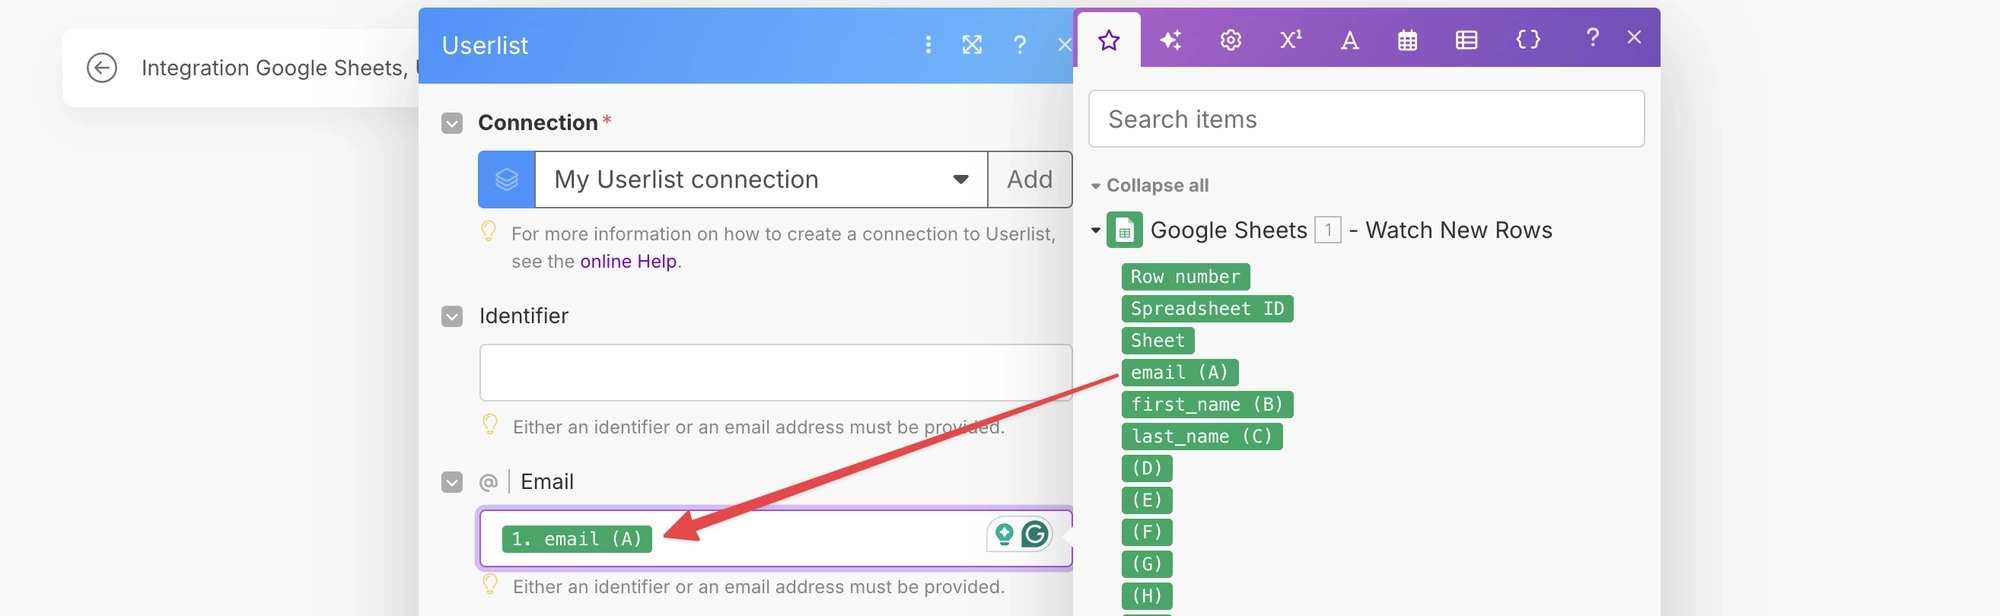
- Map the fields from your spreadsheet (e.g. map the
emailcolumn to Userlist’semailfield). - To add custom properties, scroll to the "Custom Properties" section.
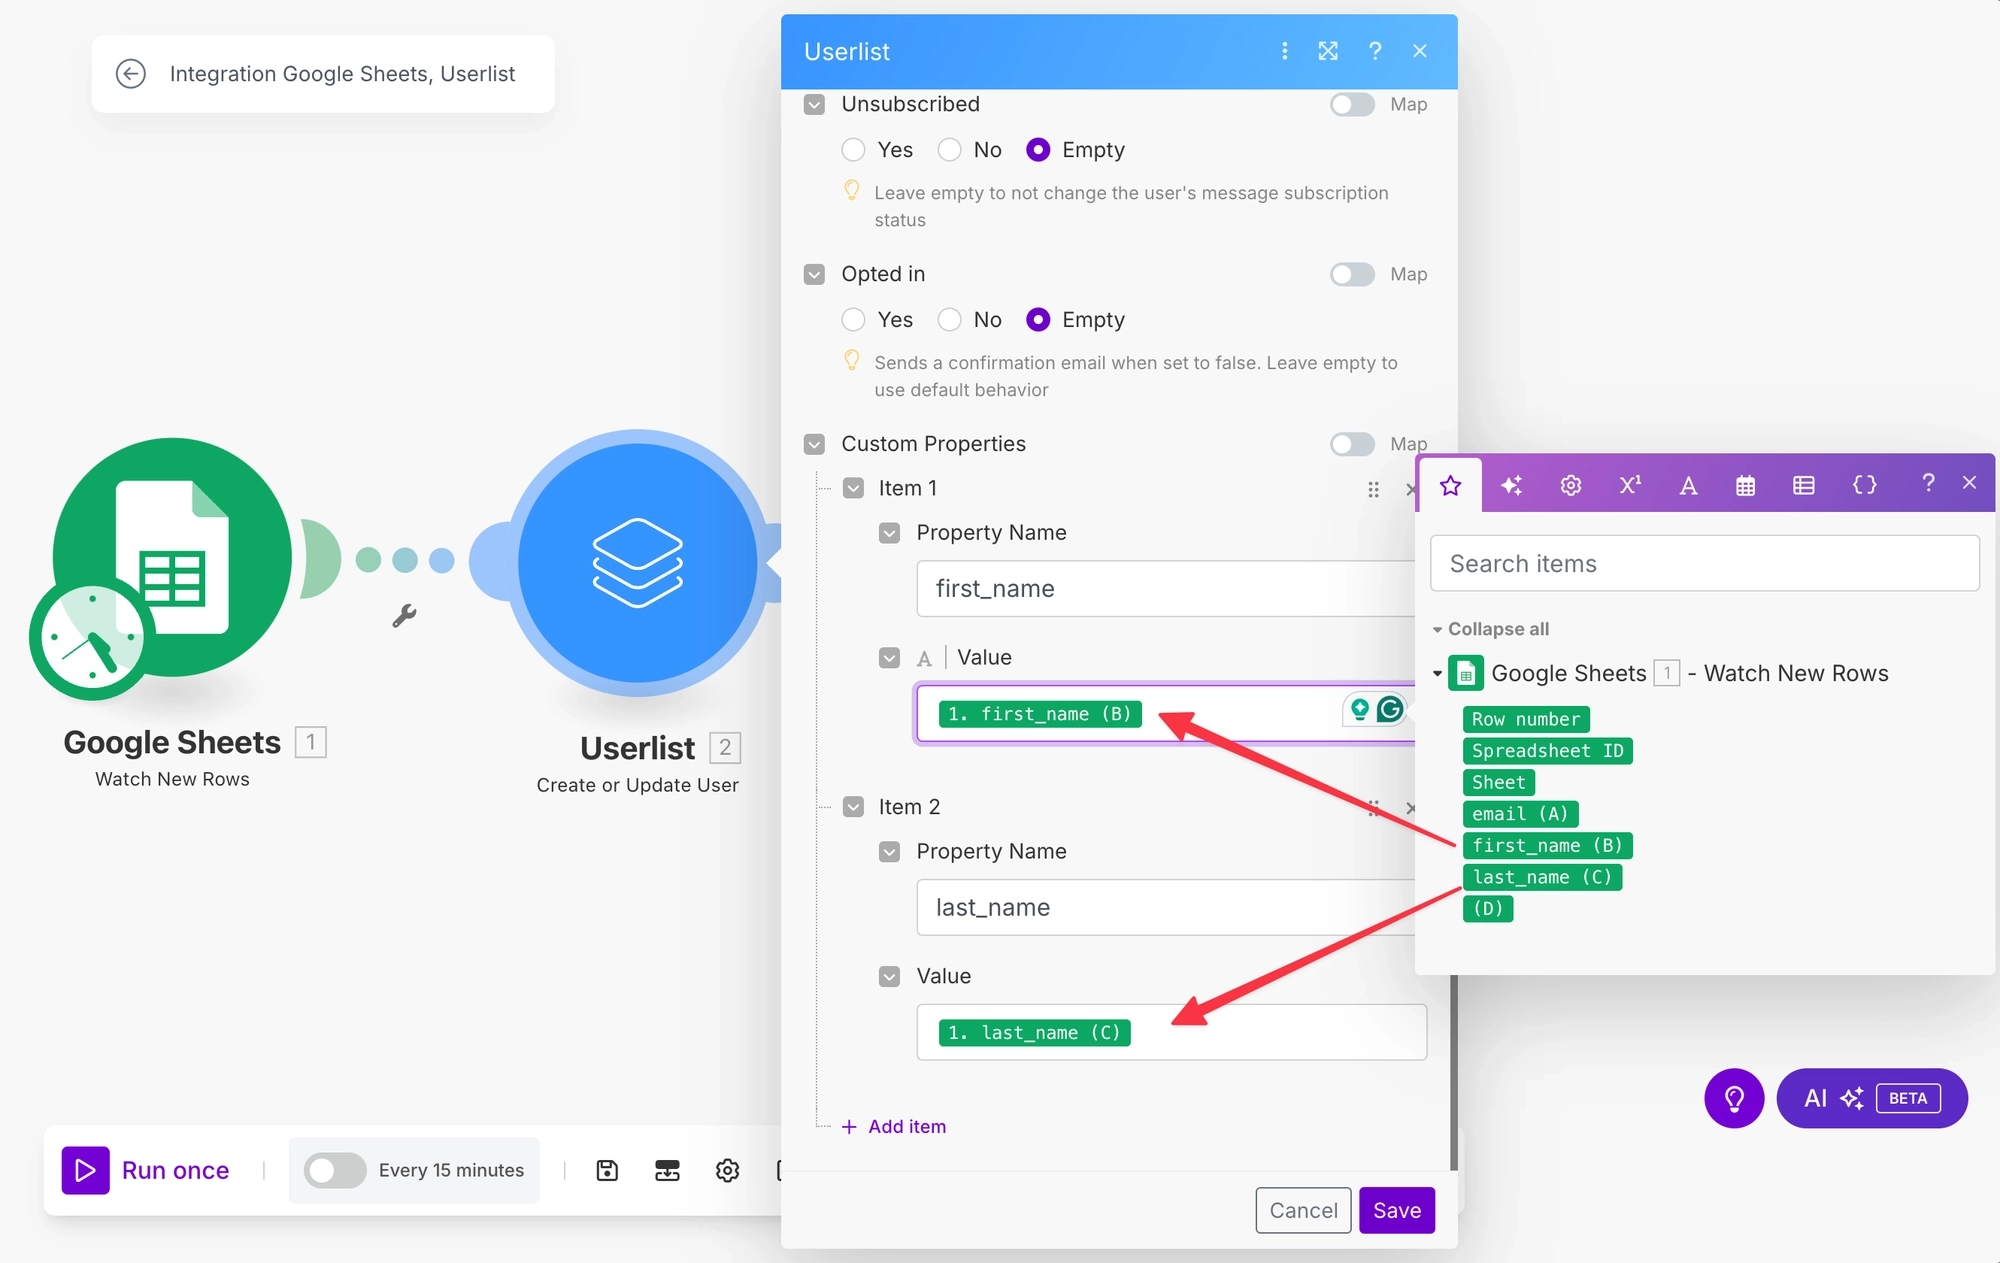
- Click Add item, set the custom property name (e.g.
first_name), and choose the spreadsheet column that holds the value. You can add as many custom properties as you wish. - Once everything set, click Save.
Step 3. Run and test
- Add a new row to your Google Sheet.
- In Make, click Run once to test the scenario.
- Watch it trigger and send data to Userlist. You should see a new or updated user appear in your Userlist account.
Step 4. Activate the scenario
Click Activate in Make to keep the scenario running in the background. It’ll check your sheet regularly and update Userlist automatically.